Hardware
360
9.
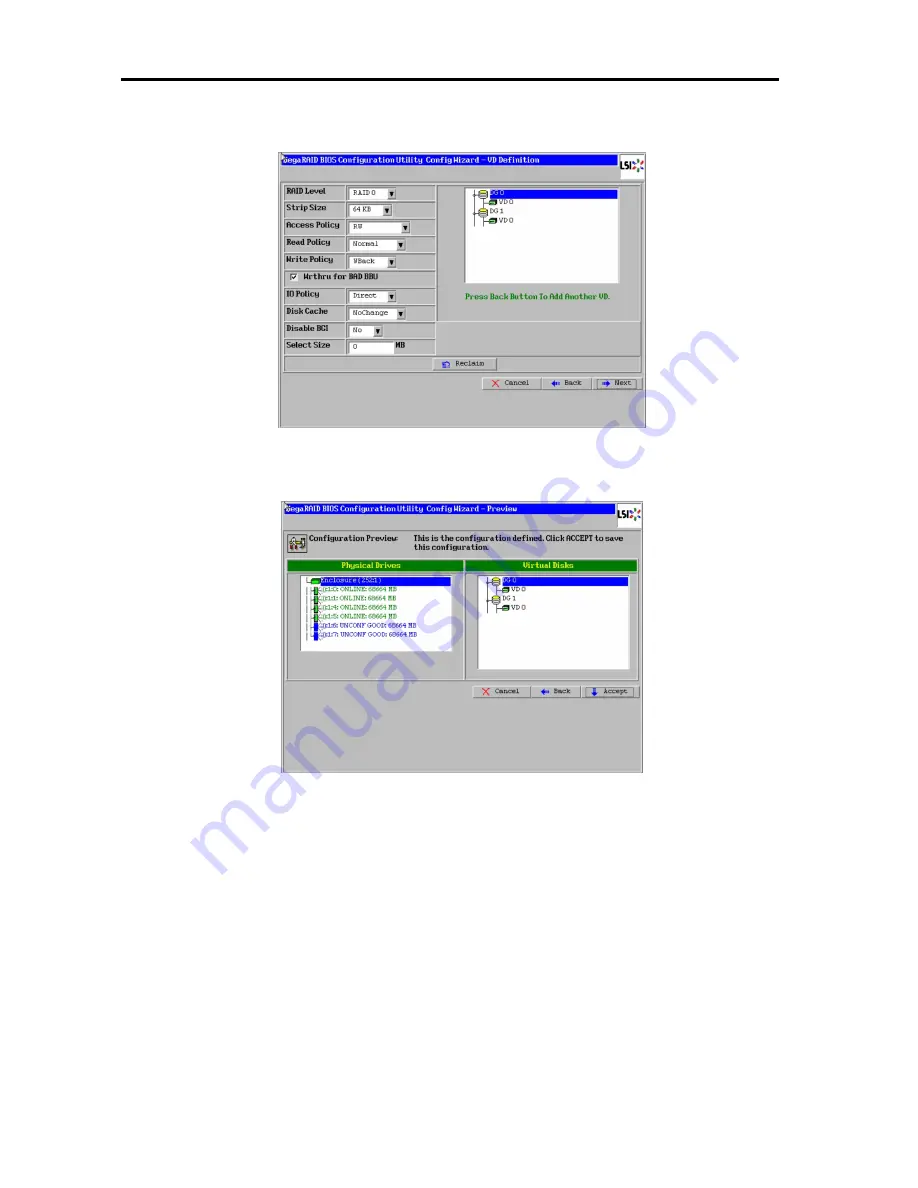
Make sure that both DG0 and DG1 are defined as VD 0, then select [Next] at the lower
right of the screen and press
Enter
.
10.
On the "Preview" screen, make sure the VD is defined correctly, then select [Accept] at
the lower right of the screen and press
Enter
.
11.
The confirmation message "Save this Configuration?" appears. Select "Yes" and press
Enter
to save the configuration.
12.
The confirmation message "All data on the new Virtual Disks will be lost. Want to
Initialize?" appears. Normally, select "Yes" and press
Enter
.
13.
"Virtual Disks" operation screen is displayed. If no other operation is required, select
[Home] at the lower left of the screen and press
Enter
.
14.
The WebBIOS Home Menu is displayed. Virtual Disk you have created is displayed in
the lower right frame of the screen.
Summary of Contents for Express 5800
Page 73: ...73 Memo ...
Page 279: ...Hardware 279 3 BIOS Menu screen is displayed ...
Page 339: ...Hardware 339 3 BIOS will start Select Save Exit then press Enter ...
Page 444: ...444 Part Number Part number FRU File ID FRU file ID Asset Tag Asset management tag ...
Page 573: ...573 Memo ...
Page 583: ...Software 583 Memo ...
Page 690: ...Operation and Maintenance 690 Memo ...
Page 719: ...XXIX Memo ...