4-36
Upgrading Your System
18.
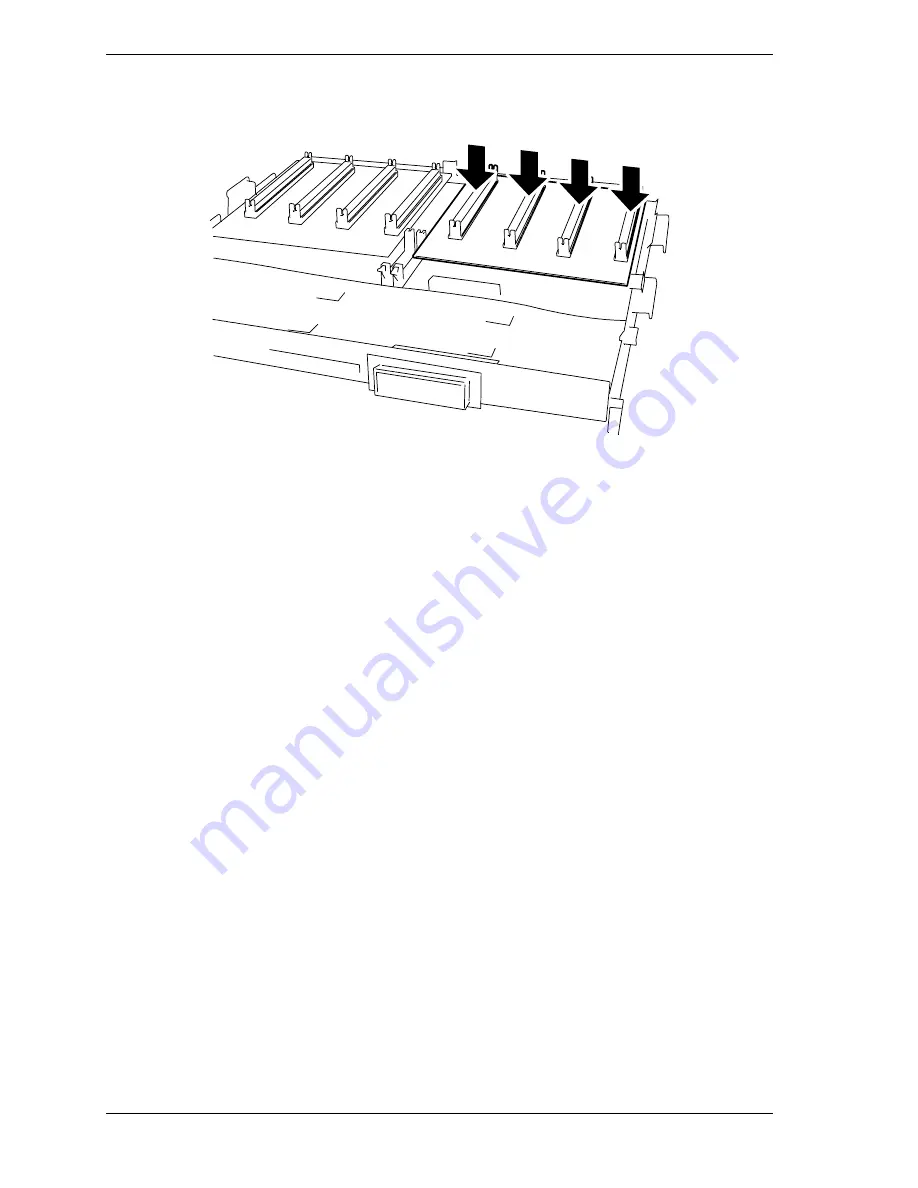
Push down firmly in the middle area of the new mezzanine board until it’s
flush with the profusion carrier. See Figure 4-25.
Figure 4-25. Installing the Processor Mezzanine Board
19.
Reinstall the processor retention cage by carefully aligning its guideposts
(larger guide on the right) with the cage guides on the profusion carrier tray
(see Figure 4-22).
20.
Ensure that all the guides for each mezzanine board are properly aligned (see
Figure 4-22). Lock the plastic mezzanine lock bars by squeezing the winged
end of the plastic lock bar while simultaneously pushing in toward the
profusion carrier tray. Lock all four mezzanine lock bars.
21.
Push up and in on the metal latch verification brackets (see Figure 4-22).
All four metal latches must be in the up position before reinstalling the
profusion carrier tray.
22.
If not removed, remove the Mezzanine Extraction Tool/Cache Coherency
Hold Down from the front of the processor retention cage by pulling out the
plastic retaining pin (see Figure 4-24).
23.
Install the first new Cache Coherency filter with the keyed or notched edge
of the filter oriented toward the back of the system, insert the filter into the
connector (see Figure 4-26).
24.
Press down firmly on the filter until the front lock retaining latch moves to
the locked position (see Figure 4-26).
25.
Push up on the retaining latch to ensure the filter is properly locked into
position (see Figure 4-26).
26.
Repeat steps 23 through 25 to install the other Cache Coherency filter.
Summary of Contents for Express5800/180Rb-7
Page 1: ... U s e r s G u i d e EXPRESS5800 180Rb 7 ...
Page 2: ...xxx ...
Page 3: ... U s e r s G u i d e EXPRESS5800 180Rb 7 ...
Page 10: ...viii Contents ...
Page 58: ...2 24 Setting Up the System ...
Page 146: ...4 40 Upgrading Your System ...
Page 166: ...5 20 Problem Solving ...
Page 186: ...10 Glossary ...
Page 190: ...4 Equipment Log ...
Page 195: ...xx ...
Page 196: ... 456 01564 001 ...


