5-110 Installing and Using Utilities
Configuring the Active Upgrade Process
Configuring the Active Upgrade process involves the following tasks:
•
Creating and managing configuration files
•
Configuring the IP address for the Upgrade Side
•
Selecting disks to upgrade
•
Selecting other configuration files to include
•
Selecting application services to control
•
Selecting Event Viewer log files to back up
•
Configuring custom actions
•
Providing a description for a configuration file
•
Displaying the upgrade summary
Creating and Managing Configuration Files
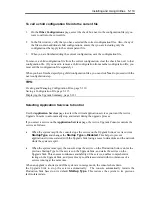
Configuration files allow you to save upgrade configurations that you can use immediately or in the
future.
If you frequently perform upgrades your system, you can create a configuration file to preserve your
settings so you can perform similar upgrades as often as necessary. If applicable, you can create
multiple configuration files, each with different system settings to prepare the system for a
particular type of system or application software upgrade.
In addition, you can
call
one or more existing configuration files from the configuration file you are
currently editing, so that the settings from the called files will also apply to the file you are editing.
This is called
nesting
The default location for Active Upgrade configuration files is \Program
Files\ftsys\ActiveUpgrade\User Configurations, but you can save a configuration file in any
directory. If you specify a different directory when saving or opening files, the Active Upgrade
Console uses the same user-specified directory (on a per-user basis) the next time you open the file
browser.
IMPORTANT:
You can save a configuration file to any disk – system or data, internal or external. The Active
Upgrade Console automatically copies configuration files to a staging area before begininning the
upgrade to ensure that they are available throughtout the upgrade process.
Summary of Contents for Express5800/320Fd-MR
Page 13: ...v Appendix B I O Port Addresses This appendix lists factory assigned I O port addresses...
Page 19: ...xi THIS PAGE IS INTENTIONALLY LEFT BLANK...
Page 43: ...2 10 General Description Rear View...
Page 47: ...2 14 General Description CPU IO Module CPU IO module...
Page 67: ...2 34 General Description This page is intentionally left blank...
Page 79: ...3 12 Windows Setup and Operation 3 Confirm that RDR of the disk is cancelled...
Page 106: ...Windows Setup and Operation 3 39 This page is intentionally left blank...
Page 198: ...4 92 System Configuration This page is intentionally left blank...
Page 370: ......
Page 371: ...This page is intentionally left blank...
Page 389: ...6 18 Maintenance 3 Stop of PCI module 1 4 Start of PCI module 1...
Page 391: ...6 20 Maintenance This page is intentionally left blank...
Page 465: ...System Upgrade 8 31 board must not be mixed with N8804 005 or N8803 035...
Page 480: ......
Page 483: ......


