4-4 System Configuration
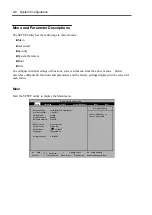
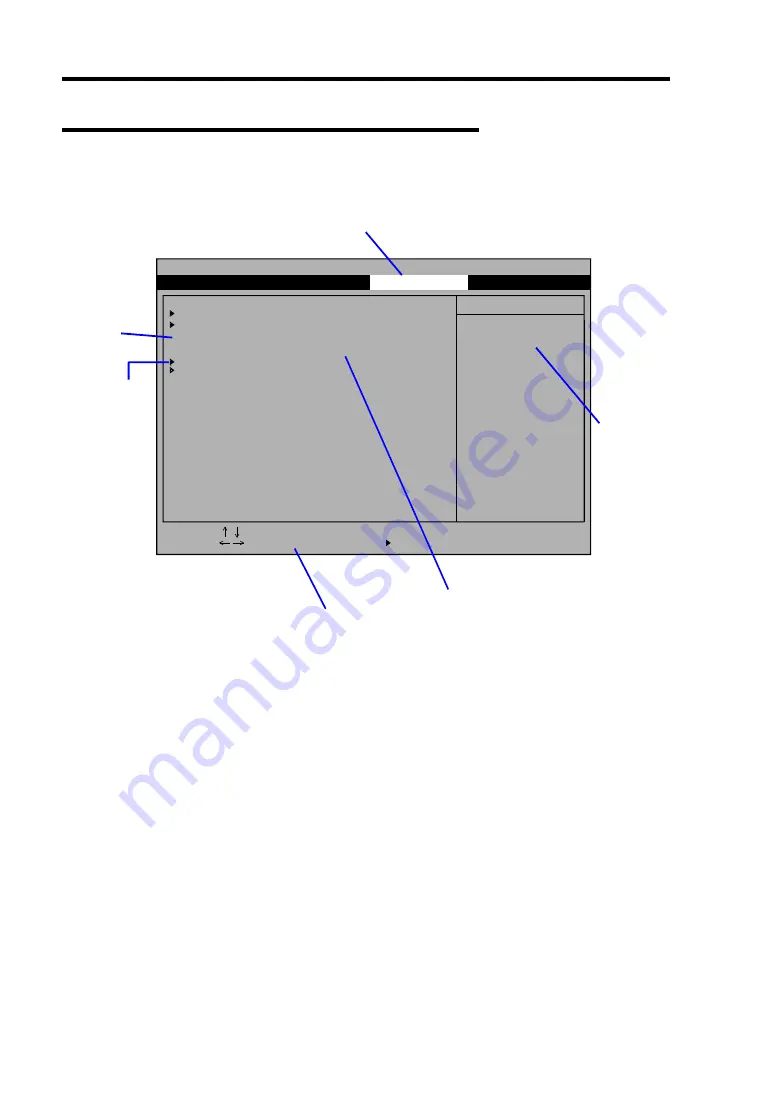
Description of On-Screen Items and Key Usage
Use the following keyboard keys to work with the SETUP utility. (Key functions are also listed at
the bottom of the screen.)
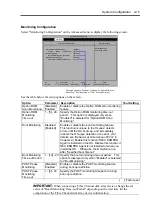
Thermal Sensor
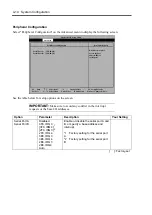
Wake On Events
AC-LINK:
Error Log Initialization:
Console Redirection
Thermal Sensor Menu.
Item Specific Help
[Last State]
Enter
Main
Advanced
Security
System Hardware
Boot
Phoenix BIOS Setup Utility
Exit
F1
-/+ Change
F9 Setup Defaults
F10 Save Changes & Exit
Sub-Menu
Enter Select
Esc Exit
Select Item
Select Menu
Indicates the current menu.
Explanation of key
function menu
Parameter (high-lights upon selection) menu
Online help
window
Indicates there
are submenus.
Setup item
menu
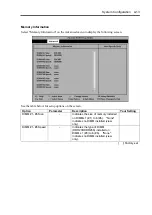
ft Memory
Cursor (
↑
,
↓
)
:
Selects an item on the screen. The highlighted item is currently
selected.
Cursor (
←
,
→
)
:
Selects the Main, Advanced, Security, System Hardware, Boot, or
Exit menu.
–
and
+
:
Changes the value (parameter) of the selected item. When a
submenu option (an option preceded by "
Æ
") is selected, these
keys are disabled.
Enter
Press
Enter
to choose the selected parameter.
Esc
Displays the previous screen.
F1
:
Press
F1
when you need help on SETUP operations. The help
screen for SETUP operations appears. Press
Esc
to return to
the previous screen.
F9
:
Sets the default parameter to the parameter of the currently
displayed item. (The default parameter may differ from the
factory setting.
F10
:
Save configuration values and exit.
Summary of Contents for Express5800/320Lb FT Linux
Page 10: ...iv This page is intentionally left blank ...
Page 16: ...x This page is intentionally left blank ...
Page 19: ...Precautions for Use 1 3 Label A Label B Label C Label E Label D ...
Page 20: ...1 4 Precautions for Use Rack mount model Label B Label A Label C Label D ...
Page 21: ...Precautions for Use 1 5 Label D Label C Label B Label A ...
Page 22: ...1 6 Precautions for Use PCI CPU Modules PCI Module CPU Module Label A Label A Label A ...
Page 36: ...1 20 Precautions for Use This page is intentionally left blank ...
Page 44: ...2 8 General Description Front View inside Tower model Rack mount model ...
Page 70: ...2 34 General Description This page is intentionally left blank ...
Page 118: ...3 48 Setup This page is intentionally left blank ...
Page 162: ...4 44 System Configuration This page is intentionally left blank ...
Page 294: ...6 14 Maintenance This page is intentionally left blank ...
Page 336: ...7 42 Troubleshooting This page is intentionally left blank ...
Page 355: ...System Upgrade 8 19 15 Check the disk you selected and click Next 16 Click Complete ...
Page 399: ...System Upgrade 8 63 Cable ties included with cabinet ...
Page 410: ...8 74 System Upgrade This page is intentionally left blank ...
Page 412: ...A 2 Specifications This page is intentionally left blank ...

