5-18 Installing and Using Utilities
Preparation before Setup
Be sure to read the following description before system installation or setup.
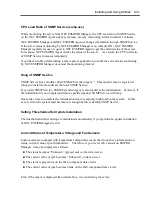
To operate NEC ESMPRO Agent, you need to make settings of TCP/IP and the SNMP of
components associated with TCP/IP.
TCP/IP Setting
See the Help started from the Start menu for how to set TCP/IP.
SNMP Service Setting
To install the SNMP Service:
1.
Open [Add/Remove Programs] in [Control Panel].
2.
Click [Add/Remove Windows Components].
3.
Select [Management and Monitoring Tools] in the Windows component wizard and click
the [Details...] button.
4.
Check the check box of [Simple Network Management Protocol].
5.
Click the [Next] button.
The file copy operation is started.
6.
After the file copy is finished, click the [Finish] button.
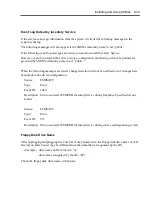
To change the settings of the SNMP Service:
1.
Double-click [Administrative Tool] in [Control Panel].
2.
Start [Services] in [Administrative Tool].
3.
Select [SNMP Service] from the service list and then [Properties] in the [Action] menu.
The "SNMP Properties" dialog box appears.
4.
Enter "public" in the [Community name] box in the [Traps] property sheet and click the
[Add to list] button.
IMPORTANT:
To change the community name of traps to be received
from the default "public" in the NEC ESMPRO Manager site, enter
the same name as the community name newly set in the NEC
ESMPRO Manager site.
Summary of Contents for Express5800/320Lb FT Linux
Page 10: ...iv This page is intentionally left blank ...
Page 16: ...x This page is intentionally left blank ...
Page 19: ...Precautions for Use 1 3 Label A Label B Label C Label E Label D ...
Page 20: ...1 4 Precautions for Use Rack mount model Label B Label A Label C Label D ...
Page 21: ...Precautions for Use 1 5 Label D Label C Label B Label A ...
Page 22: ...1 6 Precautions for Use PCI CPU Modules PCI Module CPU Module Label A Label A Label A ...
Page 36: ...1 20 Precautions for Use This page is intentionally left blank ...
Page 44: ...2 8 General Description Front View inside Tower model Rack mount model ...
Page 70: ...2 34 General Description This page is intentionally left blank ...
Page 118: ...3 48 Setup This page is intentionally left blank ...
Page 162: ...4 44 System Configuration This page is intentionally left blank ...
Page 294: ...6 14 Maintenance This page is intentionally left blank ...
Page 336: ...7 42 Troubleshooting This page is intentionally left blank ...
Page 355: ...System Upgrade 8 19 15 Check the disk you selected and click Next 16 Click Complete ...
Page 399: ...System Upgrade 8 63 Cable ties included with cabinet ...
Page 410: ...8 74 System Upgrade This page is intentionally left blank ...
Page 412: ...A 2 Specifications This page is intentionally left blank ...


