5-100 Installing and Using Utilities
FastResync Configuration Procedures
FastResync use: The contents of the following sections will be described as below.
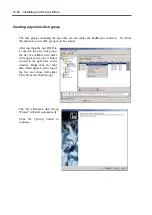
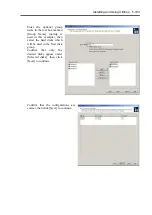
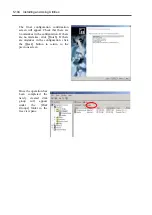
1. Creating disk groups
The disk group containing the boot disk will not be able to utilize the FastResync
function. Therefore to utilize the FastResync function, a new disk group must be
created.
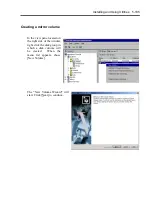
2. Creating mirror volumes.
This section will describe the creation of standard mirror volumes.
3. Adding FastResync
This section will describe the addition of the FastResync log to a newly created mirror
volume.
4. Notes
This section includes precautions and notes pertaining to the use of the FastResync
function.
Using the VERITAS Enterprise Administrator
Disk volume operations will be performed using the VERITAS Enterprise Administrator.
Before performing any operations, the VERITAS Enterprise Administrator must connect to the
machine in which it will administer. To make connection, follow the procedures described
below.
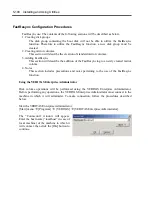
Start the VERITAS Enterprise Administrator:
[Start] menu [Programs] [VERITAS] [VERITAS Enterprise Administrator].
The “Connection” window will appear.
Enter the host name (“localhost” in case of
local machine) of the machine to which it
will connect, then click the [OK] button to
continue.
Summary of Contents for Express5800/320Lb FT Linux
Page 10: ...iv This page is intentionally left blank ...
Page 16: ...x This page is intentionally left blank ...
Page 19: ...Precautions for Use 1 3 Label A Label B Label C Label E Label D ...
Page 20: ...1 4 Precautions for Use Rack mount model Label B Label A Label C Label D ...
Page 21: ...Precautions for Use 1 5 Label D Label C Label B Label A ...
Page 22: ...1 6 Precautions for Use PCI CPU Modules PCI Module CPU Module Label A Label A Label A ...
Page 36: ...1 20 Precautions for Use This page is intentionally left blank ...
Page 44: ...2 8 General Description Front View inside Tower model Rack mount model ...
Page 70: ...2 34 General Description This page is intentionally left blank ...
Page 118: ...3 48 Setup This page is intentionally left blank ...
Page 162: ...4 44 System Configuration This page is intentionally left blank ...
Page 294: ...6 14 Maintenance This page is intentionally left blank ...
Page 336: ...7 42 Troubleshooting This page is intentionally left blank ...
Page 355: ...System Upgrade 8 19 15 Check the disk you selected and click Next 16 Click Complete ...
Page 399: ...System Upgrade 8 63 Cable ties included with cabinet ...
Page 410: ...8 74 System Upgrade This page is intentionally left blank ...
Page 412: ...A 2 Specifications This page is intentionally left blank ...

