7-24 Troubleshooting
SOLVING PROBLEMS
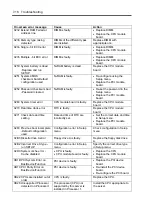
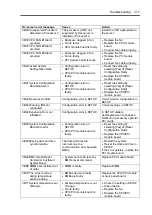
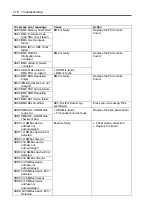
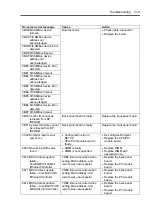
When the server fails to operate as expected, see the following to find out your problem and follow
the given instruction before asking for repair.
If the server still fails to operate successfully after solving your problem, take a note on the
on-screen message and contact your sales agent.
Problems with NEC Express5800/ft series
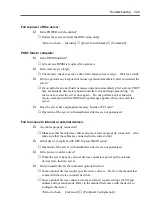
Fail to power on the server:
Is the server properly supplied with power?
→
Check if the power cord is connected to a power outlet (or UPS) that meets the
power specifications for the server.
→
Check if the two pieces of the provided power cord are connected to the main unit
properly.
→
Make sure to use the power cord provided with the server. Check the power cord
for broken shield or bent plugs.
→
Make sure the power breaker for the connected power outlet is on.
→
If the power cord is plugged to a UPS, make sure the UPS is powered and it
supplies power. See the manual that comes with the UPS for details.
Power supply to the server may be linked with the connected UPS using the BIOS
setup utility of the server.
<Menu to check: [System Hardware]
→
[AC-LINK]
→
[Power On]>
→
Make sure the POWER switch on the power unit is on.
Did you press the POWER switch?
→
Press the POWER switch on the front of the NEC Express5800/ft series to turn on
the power (the POWER LED lights).
Did you install the CPU/PCI module properly?
→
Check if the CPU/PCI module is properly installed in the server. Secure the
module with screw located on the module handle.
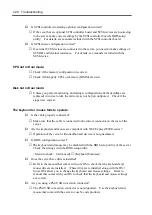
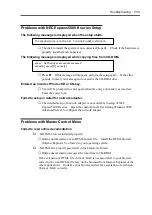
The screen turns blue during OS boot:
→
Wait for the period of time you set at BIOS [Boot Monitoring]; after the boot pair
is automatically swapped, the server will be rebooted and the OS will start up.
→
Start the OS from the other PCI module’s hard disk.
Summary of Contents for Express5800/320Lb FT Linux
Page 10: ...iv This page is intentionally left blank ...
Page 16: ...x This page is intentionally left blank ...
Page 19: ...Precautions for Use 1 3 Label A Label B Label C Label E Label D ...
Page 20: ...1 4 Precautions for Use Rack mount model Label B Label A Label C Label D ...
Page 21: ...Precautions for Use 1 5 Label D Label C Label B Label A ...
Page 22: ...1 6 Precautions for Use PCI CPU Modules PCI Module CPU Module Label A Label A Label A ...
Page 36: ...1 20 Precautions for Use This page is intentionally left blank ...
Page 44: ...2 8 General Description Front View inside Tower model Rack mount model ...
Page 70: ...2 34 General Description This page is intentionally left blank ...
Page 118: ...3 48 Setup This page is intentionally left blank ...
Page 162: ...4 44 System Configuration This page is intentionally left blank ...
Page 294: ...6 14 Maintenance This page is intentionally left blank ...
Page 336: ...7 42 Troubleshooting This page is intentionally left blank ...
Page 355: ...System Upgrade 8 19 15 Check the disk you selected and click Next 16 Click Complete ...
Page 399: ...System Upgrade 8 63 Cable ties included with cabinet ...
Page 410: ...8 74 System Upgrade This page is intentionally left blank ...
Page 412: ...A 2 Specifications This page is intentionally left blank ...

