8-8 System Upgrade
7.
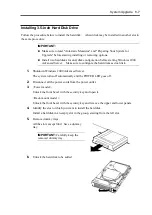
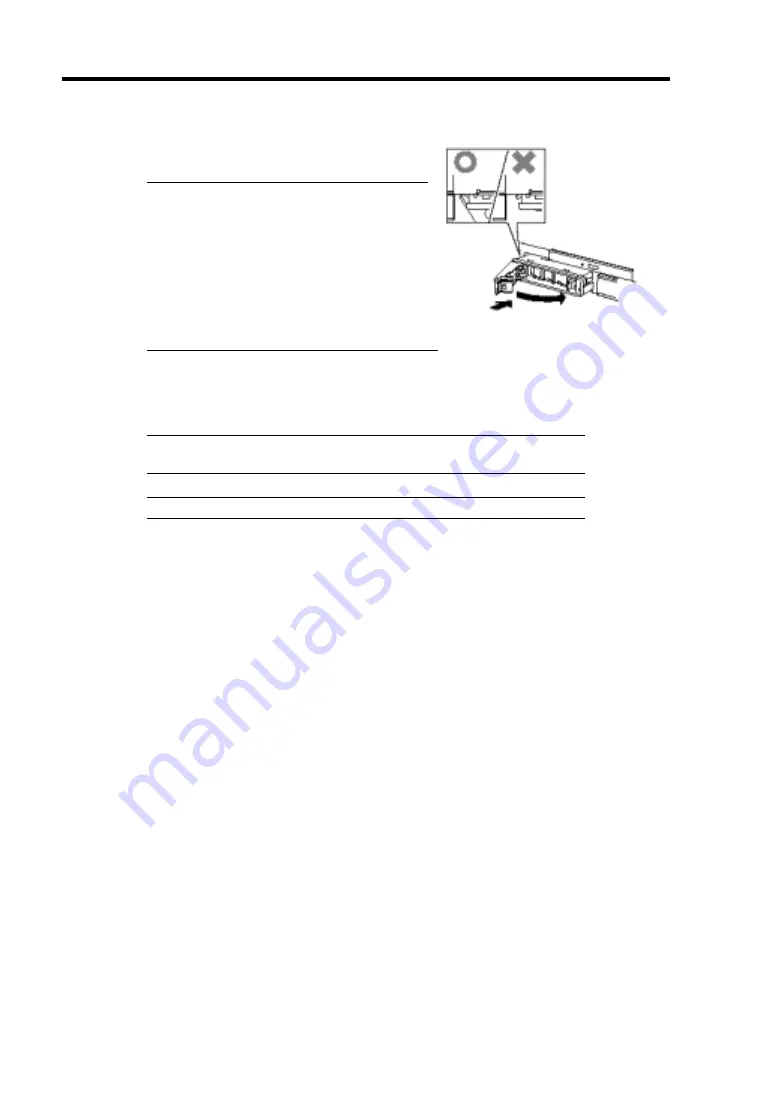
Firmly hold the handle of the hard disk to install
and insert the hard disk into the slot.
NOTES:
Engage the upper and lower frames of the
tray with the left and right grooves on the
device bay and insert the hard disk.
Insert the disk until the lever hook touches
the server frame.
Check the orientation of lever. Insert the
hard disk with the lever unlocked.
8.
Slowly close the lever.
When the lever is locked, you will hear a click sound.
IMPORTANT:
Be careful not to pinch your finger(s) between the lever
and handle.
NOTE:
Check the hook of the lever is engaged with the frame.
9.
Connect all the power cords.
10.
Press the POWER switch to turn on the system power.
11.
<Tower model>
Close the front bezel and lock it with the security key.
<Rack-mount model>
Install the upper and lower panels and lock the front bezel with the security key.
A while after Windows 2000 Advanced Server is started, [New Hardware Detection]
wizard is displayed.
12.
Select [Make known drivers for this device displayed and select a driver from the list] and
click [Next].
13.
Check that "Stratus Dual Initiated disk Device" is displayed in the list, and click [Next]
repeatedly until [Finish] is displayed.
14.
Set the dual disk configuration (see Chapter 3).
Summary of Contents for Express5800/320Lb FT Linux
Page 10: ...iv This page is intentionally left blank ...
Page 16: ...x This page is intentionally left blank ...
Page 19: ...Precautions for Use 1 3 Label A Label B Label C Label E Label D ...
Page 20: ...1 4 Precautions for Use Rack mount model Label B Label A Label C Label D ...
Page 21: ...Precautions for Use 1 5 Label D Label C Label B Label A ...
Page 22: ...1 6 Precautions for Use PCI CPU Modules PCI Module CPU Module Label A Label A Label A ...
Page 36: ...1 20 Precautions for Use This page is intentionally left blank ...
Page 44: ...2 8 General Description Front View inside Tower model Rack mount model ...
Page 70: ...2 34 General Description This page is intentionally left blank ...
Page 118: ...3 48 Setup This page is intentionally left blank ...
Page 162: ...4 44 System Configuration This page is intentionally left blank ...
Page 294: ...6 14 Maintenance This page is intentionally left blank ...
Page 336: ...7 42 Troubleshooting This page is intentionally left blank ...
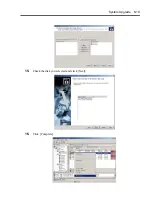
Page 355: ...System Upgrade 8 19 15 Check the disk you selected and click Next 16 Click Complete ...
Page 399: ...System Upgrade 8 63 Cable ties included with cabinet ...
Page 410: ...8 74 System Upgrade This page is intentionally left blank ...
Page 412: ...A 2 Specifications This page is intentionally left blank ...


