System Upgrade 8-11
How to Locate Failed Disks
This section describes a procedure to locate failed disks.
1.
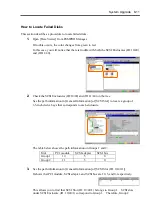
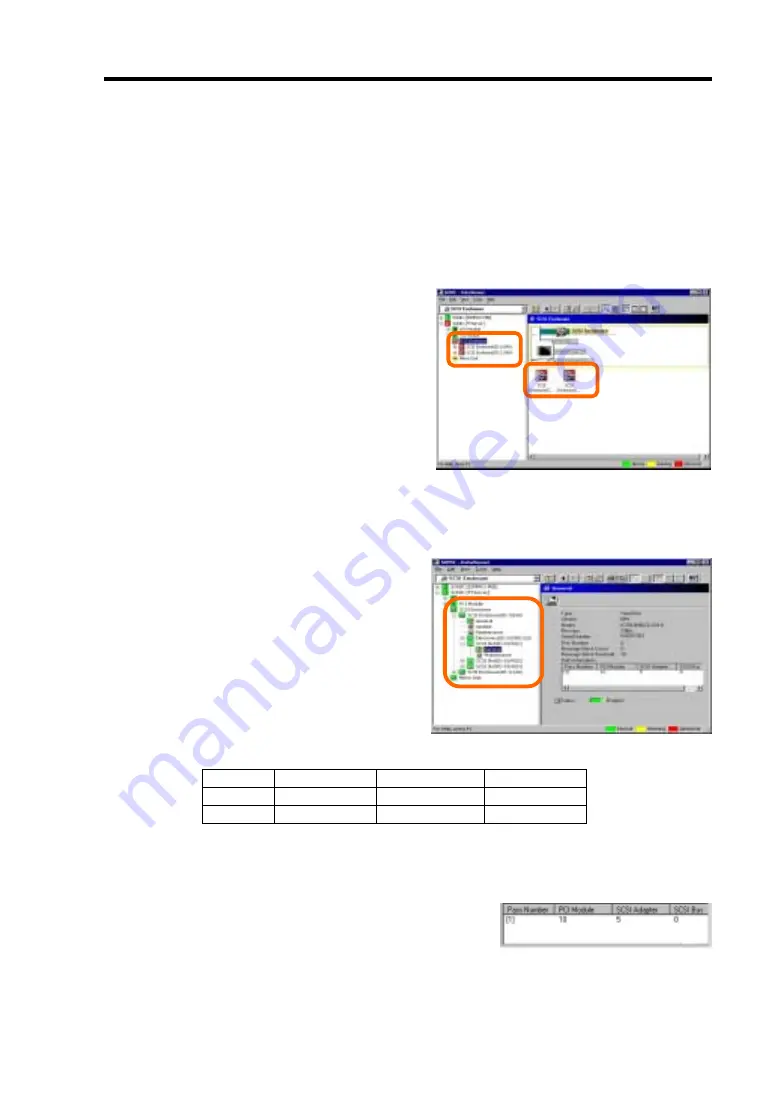
Open [Data Viewer] from ESMPRO Manager.
If trouble occurs, the color changes from green to red.
In this case, you will notice that there is trouble with both the SCSI Enclosures (ID:10/40)
and (ID:11/40).
2.
Check the SCSI Enclosures (ID:10/40) and (ID:11/40) on the tree.
See the path information in [General Information] of [SCSI Slot] to locate a group of
3.5-inch device bays that corresponds to each enclosure.
The table below shows the path information on Groups 1 and 2:
Slot
PCI module
SCSI adapter
SCSI bus
Group1 10
5
0
Group2 11
5
0
3.
See the path information in [General Information] of [SCSI Slot (ID: 10/40/1)].
It shows that PCI module, SCSI adapter, and SCSI bus are 10, 5, and 0, respectively.
This allows you to find that SCSI Slot (ID: 10/40/1) belongs to Group 1. SCSI slots
under SCSI Enclosure (ID: 10/40/1) correspond to Group 1. Therefore, Group 2
Summary of Contents for Express5800/320Lb FT Linux
Page 10: ...iv This page is intentionally left blank ...
Page 16: ...x This page is intentionally left blank ...
Page 19: ...Precautions for Use 1 3 Label A Label B Label C Label E Label D ...
Page 20: ...1 4 Precautions for Use Rack mount model Label B Label A Label C Label D ...
Page 21: ...Precautions for Use 1 5 Label D Label C Label B Label A ...
Page 22: ...1 6 Precautions for Use PCI CPU Modules PCI Module CPU Module Label A Label A Label A ...
Page 36: ...1 20 Precautions for Use This page is intentionally left blank ...
Page 44: ...2 8 General Description Front View inside Tower model Rack mount model ...
Page 70: ...2 34 General Description This page is intentionally left blank ...
Page 118: ...3 48 Setup This page is intentionally left blank ...
Page 162: ...4 44 System Configuration This page is intentionally left blank ...
Page 294: ...6 14 Maintenance This page is intentionally left blank ...
Page 336: ...7 42 Troubleshooting This page is intentionally left blank ...
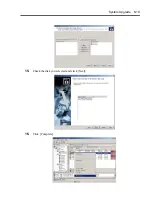
Page 355: ...System Upgrade 8 19 15 Check the disk you selected and click Next 16 Click Complete ...
Page 399: ...System Upgrade 8 63 Cable ties included with cabinet ...
Page 410: ...8 74 System Upgrade This page is intentionally left blank ...
Page 412: ...A 2 Specifications This page is intentionally left blank ...

