8-46 System Upgrade
8.
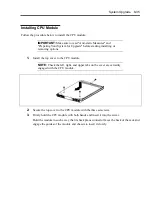
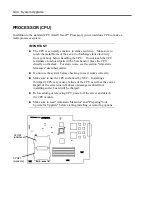
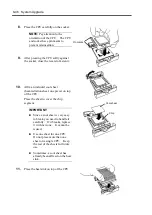
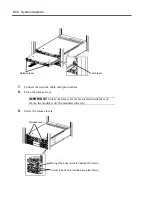
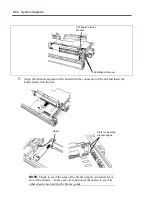
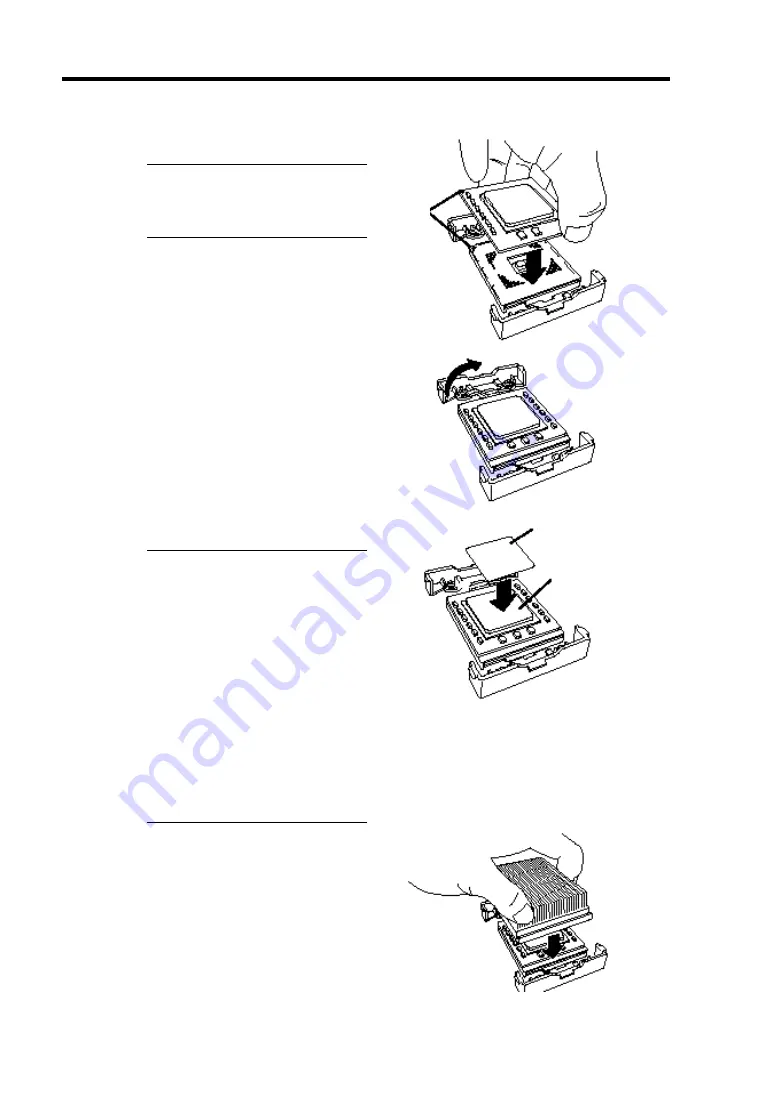
Place the CPU carefully on the socket.
NOTE:
Pay attention to the
orientation of the CPU. The CPU
and socket have pin marks to
prevent misinsertion.
9.
After pressing the CPU softly against
the socket, close the levers to fasten it.
10.
Affix an included cool sheet
(heat-radiation sheet: one piece) on top
of the CPU.
Place the sheet to cover the chip
segment.
IMPORTANT:
Since a cool sheet is very easy
to break, you need to handle it
carefully. If it breaks, replace
it with new one. It cannot be
reused.
Use one sheet for one CPU.
Do not place more than one
sheet on a single CPU. Keep
the rest of the sheets for future
use.
Sometimes, a cool sheet has
already been affixed on the heat
sink.
11.
Place the heat sink on top of the CPU.
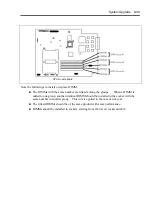
Pin marks
Cool sheet
Chip
Summary of Contents for Express5800/320Lb FT Linux
Page 10: ...iv This page is intentionally left blank ...
Page 16: ...x This page is intentionally left blank ...
Page 19: ...Precautions for Use 1 3 Label A Label B Label C Label E Label D ...
Page 20: ...1 4 Precautions for Use Rack mount model Label B Label A Label C Label D ...
Page 21: ...Precautions for Use 1 5 Label D Label C Label B Label A ...
Page 22: ...1 6 Precautions for Use PCI CPU Modules PCI Module CPU Module Label A Label A Label A ...
Page 36: ...1 20 Precautions for Use This page is intentionally left blank ...
Page 44: ...2 8 General Description Front View inside Tower model Rack mount model ...
Page 70: ...2 34 General Description This page is intentionally left blank ...
Page 118: ...3 48 Setup This page is intentionally left blank ...
Page 162: ...4 44 System Configuration This page is intentionally left blank ...
Page 294: ...6 14 Maintenance This page is intentionally left blank ...
Page 336: ...7 42 Troubleshooting This page is intentionally left blank ...
Page 355: ...System Upgrade 8 19 15 Check the disk you selected and click Next 16 Click Complete ...
Page 399: ...System Upgrade 8 63 Cable ties included with cabinet ...
Page 410: ...8 74 System Upgrade This page is intentionally left blank ...
Page 412: ...A 2 Specifications This page is intentionally left blank ...

