8-68 System Upgrade
1.
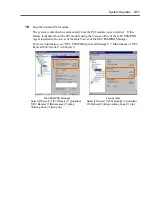
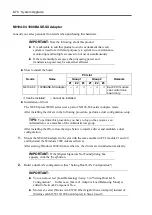
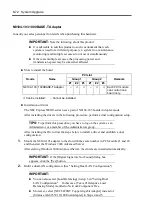
Mount the N8804-001P1 100BASE-TX adapter to the slot with the same number in PCI
module #1 and #2, and then start Windows 2000 Advanced Server.
After starting Windows 2000 Advanced Server, the drivers are installed automatically.
IMPORTANT:
If the [Digital Signature Not Found] dialog box
appears, click the [Yes] button.
2.
Build a dual LAN configuration. (See "Setting Dual LAN Configuration")
IMPORTANT:
You can also select [Load Balancing] in step 3 in "Setting Dual
LAN Configuration". In this case, [Team #1:Adaptive Load
Balancing Mode] is added to Network Component Tree.
Moreover, select [Stratus AA-U51500 10/100 Enet Adapter] instead
of [Stratus emb-82559 10/100 Enet Adapter] in Steps 4 and 5.
If you build a dual configuration by using two pairs of adapters in
Step 5, add an adapter in the same way.
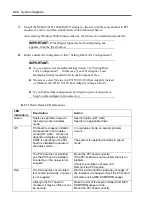
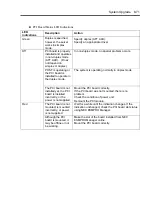
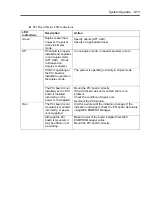
PCI Board Status LED Indications
LED
indications
Description Action
Green
Duplex is specified, however,
the server works in simplex
mode.
Specify duplex (AFT, ALB).
Specify an appropriate driver.
PCI board is properly installed
and operates in non-duplex
mode (AFT, ALB). (Does not
depend on simplex or duplex.)
In non-duplex mode, no special problem
occurs.
POST is operating or the PCI
board is installed to operate in
the duplex mode.
The system is operating normally in duplex
mode.
Off
The PCI board is not installed
yet, the PCI board is installed
incorrectly, or the power is not
supplied.
Mount the PCI board correctly.
If the PCI board was not mounted, there is no
problem.
Check the condition of power unit.
Remount the PCI module.
The PCI board is not mounted;
is mounted incorrectly; or power
is not supplied.
Wait for a while until the indication changes. If
the indication unchanged, check the PCI board
slot status using NEC ESMPRO Manager.
Red
Although the PCI board is
mounted, it may be offline or not
be working.
Make the slot of the board installed from NEC
ESMPRO Manager online.
Mount the PCI board correctly.
Summary of Contents for Express5800/320Lb FT Linux
Page 10: ...iv This page is intentionally left blank ...
Page 16: ...x This page is intentionally left blank ...
Page 19: ...Precautions for Use 1 3 Label A Label B Label C Label E Label D ...
Page 20: ...1 4 Precautions for Use Rack mount model Label B Label A Label C Label D ...
Page 21: ...Precautions for Use 1 5 Label D Label C Label B Label A ...
Page 22: ...1 6 Precautions for Use PCI CPU Modules PCI Module CPU Module Label A Label A Label A ...
Page 36: ...1 20 Precautions for Use This page is intentionally left blank ...
Page 44: ...2 8 General Description Front View inside Tower model Rack mount model ...
Page 70: ...2 34 General Description This page is intentionally left blank ...
Page 118: ...3 48 Setup This page is intentionally left blank ...
Page 162: ...4 44 System Configuration This page is intentionally left blank ...
Page 294: ...6 14 Maintenance This page is intentionally left blank ...
Page 336: ...7 42 Troubleshooting This page is intentionally left blank ...
Page 355: ...System Upgrade 8 19 15 Check the disk you selected and click Next 16 Click Complete ...
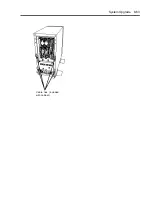
Page 399: ...System Upgrade 8 63 Cable ties included with cabinet ...
Page 410: ...8 74 System Upgrade This page is intentionally left blank ...
Page 412: ...A 2 Specifications This page is intentionally left blank ...

