Appendix B
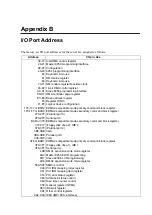
I/O Port Address
The factory-set I/O port addresses for the server are assigned as follows:
Address
Chip in Use
00-1F
20-21
2E-2F
40-43
60
61
64
70-71
80-8F
A0-A1
C0-DF
E0-E9
F0
F1-FF
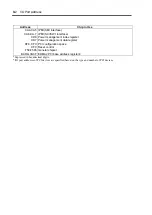
170-177 or BAR2
1F0-1F7 or BAR0
278-27F
2F8-2FF
BAR or 376
370-377
378-37F
3B0-3BB
3BC-3BE
3C0-3DF
3F6 or BAR1
3F0-3F7
3F8-3FF
40B
4D0
4D1
4D6
580-58F
C00
C01
C14
C49
C4A
C52
C6C
C6F
CA2-CA3
8-bit DMA control register
Master 8259 programming interface
Configuration
8254 programming interface
Keyboard & mouse
NMI status register
Keyboard & mouse
NMI enable register/real-time clock
16-bit DMA control register
Slave 8259 programming interface
DMA controller page register
Base address register
Register IRQ13
Logical device configuration
EDMA2-compatible mode primary command block register
EDMA2-compatible mode secondary command block register
(Parallel port 3)
Serial port 2
EDMA2-compatible mode secondary command block register
(Floppy disk drive 2), IDE 2
(Parallel port 2)
VGA
Parallel port 1
VGA
EDMA2-compatible mode primary command block register
(Floppy disk drive 1), IDE 1
Serial port A
DMA1 expansion write mode register
Master 8259 ELCR programming
Slave 8259 ELCR programming
DMA2 expansion write mode register
SMBus control
PCI IRQ mapping index register
PCI IRQ mapping data register
PCI error status register
Address & status control
Rise time counter control
General register (GPMs)
ISA wait register
Other control registers
IPMI (IMPI KCS interface)
Summary of Contents for Express5800/320Lb FT Linux
Page 10: ...iv This page is intentionally left blank ...
Page 16: ...x This page is intentionally left blank ...
Page 19: ...Precautions for Use 1 3 Label A Label B Label C Label E Label D ...
Page 20: ...1 4 Precautions for Use Rack mount model Label B Label A Label C Label D ...
Page 21: ...Precautions for Use 1 5 Label D Label C Label B Label A ...
Page 22: ...1 6 Precautions for Use PCI CPU Modules PCI Module CPU Module Label A Label A Label A ...
Page 36: ...1 20 Precautions for Use This page is intentionally left blank ...
Page 44: ...2 8 General Description Front View inside Tower model Rack mount model ...
Page 70: ...2 34 General Description This page is intentionally left blank ...
Page 118: ...3 48 Setup This page is intentionally left blank ...
Page 162: ...4 44 System Configuration This page is intentionally left blank ...
Page 294: ...6 14 Maintenance This page is intentionally left blank ...
Page 336: ...7 42 Troubleshooting This page is intentionally left blank ...
Page 355: ...System Upgrade 8 19 15 Check the disk you selected and click Next 16 Click Complete ...
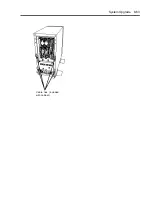
Page 399: ...System Upgrade 8 63 Cable ties included with cabinet ...
Page 410: ...8 74 System Upgrade This page is intentionally left blank ...
Page 412: ...A 2 Specifications This page is intentionally left blank ...

