2-30 General Description
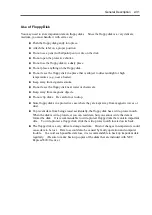
Insert/Remove Floppy Disk
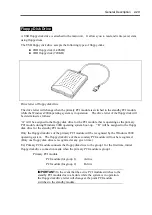
Before inserting a floppy disk into the drive, make sure that NEC Express5800/ft series is on and
that the drive’s USB cable is connected to the USB connector at the back of the server.
Insert a floppy disk into the drive firmly with the label side up and its protective shutter facing the
drive.
NOTES:
If you insert an unformatted disk, you will see a message that the
disk cannot be read or that needs formatting. To format a floppy
disk, see your OS manual.
If you power on or restart NEC Express5800/ft series with a floppy
disk left in the drive, the server will access the floppy disk to start
the system. Unless a system exits on the FD, the server will be
unable to start.
To remove a floppy disk from the drive, press the eject button.
NOTE:
Before removing a floppy disk, make sure that the access LED
is off. If you eject a floppy disk while the LED is on, the stored data
could be damaged.
Summary of Contents for Express5800/320Lb FT Linux
Page 10: ...iv This page is intentionally left blank ...
Page 16: ...x This page is intentionally left blank ...
Page 19: ...Precautions for Use 1 3 Label A Label B Label C Label E Label D ...
Page 20: ...1 4 Precautions for Use Rack mount model Label B Label A Label C Label D ...
Page 21: ...Precautions for Use 1 5 Label D Label C Label B Label A ...
Page 22: ...1 6 Precautions for Use PCI CPU Modules PCI Module CPU Module Label A Label A Label A ...
Page 36: ...1 20 Precautions for Use This page is intentionally left blank ...
Page 44: ...2 8 General Description Front View inside Tower model Rack mount model ...
Page 70: ...2 34 General Description This page is intentionally left blank ...
Page 118: ...3 48 Setup This page is intentionally left blank ...
Page 162: ...4 44 System Configuration This page is intentionally left blank ...
Page 294: ...6 14 Maintenance This page is intentionally left blank ...
Page 336: ...7 42 Troubleshooting This page is intentionally left blank ...
Page 355: ...System Upgrade 8 19 15 Check the disk you selected and click Next 16 Click Complete ...
Page 399: ...System Upgrade 8 63 Cable ties included with cabinet ...
Page 410: ...8 74 System Upgrade This page is intentionally left blank ...
Page 412: ...A 2 Specifications This page is intentionally left blank ...


