Setup 3-5
Installation
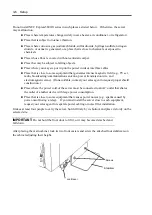
This section describes installation of NEC Express5800/ft series.
Tower Model
IMPORTANT:
NEC Express5800/ft series is a precision instrument. You should
ask maintenance personnel to install it.
Select a suitable site for tower model.
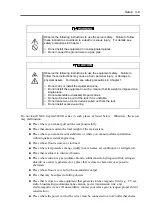
CAUTION
Observe the following instructions to use the equipment safely. Failure to
follow these instructions could cause a burn, injury, or damage to physical
assets. For details, see safety precautions in Chapter 1.
■
Do not lift the equipment alone.
■
Do not install the equipment in non-designated places.
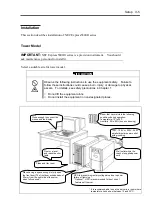
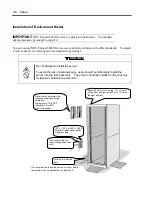
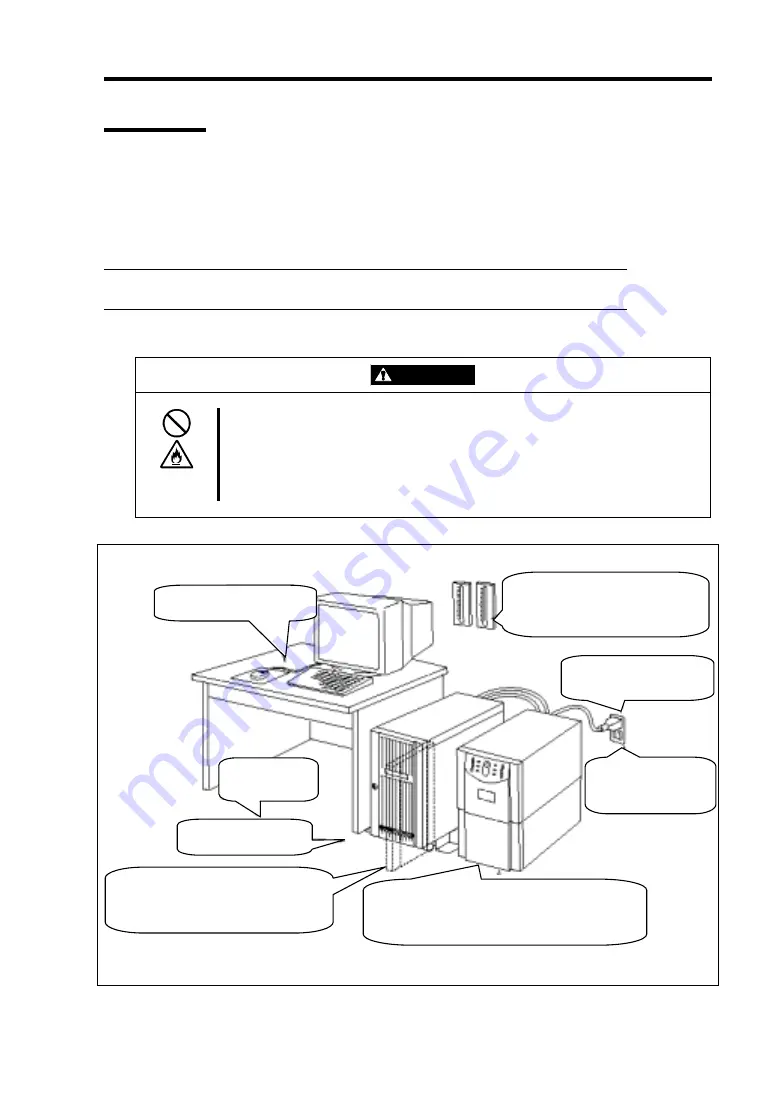
* It is recommendable to use the server in a room where
temperature can be kept between 15 and 25ºC.
100V - 120 V or 200V - 240 V
parallel bi-polar power outlet
with grounding
Room that can maintain the following
conditions during operation:
Temperature: 10 to 35ºC
Humidity: 20 to 80% (non-condensing)
Wall outlet within the
reach of supplied power
cord.
UPS to prevent momentary voltage drop due to power
failure or lightning *
* Optional. UPS is recommended for best use of
features of ft server.
Close enough to connect the
mouse and the display.
Floor or a level
and robust desk or
table.
Clean and tidy room
Place having a space enough to fully open
the front door (The front door extrudes about
50 mm from the right side of the server
when fully opened.)
Summary of Contents for Express5800/320Lb FT Linux
Page 10: ...iv This page is intentionally left blank ...
Page 16: ...x This page is intentionally left blank ...
Page 19: ...Precautions for Use 1 3 Label A Label B Label C Label E Label D ...
Page 20: ...1 4 Precautions for Use Rack mount model Label B Label A Label C Label D ...
Page 21: ...Precautions for Use 1 5 Label D Label C Label B Label A ...
Page 22: ...1 6 Precautions for Use PCI CPU Modules PCI Module CPU Module Label A Label A Label A ...
Page 36: ...1 20 Precautions for Use This page is intentionally left blank ...
Page 44: ...2 8 General Description Front View inside Tower model Rack mount model ...
Page 70: ...2 34 General Description This page is intentionally left blank ...
Page 118: ...3 48 Setup This page is intentionally left blank ...
Page 162: ...4 44 System Configuration This page is intentionally left blank ...
Page 294: ...6 14 Maintenance This page is intentionally left blank ...
Page 336: ...7 42 Troubleshooting This page is intentionally left blank ...
Page 355: ...System Upgrade 8 19 15 Check the disk you selected and click Next 16 Click Complete ...
Page 399: ...System Upgrade 8 63 Cable ties included with cabinet ...
Page 410: ...8 74 System Upgrade This page is intentionally left blank ...
Page 412: ...A 2 Specifications This page is intentionally left blank ...

