Setup 3-7
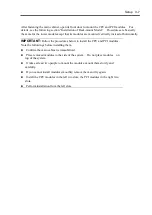
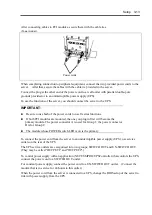
After fastening the main cabinet, open its front door to mount the CPU and PCI modules. For
details, see the following section “Installation of Rack-mount Model.” Procedures are basically
the same for the tower model except that its modules are mounted vertically instead of horizontally.
IMPORTANT:
Follow the procedures below to install the CPU and PCI modules.
Note the followings before installing them.
Confirm the main cabinet is immobilized.
Place removed modules to the side of the system. Do not place modules on
top of the system.
It takes at least two people to mount the modules; mount them slowly and
carefully.
If you cannot install modules smoothly, remove them and try again.
Install the CPU modules in the left two slots, the PCI modules in the right two
slots.
Perform installation from the left slots.
Summary of Contents for Express5800/320Lb FT Linux
Page 10: ...iv This page is intentionally left blank ...
Page 16: ...x This page is intentionally left blank ...
Page 19: ...Precautions for Use 1 3 Label A Label B Label C Label E Label D ...
Page 20: ...1 4 Precautions for Use Rack mount model Label B Label A Label C Label D ...
Page 21: ...Precautions for Use 1 5 Label D Label C Label B Label A ...
Page 22: ...1 6 Precautions for Use PCI CPU Modules PCI Module CPU Module Label A Label A Label A ...
Page 36: ...1 20 Precautions for Use This page is intentionally left blank ...
Page 44: ...2 8 General Description Front View inside Tower model Rack mount model ...
Page 70: ...2 34 General Description This page is intentionally left blank ...
Page 118: ...3 48 Setup This page is intentionally left blank ...
Page 162: ...4 44 System Configuration This page is intentionally left blank ...
Page 294: ...6 14 Maintenance This page is intentionally left blank ...
Page 336: ...7 42 Troubleshooting This page is intentionally left blank ...
Page 355: ...System Upgrade 8 19 15 Check the disk you selected and click Next 16 Click Complete ...
Page 399: ...System Upgrade 8 63 Cable ties included with cabinet ...
Page 410: ...8 74 System Upgrade This page is intentionally left blank ...
Page 412: ...A 2 Specifications This page is intentionally left blank ...

