Setup 3-23
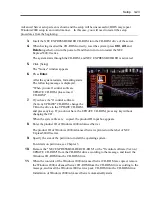
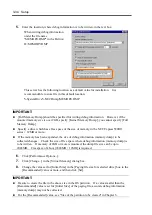
Advanced Server setup screen is shown and the setup will be unsuccessful; BIOS may repeat
Windows2000 setup in an invalid manner. In this case, you will need to restart the setup
procedures from the beginning.
3.
Insert the NEC EXPRESSBUILDER CD-ROM into the CD-ROM drive of the server.
4.
When having inserted the CD-ROM correctly, reset the system (press
Ctrl
,
Alt
, and
Delete
together), or turn the power off and then turn it on to restart the NEC
Express5800/ft series.
The system starts through the CD-ROM, and NEC EXPRESSBUILDER is activated.
5.
Click [Setup].
The "Notice" window appears.
6.
Press
Enter
.
After the system restarts, formatting starts.
The following message is displayed.
"When you use ft control software
UPDATE CD-ROM, please insert
CD-ROM."
7.
If you have the "ft control software
(Ver:n.n) UPDATE" CD-ROM, change the
CD in the drive to the UPDATE CD-ROM,
and press any key. If you do not have the UPDATE CD-ROM, press any keywithout
changing the CD.
When the system files are copied, the product ID input box appears.
8.
Enter the product ID of Windows 2000 Advanced Server.
The product ID of Windows 2000 Advanced Server is printed on the label of NEC
Express5800/ft series.
9.
Specify the size of the partition to install the operating system.
For details on partitions, see Chapter 3.
10.
Remove the "NEC EXPRESSBUILDER CD-ROM" or the "ft control software (Ver:n.n)
UPDATE CD-ROM" from the CD-ROM drive according to the message, and insert the
Windows CD-ROM into the CD-ROM drive.
11.
When the contents of the Windows 2000 Advanced Server CD-ROM are copied, remove
the Windows 2000 Advanced Server CD-ROM from the CD-ROM drive according to the
message, and insert the Windows 2000 service pack CD-ROM into the CD-ROM drive.
Installation of Windows 2000 Advanced Server automatically starts.
Summary of Contents for Express5800/320Lb FT Linux
Page 10: ...iv This page is intentionally left blank ...
Page 16: ...x This page is intentionally left blank ...
Page 19: ...Precautions for Use 1 3 Label A Label B Label C Label E Label D ...
Page 20: ...1 4 Precautions for Use Rack mount model Label B Label A Label C Label D ...
Page 21: ...Precautions for Use 1 5 Label D Label C Label B Label A ...
Page 22: ...1 6 Precautions for Use PCI CPU Modules PCI Module CPU Module Label A Label A Label A ...
Page 36: ...1 20 Precautions for Use This page is intentionally left blank ...
Page 44: ...2 8 General Description Front View inside Tower model Rack mount model ...
Page 70: ...2 34 General Description This page is intentionally left blank ...
Page 118: ...3 48 Setup This page is intentionally left blank ...
Page 162: ...4 44 System Configuration This page is intentionally left blank ...
Page 294: ...6 14 Maintenance This page is intentionally left blank ...
Page 336: ...7 42 Troubleshooting This page is intentionally left blank ...
Page 355: ...System Upgrade 8 19 15 Check the disk you selected and click Next 16 Click Complete ...
Page 399: ...System Upgrade 8 63 Cable ties included with cabinet ...
Page 410: ...8 74 System Upgrade This page is intentionally left blank ...
Page 412: ...A 2 Specifications This page is intentionally left blank ...

