Upgrading Your Server 9-11
7.
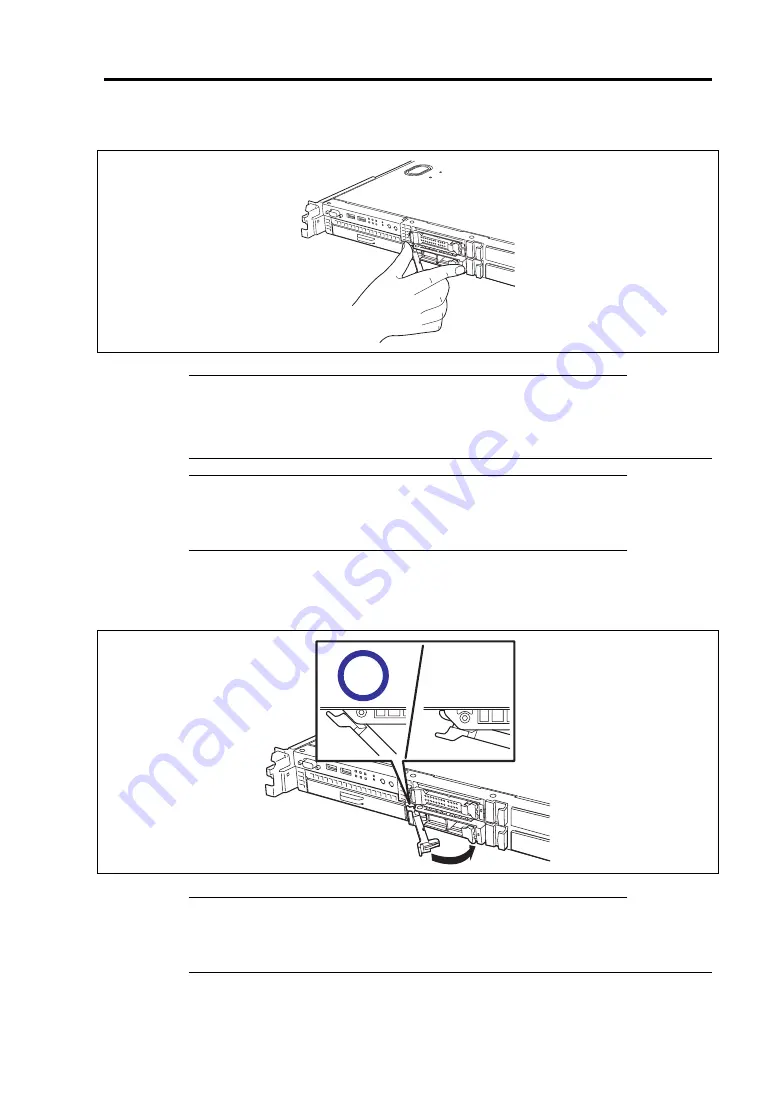
Push the drive carrier into the slot until it stops.
IMPORTANT:
Confirm that the handle is hooked to the frame when having inserted the hard disk
drive.
Be careful not to get your finger caught between the handle and tray.
NOTE:
The hard disk drive bay is located close to the POWER switch.
Pay attention not to press the POWER switch when installing/removing
the hard disk drive. If the POWER switch is pressed by mistake, the
system starts shutdown process.
8.
Slowly close the handle.
The drive carrier is locked when a "click" is heard.
IMPORTANT:
Be careful not to get your finger caught between the handle and tray.
Push the drive further to check if it is firmly secured.
±
Summary of Contents for Express5800/R120b-1
Page 20: ...Notes on Using Your Server 1 3 3 5 inch disk model...
Page 87: ...3 24 Setting Up Your Server This page is intentionally left blank...
Page 268: ...6 14 Installing and Using Utilities Windows Server 2003...
Page 296: ...7 14 Maintenance This page is intentionally left blank...
Page 350: ...8 54 Troubleshooting When you use a remote console 6 Each tool is selected and it starts...
Page 438: ...9 82 Upgrading Your Server This page is intentionally left blank...
Page 450: ...C 2 IRQ This page is intentionally left blank...
Page 474: ...D 24 Installing Windows Server 2008 R2 4 Activate Windows The Windows activation is complete...
Page 504: ...E 28 Installing Windows Server 2008 4 Activate Windows The Windows activation is complete...
Page 564: ......
Page 566: ...H 2 Using a Client Computer Which Has a CD Drive This page is intentionally left blank...
Page 576: ...I 10 Accessing Power and Performance Data This page is intentionally left blank...
Page 580: ...J 4 Product Configuration Record Table This page is intentionally left blank...


