5. Installing Optional Devices
Express5800/R310g-E4, R320g-E4, R320g-M4 Maintenance Guide (Windows)
160
Chapter 2 Configuring and Upgrading the System
5.4.2
Installing CPU/IO Module
Follow the steps below to install the CPU/IO module:
Important
See
Chapter 2 (5.1.3 Precautions for installing/replacing optional
devices
)
and
Chapter 1(1.8 Anti-static Measures) in Safety Precautions and Regulatory
Notices
before starting installing or removing options.
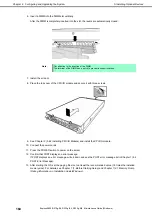
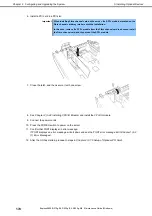
Insert the black lever slowly and fasten the screws tightly. Be careful not to
cause a shock to the device at this time.
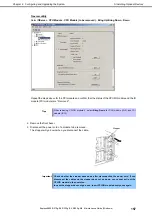
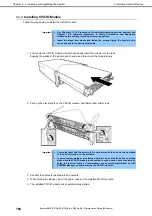
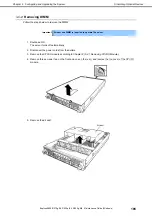
1. Firmly hold the CPU/IO module with both hands and insert the module into the rack.
Engage the guides of the module and chassis, and then insert the module slowly.
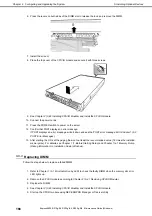
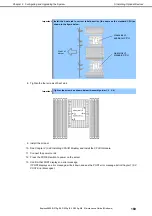
2. Push up the black levers on the CPU/IO module, and fasten them with screws.
Important
Secure the lever with the screws. If it is not secured by the screws, the operation
of the CPU/IO module will be unstable.
In some system statuses or settings, auto start up or integration does not take
place when the CPU/IO module is connected. In such a case, check the status by
using the ft server utility or "Information of server state/constitution" of NEC
ESMPRO Manager, and then start up the CPU/IO modules.
3. Connect the cables for peripherals and network.
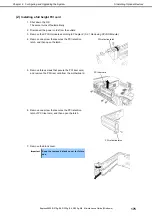
4. While holding the stopper, insert the power codes of the installed CPU/IO module.
5. The installed CPU/IO module will be automatically started.


