background image

8

7.

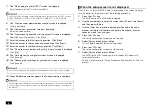
The "Who’s going to use this PC?" screen is displayed.

Enter the name of the PC user. Click [Next].

8.

The "Create a super memorable password" screen is displayed.

Enter a password.

9.

The "Confirm your password" screen is displayed.

Re-enter the password.

10.

The "Create security questions for this account" screen is displayed.

Select the security questions. Click [Next].

11.

Enter the answer to the first security question. Click [Next].

12.

Enter the answer to the second security question. Click [Next].

13.

Enter the answer to the third security question. Click [Next].

14.

The "Do more across devices with activity history" screen is displayed.

Click [No].

15.

The "Get help from your digital assistant" screen is displayed.

Click [Accept].

16.

The "Choose privacy settings for your device" screen is displayed.

Click [Accept].

17.

When the desktop screen appears, the Windows setup is complete.

When the setup screen is not displayed

When [Press F2 to Enter BIOS Setup] is displayed on the screen when you 
turn the power on, please carry out the following procedure.

1.

Press the <F2> key.

The BIOS setup utility will then be displayed.

2.

Use the number keys to enter the current hour (24 hour time format) 
and then press <Enter>.

3.

Use the <Tab> key to move to desired position and in the same 
manner, set the rest of the time and date in the order of minutes, 
seconds, month, day, and year.

4.

Press the <F9> key.

The setup confirmation screen should come up.

5.

Select [Yes] and then press <Enter>.

This will load the default factory setting values.

6.

Press the <F10> key.

The setup confirmation screen should come up.

7.

Select [Yes] and then press <Enter>.

The BIOS setup utility should now be finished and Windows will 
automatically restart.
After this, please refer to "Setup Procedure" and continue on with the 
process.

Do not enter the following character strings since they are used in the PC system.
CON, PRN, AUX, CLOCK, $, NUL, COM1 to COM9, LPT1 to LPT9, NONE

If a screen saying there are updates available appears here, select do not apply.

If a message about Windows license authentication appears, follow the instructions 
on the screen. License authentication is performed automatically by connecting to 
the Internet.

Summary of Contents for Lavie PC-HA97GRAW

Page 1: ...can be determined by turning the equipment off and on the user is encouraged to try to correct the interference by one or more of the following measures Reorient or relocate the receiving antenna Increase the separation between the equipment and receiver Connect the equipment into an outlet on a circuit different from that to which the receiver is connected Consult the dealer or an experienced rad...

Page 2: ...s can be restored by repairs we will perform repairs for a fee with request from the customer Installation of this unit Install on a solid table on a desk or table that can support the weight of the computer Secure the computer prevent overturning On the back of this computer there is a hole for passing a string to prevent the computer from falling To prevent injuries caused by toppling or fall of...

Page 3: ... there is no slack 2 Connection of Included Accessories Important points for connections Do not touch the connector terminals when connecting any items Failure to do so may cause damage Prepare the keyboard for use 1 Attach the USB receiver to the USB connector 2 Remove the cover on the back of the keyboard by sliding it in the direction of the arrow Hole to pass the string ...

Page 4: ... hours a day 5 days a week It may vary depending on the usage and environmental conditions Batteries provided at the time of purchase may be shorter than the listed life Manganese batteries and oxyride batteries cannot be used If the keyboard will not be used for a long time set the keyboard power switch at the top right of the keyboard to OFF to increase the battery life When inserting the batter...

Page 5: ...e terminal behind the mouse does not deform Manganese batteries and oxyride batteries cannot be used The battery life of the mouse is approximately XX months when used with alkaline batteries when used for 8 hours a day 5 days a week It may vary depending on the method of use and environmental conditions Batteries provided at the time of purchase may be shorter than the listed life If the mouse wi...

Page 6: ... a LAN cable and make sure that the wireless LAN is turned OFF To ensure safe connection of this product to the network connect a LAN cable or turn on the wireless LAN only after Windows setup and firewall configuration has been completed Do not turn off the power during setup The setup program is running normally even if the screen appears to stop Please keep following the steps in the manual Do ...

Page 7: ...displayed Read the license agreement and click Accept to continue If the AC adapter is not properly connected the power is not turned on by pressing the power switch when you first turn the power on Check the connection of the AC adapter again Never turn OFF the power during Windows setup Turning OFF the power switch or pulling out the power cord in the middle of this process may lead to damage It...

Page 8: ...the power on please carry out the following procedure 1 Press the F2 key The BIOS setup utility will then be displayed 2 Use the number keys to enter the current hour 24 hour time format and then press Enter 3 Use the Tab key to move to desired position and in the same manner set the rest of the time and date in the order of minutes seconds month day and year 4 Press the F9 key The setup confirmat...

Page 9: ... reading or writing data Off The optical drive or internal storage is not reading or writing data Do not turn off the power or remove a CD ROM or other disc while it is flashing or lit The contents of the internal storage may be damaged or cause a failure d Power lamp Blue The computer is on Orange The computer is in sleep mode Off The computer is off 2 Display Display the computer screen 3 Built ...

Page 10: ...om the back of the main unit 8 USB3 1 connector Connector for connecting USB compatible devices The USB 3 1 connector supports up to the USB 3 1 standard Check with the manufacturer or distributor of the peripheral device to see if it can be used with this computer If there is a mark on the plug insert such that the mark can be seen from the back of the main unit 1 3 2 4 5 7 8 6 Notes on using USB...

Page 11: ...hut down and click Shutdown Note that turning the power OFF ON puts a burden on the computer so wait at least 5 seconds when turning OFF the power and turning it ON again If Windows has clearly stopped the computer can be forced to power OFF by pressing the power switch for more than 10 seconds In this case the data being created will be deleted 6 Wake on Voice on off switch button Button to switc...

Page 12: ... please be careful about the front and back facing the back side and firmly fit the disc hole into the shaft until you hear a click 4 Press the disc tray to return the disc tray to its original position Remove the disc The disc tray can be ejected only when the computer is turned on Do not touch the lens in the optical drive 1 Press the disc tray eject button The disc tray pops out a little 2 Pull...

Page 13: ...the left and right and returns to its original position after the memory card is locked Wireless communication based on the Wi Fi4 IEEE802 11n Wi Fi5 IEEE802 11ac and Wi Fi6 IEEE802 11ax standards has changed the bandwidth of communication channels used from the conventional 20MHz to 40MHz 80MHz Wi Fi By expanding to Wi Fi5 Wi Fi6 only it supports functions that realize higher communication speeds...

Page 14: ... antenna or transmitter Operations in the 5 15 5 25GHz band are restricted to indoor usage only This device meets all the other requirements specified in Part 15E Section 15 407 of the FCC Rules Radiation Exposure Statement This equipment complies with FCC radiation exposure limits set forth for an uncontrolled environment This equipment should be installed and operated with minimum distance 20cm ...

Page 15: ...ommunication load may increase and affect the operation Some Bluetooth devices may have specifications that cannot be used simultaneously There may be functional differences even with the same type of Bluetooth device The Bluetooth function is not guaranteed to work with all Bluetooth devices Check the operating environment of the Bluetooth device and whether it can be connected Switching the Blue...

Page 16: ...ap the Bluetooth compatible information terminal displayed on the Add device screen Once paired it will appear in Your device is ready to go 8 Click or tap Done When connecting to a Windows 10 Bluetooth device you may need to enter a passcode In that case enter the passcode click or tap Next and then follow the instructions on the screen To check the registered devices perform steps 1 to 3 above a...

Page 17: ...ation for creating a recovery drive A USB memory is required to create a recovery drive The capacity of the USB memory to be used is displayed on the Create Recovery Drive screen Please follow the instructions on the screen When you create a recovery drive all data on the USB memory will be deleted The recovery drive cannot be divided and written to multiple USB memory devices 1 Remove all periphe...

Page 18: ...ery drive in the Boot Override field and press Enter key In general Windows Boot Manager and the recovery drive device set in step 4 are displayed Select a device other than Windows Boot Manager The computer will restart 8 When a screen of the keyboard layout selection appears click US 9 When the Choose an option screen appears click or tap Recover from a drive 10 Click Just remove my files 11 Nex...

Page 19: ...bit Ethernet connection WLAN Bluetooth 11ax 2 x 2 BT5 0 Color Fine White Camera HD 720p Microphone 4 microphone array Audio Support Intel High Definition Audio YAMAHA Audio Engine Crystal Sound Display 2 7W 2 7W Full range 1 5W x 2 tweeter 1 2W x 2 Keyboard Wireless Keyboard White English Mouse Wireless Mouse White Dimensions W x D x H 24 23 x 7 34 x 14 22 Minimum tilt of display No camera 24 23 x...

Page 20: ...se give away or otherwise distribute the software whether in full or in parts 4 You shall not duplicate the manual and other materials provided with the software products 4 Transfer of software products 1 You may not assign all or part of your rights or obligations under this license without our prior written consent and any attempt to the contrary will be void and a breach of this license We may ...

Page 21: ...are reserved by us 8 Disclaimer of Warranty 1 THIS SOFTWARE PRODUCT AND THE ACCOMPANYING MATERIALS ARE LICENSED TO YOU AS IS AND WITHOUT WARRANTY OF ANY KIND EITHER EXPRESS IMPLIED OR STATUTORY INCLUDING BUT NOT LIMITED TO THE IMPLIED WARRANTIES OF MERCHANTIABLITY AND FITNESS FOR A PARTICULAR PURPOSE We do not warrant that the functions of the software products will meet your requirements or that ...

Page 22: ...n arising out of or in connection or by reasons of the use of the software products 3 Intellectual Property Rights All the right title and interest to the intellectual property rights in the software products including but without limitation to any source codes images photographs animations video audio music and text incorporated into the software products the accompanying manual and other materia...

Page 23: ...e with this product only The included DVD ROM and CD ROM are for use with this product only 7 Distribution and copying all or part of the software without permission of the copyright owner is a copyright infringement 8 Hardware maintenance information is saved 9 This product contains software that does not pass the test of the Designed for WindowsR program 10 The content in this manual was created...

Reviews: