10
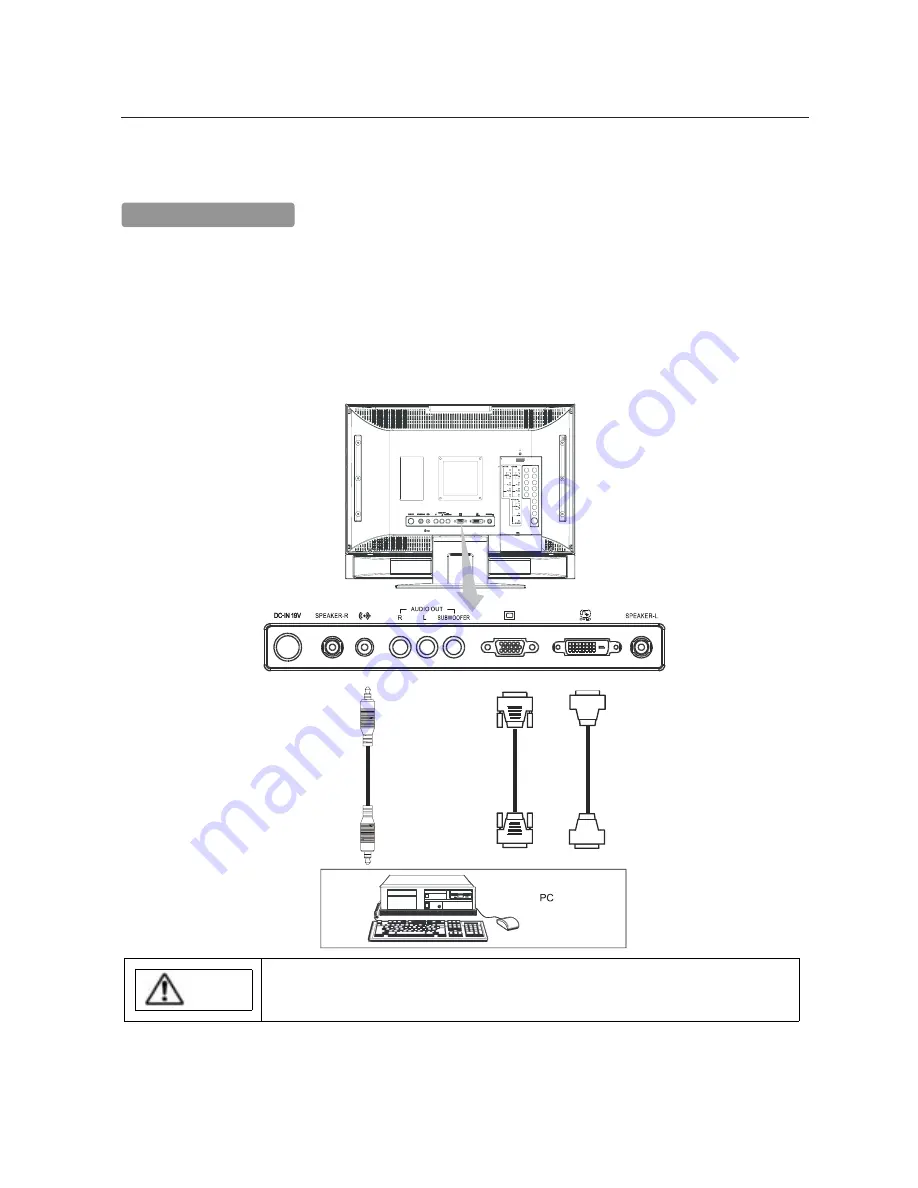
Connecting to a PC
Choose an appropriate site and install the product on a level table where the stand is secure.
Ensure that a power socket is readily accessible near the place where you install the LCD MONITOR.
Make sure that the power switch of this device is turned off.
1. Make sure that the display signal of the personal computer to be used is compatible with the specifications of this device.
See "Product Specifications" concerning the specifications of this device.
2.Make sure that the power switch of the personal computer is turned off.
3.Connect the signal input terminal (RGB 1 or RGB 2) on the rear panel of this device to the display signal output terminal of the
personal computer.
z
Use a cable that fits the input terminal of this device and the output terminal of the personal computer.
z
Depending on the type of personal computer being connected, the use of an optional conversion adapter or the adapter provided with the personal
computer may be necessary in some cases. For details, refer to the instruction manual of the personal computer or ask the personal computer
manufacturer or your local retail.
Note
PREVENTION OF SCREEN BURN
Continuous on-screen display of fixed (non-moving) images, such as video games, stock market quotations,
computer generated graphics and other patterns can cause permanent damage to the LCD MONITOR.
Such "SCREEN BURN-IN" constitutes misuse and IS NOT COVERED by our Factory Warranty.
Subwoofer Output provides a single un-amplified audio output that passes along the audio signal from the LCD MONITOR.
Note: When using a Home Theater audio system with this LCD MONITOR, please connect the sub woofer (if originally supplied with the audio
system) directly to the Home Theater components subwoofer terminal.
DVI Connector
15 Pin D-sub
VGA
connector
Audio input
from PC.
Installation Instructions
continued


