Release 6.0
55
User Guide
Chapter 1 Overview
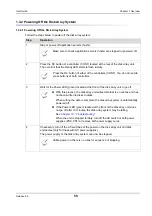
1.3.1.2 Powering On the Disk Array System
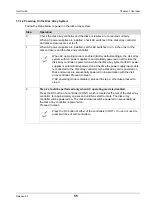
Follow the steps below to power on the disk array system:
Step
Operation
0
Check the disk array controller and the disk enclosures are connected correctly.
When AC power supplies are installed, check AC switches of the disk array controller
and disk enclosures are set to off.
1
When AC power supplies are installed, set the AC switches to on, in the order of the
disk enclosure and the disk array controller.
2
Step 2 should be performed only when AC operating mode is disabled.
Press the DC button of a controller (CONT), which is located at the rear of the disk array
controller, for approximately one second until fans start to rotate. The disk array
controller will be powered on. The disk enclosures will be powered on sequentially as
the disk array controller is powered on.
Proceed to step 3.
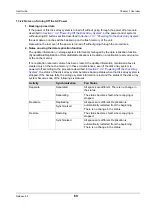
When AC operating mode is enabled (factory default settings), the disk array
system with AC power supplies is automatically powered on at the time the
disk array controller is powered on while the disk array system with DC power
supplies is automatically powered on at the time the power supply input cable
is connected to the disk array controller or the disk array unit is powered on.
Disk enclosures are sequentially powered on in association with the disk
array controller. Proceed to step 3.
If AC operating mode is disabled, proceed to step 2, otherwise proceed to
step 3.
Press the DC button of either of the controllers (CONT). You do not need to
press switches of both controllers.
Summary of Contents for M100
Page 25: ...Release 6 0 25 User Guide About Warning Labels Power Supply AC Power Supply ...
Page 27: ...Release 6 0 27 User Guide About Warning Labels Battery ...
Page 29: ...Release 6 0 29 User Guide About Warning Labels Power Cable AC Power Supply ...
Page 40: ...Release 6 0 40 User Guide Chapter 1 Overview 1 2 1 4 Controller CONT ...
Page 48: ...Release 6 0 48 User Guide Chapter 1 Overview 1 2 3 3 Controller CONT ...
Page 260: ...Release 6 0 260 User Guide Chapter 8 Installing Optional Parts Figure 8 12 Removing the DIMMs ...
Page 459: ...NEC Corporation 7 1 Shiba 5 chome Minato ku Tokyo 108 8001 Japan URL http www necstorage com ...


