Release 6.0
250
User Guide
Chapter 8 Installing Optional Parts
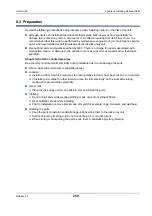
8.2 Preparation
Review the following precautions and procedures when installing options to the disk array unit.
Although users can install optional products themselves, NEC assumes no responsibility for
damage to the disk array unit or components or for effects resulting from use if they do so. It is
recommended that this work be performed by maintenance engineers of your maintenance service
agent who have detailed expert knowledge about the disk array unit.
Use optional parts and cables specified by NEC. There is a charge for repairs associated with
malfunction, failure, or damage to the unit that occurs as a result of using parts other than those
specified.
About electrostatic countermeasures
Be extremely careful of static electricity during installation as it could damage the parts.
Wear a wrist strap (armband or antistatic gloves)
Location
Install on a floor for which measures to prevent static electricity have been taken or on concrete.
If installing on a carpet or other location prone to static electricity, do the work after taking
measures to prevent static electricity.
Use of mat
Place the disk array unit on an antistatic mat and install the parts.
Clothing
Do not install parts while wearing clothing made of wool or synthetic fibers.
Wear antistatic shoes while installing.
Prior to installation, remove items made of metal (for example: rings, bracelets, and watches).
Handling the parts
Keep the parts to install in antistatic bags until inserting them in the disk array unit.
Hold each part by its edge and do not touch the pins or mounting parts.
When storing or transporting the parts, keep them in antistatic bags for protection.
Summary of Contents for M100
Page 25: ...Release 6 0 25 User Guide About Warning Labels Power Supply AC Power Supply ...
Page 27: ...Release 6 0 27 User Guide About Warning Labels Battery ...
Page 29: ...Release 6 0 29 User Guide About Warning Labels Power Cable AC Power Supply ...
Page 40: ...Release 6 0 40 User Guide Chapter 1 Overview 1 2 1 4 Controller CONT ...
Page 48: ...Release 6 0 48 User Guide Chapter 1 Overview 1 2 3 3 Controller CONT ...
Page 260: ...Release 6 0 260 User Guide Chapter 8 Installing Optional Parts Figure 8 12 Removing the DIMMs ...
Page 459: ...NEC Corporation 7 1 Shiba 5 chome Minato ku Tokyo 108 8001 Japan URL http www necstorage com ...


