Upgrading Your System 4-27
10.
Connect the interface and power cables to the device as follows (see figure above):
If you are installing a 5 1/4-inch tape drive or other IDE device, align and
connect the drive signal cable and the system power cable to their connectors.
The cable connector for the 5 1/4-inch device is keyed to fit only in the correct
position. The red edge of the cable goes to pin 1 on the cable connector. Align
the red edge of the connector with pin 1 (notched end) on the drive connector.
If you are installing a SCSI device, connect the SCSI cable and system power
cable. Be sure to align the SCSI cable connector (not keyed) with the device
connector.
11.
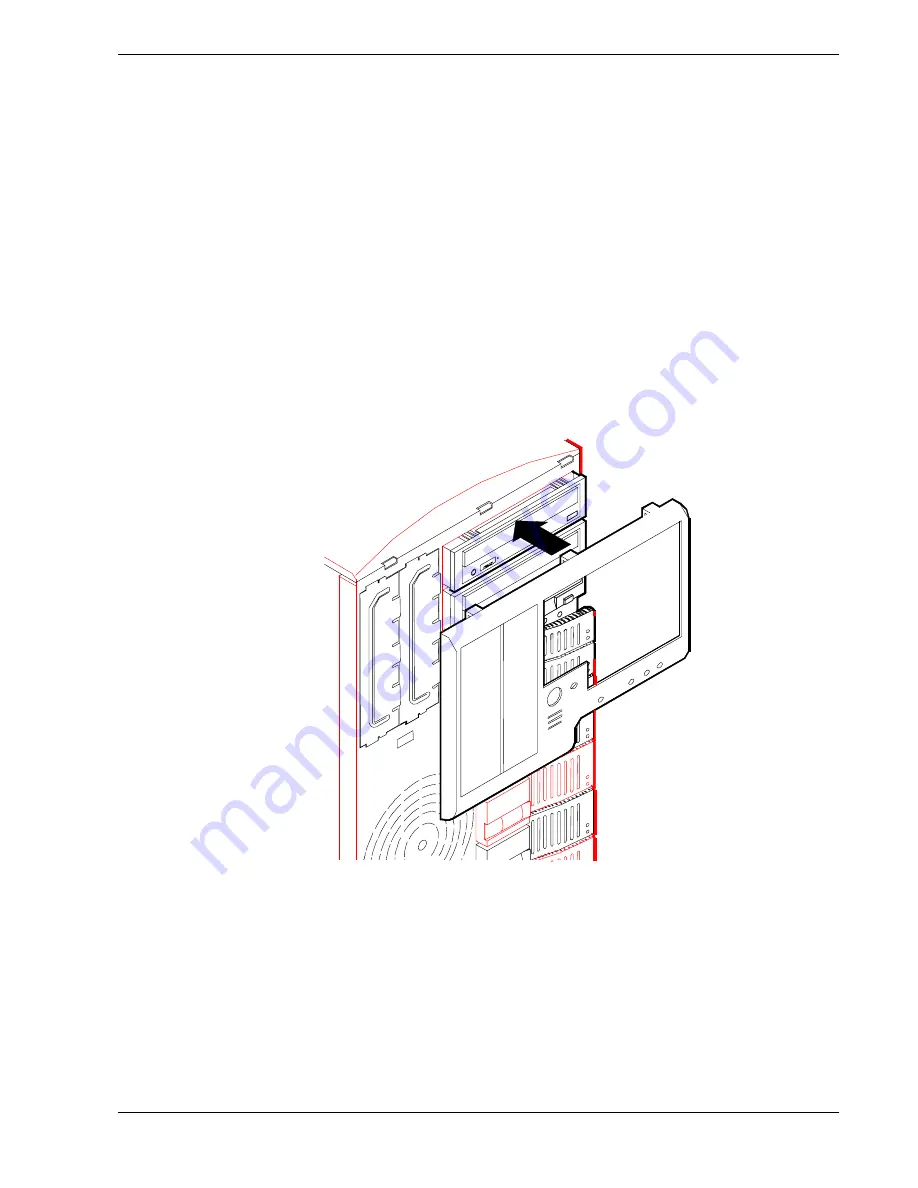
Carefully reinstall the front system bezel by inserting its top plastic tabs into the
chassis top tab slots and then pushing its bottom portion straight in against the
chassis (see figure below).
12.
Close the front door, reinstall the side panel, and power on the system.
Figure 4-20 Installing the Front System Bezel
Summary of Contents for MC2200
Page 1: ... U s e r s G u i d e Server MC2200 ...
Page 2: ...xxx ...
Page 3: ... U s e r s G u i d e Server MC2200 ...
Page 13: ...Using This Guide xi ...
Page 14: ......
Page 26: ...Packard Bell NEC ...
Page 34: ...2 8 Setting Up the System Figure 2 4 Opening the Front Door ...
Page 66: ...Packard Bell NEC ...
Page 96: ...Packard Bell NEC ...
Page 116: ......
Page 117: ...A System Cabling System Cabling Static Precautions Standard Configuration RAID Configuration ...
Page 124: ...Packard Bell NEC ...
Page 125: ...B System Status Hardware Support Information ...
Page 136: ...10 Glossary ...
Page 141: ...xx ...
Page 142: ... 904455 01 ...


