background image

Using This Guide   vii

Using This Guide

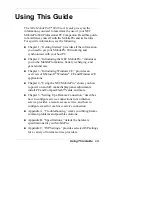
The NEC MobilePro™ 800 User's Guide gives you the
information you need to maximize the use of your NEC
MobilePro 800 Professional PC Companion. Read this guide
to familiarize yourself with the MobilePro and its features.
For specific information, see the following.

„


Chapter 1, “Getting Started,” provides all the information
you need to get your MobilePro 800 working and
synchronized with your host PC.

„


Chapter 2, “Introducing the NEC MobilePro,” introduces
you to the MobilePro features, battery recharging, and
general unit care.

„


Chapter 3, “Introducing Windows CE,” provides an
overview of Microsoft

®

 Windows

®

 CE and Windows CE

applications.

„


Chapter 4, “Using the NEC MobilePro,” shows you how
to power on and off, make display panel adjustments,
install PC and CompactFlash™ cards, and more.

„


Chapter 5, “Setting Up a Remote Connection,” describes
how to configure service connections for an internet
service provider, a remote access service, and how to
configure email for each new service connection.

„


Appendix A, “Troubleshooting,” walks you through some
common problems and possible solutions.

„


Appendix B, “Specifications,” details the hardware
specifications for your MobilePro.

„


Appendix C, “ISP Settings,” provides selected ISP settings
for a variety of internet service providers.

Summary of Contents for MOBILEPRO 800 -

Page 1: ...general unit care Chapter 3 Introducing Windows CE provides an overview of Microsoft Windows CE and Windows CE applications Chapter 4 Using the NEC MobilePro shows you how to power on and off make display panel adjustments install PC and CompactFlash cards and more Chapter 5 Setting Up a Remote Connection describes how to configure service connections for an internet service provider a remote acce...

Page 2: ...ormat WARNING Warnings alert you to situations that could result in serious personal injury or loss of life CAUTION Cautions indicate situations that can damage the system hardware or software Note Notes give particularly important information about whatever is being described Names of keys are printed as they appear on the keyboard for example Ctrl Alt or Enter Text that you must type or keys tha...

Page 3: ... configuration customer data and operator control Since implementation by customers of each product may vary the suitability of specific product configurations and applications must be determined by the customer and is not warranted by NEC CSD To allow for design and specification improvements the information in this document is subject to change at any time without notice Reproduction of this doc...

Page 4: ... with Windows NT 3 15 C Caring for the MobilePro 2 18 CompactFlash card slot 2 9 CompactFlash cards inserting 4 19 removing 4 20 Connecting activate a connection 5 8 internet service provider ISP 5 4 modem 5 3 preparation 5 2 remote access server RAS 5 5 Connecting the AC adapter 1 7 Connecting the PC Connect cable 1 13 Connecting the VGA cable 3 7 Connecting to your PC 1 9 Creating a partnership ...

Page 5: ... 4 19 Inserting PC cards 4 17 Installing Windows CE Services 1 11 with Windows NT 1 11 IR port 2 7 ISP settings AT T WorldNet C 2 CompuServe C 2 IBM C 3 MSN C 3 overview C 1 Prodigy C 4 K Kensington lock 2 9 Keyboard 2 5 application shortcut keys 4 8 brightness keys 4 8 control keys 4 9 cursor control keys 4 9 using 4 8 Windows key 4 9 L Lithium Ion battery 2 10 M Main battery pack 2 6 Microphone ...

Page 6: ...ion 1 17 Soft reset button 4 24 using 4 25 Software applications 3 13 Speaker 2 6 Specifications accessories shipped with system B 3 battery B 3 CompactFlash card slot B 3 CPU B 1 dimensions B 4 display panel B 1 I O ports B 2 infrared IR port B 2 microphone B 1 modem B 2 operating environment B 4 PC card slot B 2 RAM B 1 ROM B 1 serial B 2 speaker B 2 storage environment B 4 weight B 4 Status LED...

Page 7: ...dows CE Services 4 20 Using the stylus 2 11 Using the voice recorder 4 15 Using Windows CE 3 2 V Verifying PC connection settings 1 10 Verifying synchronization settings 1 15 VGA port 2 7 Voice memos 4 15 Voice recording 4 15 W Windows CE applications 3 6 backing up and restoring data 3 11 network capabilities 3 10 overview 3 2 printing 3 9 Windows CE desktop 3 4 Windows CE operating system 3 2 Wi...

Page 8: ... to Know Your MobilePro Installing and Charging the Battery Connecting the AC Adapter Taking a Quick Tour Knowing Your MobilePro Software Connecting to Your PC Synchronizing with your Host PC Setting Up a Remote Connection Getting Help ...

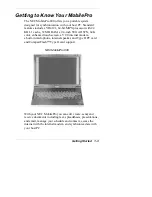
Page 9: ... Microsoft Windows CE operating system The size and capabilities of this device let you keep your most important business and personal information up to date and close at hand Windows CE Services with ActiveSync increases the power of your device by letting you synchronize the information on your host PC with your device ...

Page 10: ...RAM a 9 4 inch SVGA DSTN 64K color enhanced touch screen a V 90 internal modem a built in microphone internal speaker and Type II PC card and CompactFlash Type II card support NEC MobilePro 800 With your NEC MobilePro you can edit create send and receive documents including text spreadsheets presentations and email manage your schedule and contacts access the internet with the internal modem and s...

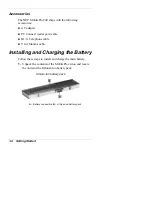
Page 11: ...al port cable RJ 11 Telephone cable VGA Monitor cable Installing and Charging the Battery Follow these steps to install and charge the main battery 1 Unpack the contents of the MobilePro carton and locate the unit and the Lithium Ion battery pack Lithium Ion battery pack A Battery connectors B Lithium Ion battery pack ...

Page 12: ... B Battery release latch C Lithium Ion battery pack 3 Firmly press the battery until it is securely connected in the bay 4 Charge the main battery while you work or explore the software on your MobilePro by connecting the AC adapter Refer to the next section Connecting the AC Adapter for connection information The color of the left status LED changes from amber to green when the battery is fully c...

Page 13: ...modem have your MobilePro on for long periods CAUTION Follow these precautions whenever you use the AC adapter and the NEC MobilePro When using the AC adapter make sure the AC outlet is near the NEC MobilePro and is easily accessible Keep the main battery installed when running on AC power When communicating or sending transmissions for a long time use the AC adapter to conserve power ...

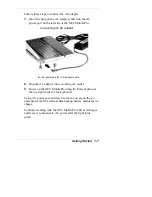
Page 14: ...rt B AC adapter cable 2 Plug the AC adapter into a working AC outlet 3 Power on the NEC MobilePro using the Power button at the top right corner of the keyboard Using AC power saves battery life when you are on the go and ensures that the internal data backup battery maintains its charge Continue working with the NEC MobilePro 800 as it charges and leave it connected to AC power after the light tu...

Page 15: ...ocal time 4 Be sure to specify a country for using the built in modem For details see the section Adjusting MobilePro Settings in Chapter 4 Knowing Your MobilePro Software Your NEC MobilePro 800 features the latest version of Microsoft Windows CE software along with additional applications on the accompanying CDs Your NEC MobilePro 800 software includes Microsoft Windows CE Services 2 2 CD Install...

Page 16: ...he synchronization process followed by detailed instructions for each stage of the process Follow these procedures to configure your MobilePro for synchronization Verify the accuracy of the PC Connection default settings on your MobilePro Ensure the availability of the serial port on your host PC Install Windows CE Services on your host PC Connect the PC Connect serial cable to your host PC and to...

Page 17: ...t using Serial Port 19200 displays Proceed to the next section to check the availability of the serial port on your host PC Ensuring the Availability of the Serial Port The serial port on your host PC must be available for synchronization with your NEC MobilePro Follow these steps to ensure the availability of the serial port 1 Access the Setup utility on your host PC to verify that the port is en...

Page 18: ...CE Services on your host PC to enable synchronization with your MobilePro The Microsoft Windows CE Services CD that ships with your MobilePro contains the Windows CE Services software designed for synchronization with Microsoft Office components The following procedure assumes Microsoft Outlook 97 as the host PC synchronization component Follow these steps to install Windows CE Services for synchr...

Page 19: ...pted to display the license agreement window 4 Read the license agreement and click Yes to accept the agreement The setup window prompts for your name and company 5 Enter your name and company and click Next to display the Installation Selection window 6 Select Typical to display the Installation Complete window The Installation Complete window indicates that you will next establish communication ...

Page 20: ...your MobilePro 2 Align and attach the PC Connect cable to the serial port on the MobilePro If your cable is labeled insert the cable with the word Up visible on the top If your cable has an arrow near the connector insert the cable with the arrow visible on top Connecting the PC connect cable 3 Connect the other end of the cable to the 9 pin serial port on your host PC If your host PC has a 25 pin...

Page 21: ...t cable is connected proceed with the installation to create a partnership between the MobilePro and your host PC Once the cable is connected the Get Connected Window appears Press the Start button and your host PC polls the MobilePro When polling is complete the Multiple Partnership window may appear 1 Select Single or Multiple depending upon your configuration needs The New Partnership wizard pr...

Page 22: ... your host PC Follow these steps to verify the synchronization settings on the MobilePro 1 Double click the Mobile Devices folder 2 Click Tools ActiveSync Options and verify that the desired synchronization services are checked Modify the selections as required Once installed Windows CE Services automatically synchronizes your MobilePro 800 with your host PC s Microsoft Outlook or Schedule email c...

Page 23: ...izing with Your Host PC Once the MobilePro is configured for synchronization the synchronization process automatically occurs each time you connect the MobilePro to your host PC In addition you can manually initiate the synchronization process using Microsoft Windows CE Services on your host PC Simply open the Mobile Devices folder click Tools and highlight Synchronize Now Resynchronizing Your Mob...

Page 24: ...work card in your MobilePro Setting Up a Remote Connection In addition to using your MobilePro as a companion PC when you travel you can connect by modem directly to an internet service provider or a network remote access server to get email and to view web pages Refer to Chapter 5 Setting Up a Remote Connection or the MobilePro 800 s online help file click the MobilePro Online Help icon on the Mo...

Page 25: ...PC double click on the Mobile Devices folder shortcut Click Help then Windows CE Services Help Topics http www microsoft com windowsce hpc abou t wcesv htm Connecting to Your Host PC Windows CE Main Help Tap Communications then Connecting to Your Desktop Computer MobilePro 800 Online Help http support microsoft com Search for Connecting to Your Desktop Modem Communications MobilePro 800 Online Hel...

Page 26: ...m MobilePro Accessories1 http www nec now com necnow accessories default asp MobilePro Technical Support Warranty Service1 800 632 4525 fax 801 981 3133 NEC NOW SM 888 863 26691 http www nec now com2 1 For U S and Canada only If you purchased and are using this computer outside the U S and Canada then a local service may apply Contact a local NEC CSD dealer in your country 2 World Wide Web address...

Page 27: ...2 Introducing the NEC MobilePro Unpacking Your MobilePro NEC MobilePro Features Opening the Display Panel Using the Stylus Using the MobilePro s Power Sources Caring for the MobilePro ...

Page 28: ...rging the Battery Connecting the AC Adapter and Taking a Quick Tour in Chapter 1 NEC MobilePro 800 a stylus ships in a holder in the MobilePro NEC MobilePro 800 AC Adapter NEC MobilePro 800 VGA Cable NEC MobilePro 800 PC Connect Cable serial cable NEC MobilePro 800 RJ 11 telephone cable One 1 rechargeable Lithium Ion Battery pack main battery Microsoft Windows CE Services 2 2 CD NEC MobilePro Bonu...

Page 29: ...ollowing sections describe front features beginning with the display panel Display Panel Your NEC MobilePro 800 comes with a 9 4 inch display panel that you can adjust for a comfortable viewing position See the section Making display panel adjustments in Chapter 4 for information about adjusting the panel brightness Display panel A System Information icons B Display panel latch C Display panel D U...

Page 30: ...el when it is closed Display Panel with built in touch screen provides a clear view of information stored or input into the unit The touch screen lets you activate functions by touching the screen with the stylus or your fingertip User Software Icons allow you to configure direct access to five system functions or programs of your choice For details about defining these icons refer to the section ...

Page 31: ... after the figure Keyboard panel and base unit A Suspend switch B Power button C Keyboard D Stylus E Status LEDs F Main battery pack G Microphone H Speaker Suspend Switch puts the MobilePro into a suspend state when the lid is closed if enabled in MobilePro Settings Power Button allows you to power on and off the unit when it is open Keyboard lets you enter data with your fingertips ...

Page 32: ...tion LED Battery Charging LED lights amber when the battery is charging lights green when the battery is fully charged Notification LED flashes amber as a reminder of appointments pages etc Main Battery Pack provides battery power to the NEC MobilePro when away from an AC power source Microphone lets you record your voice Speaker lets you listen to digital audio You can program MobilePro audio to ...

Page 33: ...R port B Not used C VGA port D Serial port E USB port Infrared IrDA Port allows the MobilePro to communicate without cables with similarly equipped devices including other MobilePros Not used in some models VGA Port provides a connection point for the VGA cable for use with an external monitor Serial Port provides a connection point for the PC Connect cable USB Port allows you to connect a USB mou...

Page 34: ... Left side features A AC power port B PC card slot C PC card eject button D Earphone microphone jack AC Power Port lets you connect the AC adapter to run your unit on AC power PC card Slot lets you install one Type I or Type II PC card PC Card Eject Button allows you to remove an installed PC card Earphone Microphone Jack lets you connect the earphone microphone accessory to your NEC MobilePro ...

Page 35: ...C CompactFlash card eject button D CompactFlash card slot E Kensington lock Modem Port provides connection access to the internal modem using the RJ 11 telephone cable Stylus Slot houses the unit s pointing device CompactFlash Card Eject Button allows you to remove an installed CompactFlash card CompactFlash Card Slot lets you install one CompactFlash card Kensington Lock provides additional secur...

Page 36: ...M RAM bay cover B Docking cradle connector C Battery release latch D Lithium Ion battery pack ROM RAM Bay Cover protects the ROM RAM bay and the installed ROM RAM modules Docking Cradle Connector allows you to connect the NEC MobilePro to the Docking Cradle Battery Release Latch allows you to release and remove the battery Lithium Ion Battery Pack provides battery power to the NEC MobilePro when a...

Page 37: ... to the touch screen or keyboard Using the Stylus Follow these steps to use the stylus 1 Open the MobilePro display panel 2 Locate the stylus holder on the lower right of the base unit To remove the stylus slide it away from the unit CAUTION Although you can use your fingertip to activate the touch screen never use hard pointed or sharp objects These objects can damage the touch screen 3 Gently to...

Page 38: ...f the taskbar The icon on the taskbar displays as an electrical plug when the battery is fully charged battery charging LED lights green or as a battery while charging battery charging LED lights amber To display battery status use one of the following methods Tap the battery icon on the left side of the MobilePro display panel Tap the battery plug icon on the taskbar if present Recharging the Mai...

Page 39: ... charged as long as expected it is probably necessary to replace the battery with a new one Please refer to the section Battery Replacement later in this chapter MobilePro Power Management When your MobilePro is connected to an AC power source and the main battery is removed from the system be sure to replace the main battery before disconnecting the AC adapter to prevent possible data loss CAUTIO...

Page 40: ...eplace a depleted main battery for an extended period of time and the back up battery is weak the contents of the MobilePro memory and all user data may be lost Removing and Inserting the Battery Pack Should you notice the life of a charged battery pack is short replace it with a new one Follow these instructions to replace a battery pack 1 Save your data turn off unit power and close the display ...

Page 41: ...k as follows Locate the release latch on the bottom of the system Slide the release latch in the direction of its arrow and hold it Remove the battery from its bay Removing the battery pack A Battery connectors B Battery release latch C Lithium Ion battery pack ...

Page 42: ...Lithium Ion battery pack in the bay and slide the battery in the direction of the arrow as indicated in the following figure Inserting the battery pack A Battery connectors B Battery release latch C Lithium Ion battery pack Firmly press the battery until it is securely connected in the bay ...

Page 43: ...ries according to the manufacturer s instructions Never dispose of batteries by burning them Dispose of used batteries promptly Keep batteries away from children Do not subject batteries to impact Do not subject batteries to heat sources including direct sunlight open fires microwave ovens and high voltage containers Do not recharge batteries unless they are specifically designed for recharging Do...

Page 44: ...or damages the casing Precautions Follow these precautions when using your MobilePro and AC adapter Always plug the AC adapter cord into an easily accessible outlet It is important to be able to easily shut off power by unplugging the AC adapter if needed Avoid dropping or bumping the MobilePro or the AC adapter Do not stack heavy objects on the MobilePro or the AC adapter When using the AC adapte...

Page 45: ...ty If it is unavoidable allow your MobilePro to adjust to room temperature before use When cleaning the system use a soft clean slightly damp almost dry cloth Avoid wiping the display surface with abrasive material including rough fabric Do not use a cleaning solution this may damage the plastic If the AC adapter becomes extremely hot unplug the adapter and let it cool Keep the AC adapter away fro...

Page 46: ... environment and any internal humidity evaporates Keep the storage area free from vibration and magnetic fields Keep the MobilePro and its components away from organic solvents or corrosive gases Avoid leaving the MobilePro and its components in direct sunlight or near heat sources Routine Cleaning Clean or dust your system as follows CAUTION Never use harsh solutions household cleaners or spray c...

Page 47: ...refully wipe the LCD screen with a soft cloth or a screen wipe designed for that purpose Special screen wipes are available through your local computer dealer Unit case NEC recommends that you carefully wipe the case with a slightly damp almost dry cloth ...

Page 48: ...3 Introducing Windows CE Windows CE Operating System Windows CE Services Software Applications Online Help ...

Page 49: ... a Read Only Memory ROM module files that you work on are stored in Random Access Memory RAM on a RAM module The power of Windows CE is enhanced through its design to easily link with your host PC to synchronize your data For more information about setting up your MobilePro for synchronization see the section Connecting to Your PC in Chapter 1 Using Windows CE Windows CE is similar to Windows 95 H...

Page 50: ...ng the first and last items To select multiple non contiguous items hold down the Ctrl key while tapping each item To move the blinking cursor while editing text in a program simply tap the screen at the desired new location Dragging and Dropping Dragging and dropping works just like in Windows 95 To drag an object tap the object with the stylus and hold the stylus against the screen Continue to h...

Page 51: ...k navigation online networking functions and more Your Windows CE desktop provides the following icons My Handheld PC Opens Windows CE Explorer to display all the data on your MobilePro whether stored in RAM or on a storage card in the PC card or Compact Flash card slots My Handheld PC is much like the My Computer icon on the Windows 95 desktop My Documents Provides shortcuts to working documents ...

Page 52: ...ents meetings and other events and provides a variety of ways to display the stored information Contacts Maintains a list of names both business and personal for easy access while at home or on the road Tasks Provides a portable To do list for keeping track of all of your tasks Microsoft Pocket Word Allows you to create and edit documents on your MobilePro Microsoft Pocket Excel Allows you to view...

Page 53: ... Pocket Word Provides many features of Microsoft Word including document formatting and spell checking Copy documents from your host PC for editing or draft documents on your MobilePro for later completion on your host PC Microsoft Pocket Excel Provides spreadsheet and data base functions for budgeting and other data tasks Microsoft Pocket PowerPoint Provides an easy portable solution for desktop ...

Page 54: ...se an external monitor to enhance your MobilePro display Follow these steps to connect the VGA cable 1 Tap Start Settings Control Panel 2 Double tap the MobilePro Settings icon and select the VGA Out tab 3 Tap to place a check mark in the box Display the same image with LCD and tap OK 4 Use the soft reset button to reset the MobilePro and implement the new setting For instructions about resetting ...

Page 55: ...e VGA cable to the monitor cable connector CAUTION Be sure to properly align the cable connectors and ports Incorrect connection can damage the MobilePro and the monitor 9 Power on the MobilePro and the external monitor CAUTION When the setting Display the same image with LCD is selected the MobilePro uses more power than normal To conserve power be sure to deselect this setting when not using an ...

Page 56: ...Excel files Contacts and Task lists A view of your schedule or agenda in Calendar Inbox messages Follow these steps to print documents using your MobilePro 1 Open the desired Pocket application 2 Tap File and tap Print The print dialog box appears 3 Select the appropriate printer setting PCL Laser or PCL Inkjet 4 Select the appropriate port setting IrDA COM1 57600 COM1 9600 LPT1 or Network 5 Selec...

Page 57: ...rts Ethernet LAN and serial line interface protocol SLIP used with Cellular Digital Packet data CDPD so you can have cable or wireless based network communications using an Ethernet LAN PC card In addition you can use CompactFlash type II Ethernet cards on your NEC MobilePro Windows CE Services The Windows CE operating system and your MobilePro provide a powerful portable extension to your host PC...

Page 58: ... the HPC dbExplorer backup application included with the NEC MobilePro Bonus Software CD to back up all Calendar Task and Contact PIM data bases Using Windows CE Services to Back Up Your Data The Windows CE Services backup feature creates a complete duplicate of all data stored on your NEC MobilePro If you routinely connect to your host PC this is the best method of data backup The backup file is ...

Page 59: ...o data while traveling or away from your host PC Back up data to a PC card or CompactFlash card for secure storage To back up data using HPC dbExplorer simply double tap the HPC dbExplorer icon on your MobilePro desktop Tap Tools then Backup select the desired backup option and follow the on screen instructions to complete the backup process For more information about HPC dbExplorer see the online...

Page 60: ...press A mobile communication software that allows you to send faxes from your NEC MobilePro ImageExpert 30 Day Trial A truly mobile imaging solution that allows you to view annotate or share your digital images through email and IrDA Connect Force An internet setup wizard that simplifies and facilitates your remote connection setup JETCET PowerPoint Companion A versatile print driver that allows y...

Page 61: ... to your NEC MobilePro Note Before using the Bonus Software CD to install additional applications you must first install Windows CE Services on your host PC 1 Insert the Bonus Software CD to the CD ROM drive in your host PC If auto insert is enabled on your host PC the CD automatically plays and the introduction screen appears If auto insert is not enabled tap Start Run browse for the CD ROM drive...

Page 62: ... help for details about how to use the application Note Be sure to keep your main battery pack charged to maintain all applications stored in RAM If your main battery pack loses its charge applications stored in RAM may be lost Once lost you must reinstall the desired software applications Online Help Your NEC MobilePro and Windows CE provide a variety of online help resources In addition Windows ...

Page 63: ... Help Just tap the question mark in the upper right hand corner of the taskbar in each of the Pocket applications Windows CE Services Help On your host PC double click the Mobile Devices icon click Help and select the Windows CE Services Help Topics ...

Page 64: ... and Off Making Display Panel Adjustments Enabling the Suspend Switch Using the Keyboard Adjusting MobilePro Settings Using the Voice Recorder Using PC Cards Using CompactFlash Cards Using the IR Port Upgrading ROM Resetting the MobilePro ...

Page 65: ...e USB mouse is connected it prevents you from calibrating the touch screen 1 Slide the display panel latch to the right Lift the display panel up towards the rear of the unit CAUTION Do not push the display panel beyond its pre designed stop point as you open the panel 2 Locate and press the Power button To power off the unit press the Power button a second time Powering on and off A Power button ...

Page 66: ...emains on through the Power selection in the Windows CE Control Panel On the Windows CE desktop tap Start Settings then select Control Panel Double tap the Power icon and select the Power Off tab to designate a power off time Note As a general operation rule frequently back up and synchronize data between your MobilePro and your host PC Synchronization occurs each time you connect your MobilePro t...

Page 67: ...the display panel and power on the unit 2 Press the brightness up or brightness down keys as required Adjusting the brightness A Brightness up B Brightness down Backlight You can conserve battery life by configuring your NEC MobilePro to automatically turn off the display panel s backlight Follow these steps to configure the backlight for automatic turn off 1 Tap Start Settings then select Control...

Page 68: ...n boxes to select the desired time settings Backlight settings In addition you can configure the NEC MobilePro to turn on the backlight automatically Follow these steps to configure the backlight for automatic turn on 1 Tap the Advanced tab shown in the previous figure to access the Advanced backlight settings ...

Page 69: ...er substantially reduces battery life Enabling the Suspend Switch You can configure your NEC MobilePro to power on or off by simply opening or closing the display cover The Suspend switch acts as a switch for both the power and the display panel Opening the NEC MobilePro powers on the unit To power on the unit while it is open use the Power button Closing the MobilePro powers off the unit and insu...

Page 70: ...elect the LCD Suspend Resume tab Power off settings 3 Select either Enable suspend while on Battery Power or Enable suspend while on External Power or both to enable the Suspend switch Note Your NEC MobilePro will not automatically suspend while on battery power during synchronization unless the battery charge is at a very low status You may want to connect your MobilePro to an AC power source bef...

Page 71: ...ey operations are described after the figure Keyboard A Applications shortcut keys B Brightness up down keys C Cursor control keys D Control keys E Windows key Application shortcut keys Ten application shortcut keys allow you to launch applications directly from the keyboard For details about each key refer to the section that follows Using Application Shortcut Keys Brightness up down keys Use the...

Page 72: ... in conjunction with other keys to change their functions To use control keys press and hold the control key while pressing another key Windows Key You can use the Windows key to display the Start menu Using Application Shortcut Keys The NEC MobilePro provides application shortcut keys located in the top of the keyboard Use these keys to launch applications directly from the keyboard The key defau...

Page 73: ...n Shortcut Keys Icon Application Inbox Microsoft Internet Explorer Calendar Contacts Tasks Microsoft Pocket Word Microsoft Pocket Excel Microsoft Pocket PowerPoint Voice Recorder Ctrl Microsoft Pocket Access Calculator Brightness Up Brightness Down ...

Page 74: ...y Fn 5 Euro Alt Contrast Up Alt Contrast Down Alt Left Arrow Home Alt Right Arrow End Alt Up Arrow PgUp Alt Down Arrow PgDn Display Panel Icons The NEC MobilePro 800 is equipped with 10 icons that provide shortcuts to system functions and user selected applications The left side of the MobilePro s display panel has five system information icons that provide shortcut access to the following functio...

Page 75: ...riety of properties on your NEC MobilePro and includes the following features Quick Launch Allows you to customize the user software icons VGA Out Allows you to display the same image on both the display panel and an external monitor The VGA Out features also allows you to adjust the display resolution setting Color Palette Lets you select a 256 color display or the default 64K color display LCD S...

Page 76: ...ubject to change For the latest list of compliant countries outside the U S and Canada refer to NEC CSD s web site at www nec now com Assigning User Software Icons The user software icons located on the right side of the MobilePro s display panel are assigned through the MobilePro Settings applet in the Control Panel Using this applet you can manually assign programs to the icons numbered 1 5 Foll...

Page 77: ...cts the factory assigned application Shipping default for icons 1 5 is the MobilePro Settings applet Browse opens a directory dialog that allows you to locate the application that you want to assign Delete removes the currently assigned application 5 Click OK to complete your assignments Accessing MobilePro Settings To access MobilePro Settings simply tap the MobilePro Settings system information ...

Page 78: ...you are finished recording press the Stop button black square A beep sounds when the recording stops To play back your recording tap to highlight your selection and press the Play button green triangle or simply double tap your selection You may want to modify the recording format to improve the quality of playback To modify the recording format tap Tools Recording Format and use the dropdown box ...

Page 79: ... are approximately the same size have a standard 68 pin connector and vary only in thickness PC cards add a variety of storage and communication functionality to your MobilePro CAUTION Windows CE supports the hot swapping of PC cards However to avoid data loss do not remove a PC card while in use When using a PC card in the MobilePro we recommend that you also use AC power The batteries alone may ...

Page 80: ...PC card is securely in the slot CAUTION Make sure you align the PC card correctly for insertion Inserting a PC card incorrectly can damage the card and or the NEC MobilePro Removing PC Cards Follow these steps to remove a PC card from the MobilePro 1 Locate the PC card eject button beside the PC card slot and press it to release the card from the slot 2 Once the card is released pull it the rest o...

Page 81: ...ndheld PC icon on your MobilePro desktop then double tap the Storage Card 2 folder CAUTION Windows CE supports the hot swapping of CompactFlash cards However to avoid data loss do not remove a CompactFlash card while in use When using a CompactFlash card in the MobilePro also use AC power The batteries alone may not provide enough power for some CompactFlash cards to operate properly Note Use the ...

Page 82: ...serting a CompactFlash card Note When you insert a CompactFlash card a button pops out of the card bay Pivot the button towards the left side of the unit until it fits into the recessed space next to the slot 2 Verify that the CompactFlash card is securely in the slot CAUTION Make sure you align the CompactFlash card correctly for insertion Inserting a CompactFlash card incorrectly can damage the ...

Page 83: ... Port With the NEC MobilePro you can send and receive data to and from another similarly equipped device using the infrared IrDA communication port In addition you can use the IR port to synchronize data with your host PC in place of using the PC Connect serial cable Before using the NEC MobilePro for IrDA communication first configure enable the IR port on your host system then install Windows CE...

Page 84: ... apart 4 Be sure that nothing obstructs the path between the IR ports on both units and that the ports are aligned properly 5 Send your data by using the Send To selection in the Windows CE Pocket Explorer File menu Highlight the file you want to transfer and choose Infrared Recipient from the Send To selections Your file is transferred to the other MobilePro The receiving MobilePro uses the File ...

Page 85: ...o data before upgrading your ROM module You may need to copy some files back to your MobilePro following this upgrade procedure Follow these steps to upgrade your MobilePro ROM module 1 Save your data to a host PC power off the MobilePro and close the display panel 2 Disconnect any peripheral devices attached to the MobilePro such as the AC adapter 3 Remove the battery pack For details see the sec...

Page 86: ...bay cover A ROM bay cover 6 With the small screwdriver remove the two screws on the ROM module 7 Gently lift up the ROM module to disconnect it from its connector and remove it from the bay 8 Insert the upgraded ROM module into the bay aligning the connector on the module with the one in the bay 9 Gently press on the module just above the connectors until the connection is secure 10 Replace the tw...

Page 87: ... host PC after modifying the MobilePro s configuration when you are unable to power on using the Power button or when the operating system stops responding The NEC MobilePro is equipped with two reset buttons a soft reset button and a full reset button Read the following descriptions to better understand the functions of and the differences between the buttons Soft Reset Button The soft reset butt...

Page 88: ...n Chapter 3 Using the Soft Reset Button Before using the soft reset button to reset the MobilePro close any open files or applications if possible When you soft reset the MobilePro you may lose open unsaved files Follow these steps to use the soft reset button to reset the MobilePro 1 Open the display panel and remove the stylus from its holder 2 Power on the MobilePro 3 Locate the soft reset butt...

Page 89: ...e than once This resets the unit Soft reset button A Soft reset button Using the Full Reset Button Use the full reset button only when your unit does not respond after doing all of the following Installing a charged battery Connecting the unit to an AC power source Using the soft reset button to reset the system ...

Page 90: ...user specific data such as contacts tasks etc are erased You can only restore data that has been backed up to your host PC For more information see the section Backing Up and Restoring Data in Chapter 3 The full reset button is located inside of the main battery s bay Follow these steps to remove the battery before using the full reset button to reset the NEC MobilePro 1 Open the display panel and...

Page 91: ... as follows Locate the battery release latch on the bottom of the system Slide the release latch in the direction of its arrow and hold it Remove the battery from the bay Removing the battery pack A Battery connectors B Battery release latch C Battery pack ...

Page 92: ... the USB mouse if connected 5 Using the stylus press the full reset button This resets the unit and restores your system to its original shipping configuration You may be able to use a recent backup of your data to restore your system to a more recent configuration Refer to the section Backing Up and Restoring Your Data in Chapter 3 for details about backing up and restoring your MobilePro ...

Page 93: ...Remote Connection Preparing for Connection Setup Connecting the Internal Modem Connecting to an Internet Service Provider ISP Configuring a Remote Access Server RAS Sending and Receiving Email Activating a Connection ...

Page 94: ...n from your ISP or network administrator that may include some or all of the following the dial up telephone number TCP IP settings port settings a user name and password if required You must create a new connection for each ISP or RAS account that you want to establish Once you have created a connection for an ISP RAS etc you can define an email account for each connection if so desired Follow th...

Page 95: ...l Modem Follow these steps to connect an RJ 11 telephone cable to the internal modem 1 Locate the modem cover on the right side of the NEC MobilePro and open it 2 Carefully plug the RJ 11 telephone cable into the modem connector Connecting the telephone cable ...

Page 96: ...result in explosion or fire 3 Connect the other RJ 11 connector into an active analog phone jack Now you are ready to create a connection for an ISP or RAS account Connecting to an Internet Service Provider Once you have established an account with an ISP and gathered the necessary configuration information you are ready to create a connection on your MobilePro for your ISP account Follow these st...

Page 97: ...ro for sending and receiving email through your ISP Follow the instructions in Sending and Receiving Email and Activating a Connection later in this chapter to send and receive email through your ISP Refer to Appendix C for selected ISP settings Configuring a Remote Access Server Once you establish an account with your RAS and gather the necessary configuration information you are ready to create ...

Page 98: ...ished you can configure your MobilePro for sending and receiving email through your RAS Follow the instructions in Sending and Receiving Email and Activating a Connection later in this chapter to send and receive email through your RAS Sending and Receiving Email Before configuring the necessary email service information you need some or all of the following settings POP3 Host Your user id Your pa...

Page 99: ...ion and Optional information Fill in all information as provided by your ISP or network administrator Enter ISP information as follows POP3 Host ISP POP3 Host name User ID Your user id Password Your password if required Domain Windows NT SMTP Host ISP Host name Return Address Your email address If in a unix environment your email address Enter RAS Exchange server information as follows POP3 Host E...

Page 100: ...ur email address Note If you experience difficulty sending email check your optional configuration settings If you experience difficulty receiving email check your required configuration settings Activating a Connection Once you create a new connection for each desired service activate the connection with that service to open communication and send or receive email Follow these steps to activate a...

Page 101: ... before connecting and tap OK 3 Tap Services again if necessary and tap Connect The connection dialog box displays and may prompt you to enter a password Otherwise the connection dialog box displays the connection progress and indicates when the connection is successful 4 Enter your password if required Once the connection is established you are ready to send and receive email ...

Page 102: ...the information in the following table for possible solutions Troubleshooting Problem Resolution The MobilePro has no power Check the main battery If you are using an AC adapter make sure the connections are correct and secure Check that the ROM RAM bay cover is secure Nothing appears on the screen Try pressing the Power button again the unit might have turned itself off if it was not used for a s...

Page 103: ...he keyboard doesn t respond Press the Soft reset button to reset the unit If you have installed handwriting recognition software be sure that you have not set the disable keyboard parameter in that software The serial port doesn t work Check that the cable connections are secure The IrDA port doesn t work Check that nothing obstructs the path between the transmitting and receiving IR ports Check t...

Page 104: ...esetting the unit again If the soft reset button at the top of the keyboard does not respond use the full reset button inside the battery bay Refer to the section Resetting the Mobile Pro in Chapter 4 Caution This second procedure may result in the loss of the memory contents including all stored data settings and files Be sure to make regular backups For further assistance call NEC CSD Support Se...

Page 105: ... LCD with backlight touch screen CPU NEC VR4121 131 MHz processor optimized for Windows CE User Data Entry Methods 78 key QWERTY keyboard with stylus 17 5 mm alpha key pitch Touch screen input via stylus Random Access Memory RAM 32 megabytes MB standard Read Only Memory ROM 24 megabytes MB replaceable Microphone One internal microphone ...

Page 106: ...t Direct Cable connection IrDA port VGA port output Earphone Microphone USB port Modem Data V 90 56 Kbps AT command Fax 14 4 Kbps Fax control command Class I Note Download speed is limited to 53 Kbps Upload speed is limited to 33 6 Kbps Actual speeds may vary depending upon line conditions The built in modem requires a compatible service provider PC Card Slot One Type I or Type II PC card slot ...

Page 107: ...m use Memory backup approximately 7 days with depleted main battery at ambient temperature of 73ºF 23ºC Recharge Time Use the AC adapter to recharge the MobilePro main battery Recharging time is approximately 4 5 hours when the system is on or off Accessories ship with system AC adapter Listed Direct Plug In Power Unit Input Voltage 100 to 240V AC 60Hz 13W Output Voltage 13 5V DC 1000 mA Rechargea...

Page 108: ...85 No condensation Storage Environment Temperature 14º to 140ºF 10º to 60ºC Humidity 35 to 85 No condensation Available Options AC Adapter MC BA12 PC Connect serial Cable S1424 12S VGA Cable S1424 12V Stylus Pack S1424 17A Carrying Case S1424 30A Deluxe Carrying Case S1424 30A D Li Ion Battery Pack MC BA11 Docking Cradle MC CR1 Earphone Microphone MC EM1 16 MB CompactFlash card 050 00054 000 Print...

Page 109: ...nformation contact your ISP For additional information about ISP setup information and setup wizards check the Bonus Software CD For ISP settings information try the following web sites subject to change without notice http www microsoft com windowsce pccompanions columns 980218helpdesk isps htm http www cewindows net wce isp htm Although not an official NEC CSD web site this site contains accurat...

Page 110: ... 204 127 129 1 Secondary DNS 204 127 160 1 POP3 Server postoffice worldnet att net SMTP Server mailhost worldnet att net CompuServe Web Site http www compuserve com Server Assigned IP Address Yes Use Slip No Use Software Compression Yes Use IP Header Compression Yes Server Assigned Address No Primary DNS 149 174 211 5 Secondary DNS 149 174 213 5 POP3 Server pop site1 csi com SMTP Server smtp site1...

Page 111: ...Assigned Address Yes Primary DNS Secondary DNS POP3 Server Email not supported SMTP Server Email not supported IBM Web Site http www ibm net Server Assigned IP Address Yes Use Slip No Use Software Compression No Use IP Header Compression Yes Server Assigned Address No Primary DNS 165 87 194 244 Secondary DNS 165 87 201 244 POP3 Server pop1 5 ibm net SMTP Server smtp1 2 ibm net ...

Page 112: ...digy com Server Assigned IP Address Yes Use Slip No Use Software Compression Yes Use IP Header Compression Yes Server Assigned Address No Primary DNS 198 83 19 241 Secondary DNS 198 83 19 244 POP3 Server pop prodigy net SMTP Server smtp prodigy net ...

Page 113: ...cket Outlook data up to date by synchronizing your mobile device with your choice of Microsoft Outlook Inbox synchronization with Outlook Express is not currently supported Microsoft Schedule or Microsoft Exchange on your host PC Synchronize Word and Excel documents Access and other ODBC databases and tables and InkWriter documents between your device and host PC Your files are automatically conve...

Page 114: ...cally If it doesn t type d setup where d is your CD ROM drive 5 Follow the directions on your screen Once installation is complete a wizard instructs you to connect your device and host PC and guide you through setting up a partnership and performing your first synchronization Some items such as messages are not synchronized by default To change the type of items that get synchronized after you ve...

Page 115: ...tomatically converted to a format that the device can read However for documents that you update frequently on both your device and host PC you may want to synchronize the copy on your host PC with the one on your device so that you always have an up to date copy on both computers To do so store the files you want to synchronize in the Synchronized Files folder on the device and host PC During syn...

Page 116: ...serve all formatting in the original document keep a copy of the original file in another folder See Windows CE Services Help for specific information on how file attributes are affected during conversion Note If you have password protection on an Excel or Word file on your device first turn off the password protection before the file is synchronized with the host PC To do so open the file select ...

Page 117: ...on in the Windows CE Services Properties dialog box If your computer must be turned off while you are away from your office you cannot synchronize remotely However you can dial in directly to your network to receive your email If these conditions are met you can synchronize with your host PC while away from the office in one of three ways Create a dial up connection using a RAS account Before you ...

Page 118: ...eated and you are connected select Start Programs Communications and then ActiveSync on the device In the ActiveSync dialog box select the dial up connection you created as the method to connect and the name of the computer from the Connect to list Creating a Dial up Connection to a Modem Attached to your Host PC Note If you are a Windows 95 user install the Dial Up Networking Upgrade 1 2 and crea...

Page 119: ...th Device Connections via Serial Port and Device Connections via Network 7 Create a dial up connection as described Setting Up a Remote Connection in Chapter 5 Getting Help on Windows CE Services For additional setup usage and troubleshooting information see online Help on the host PC by choosing Windows CE Services Help Topics on the Help menu in the Mobile Devices folder ...

Page 120: ...ocket Outlook data up to date by synchronizing your MobilePro with your choice of Microsoft Outlook Inbox synchronization with Outlook Express is not currently supported Microsoft Schedule or Microsoft Exchange on your host PC Synchronize Word and Excel documents Access and other ODBC databases and tables and InkWriter documents between your MobilePro and host PC Your files are automatically conve...

Page 121: ...f autorun is enabled If it doesn t click Start Run then type d setup where d is your CD ROM drive 5 Follow the directions on your screen Once installation is complete a wizard instructs you to connect your MobilePro and host PC and guide you through setting up a partnership and performing your first synchronization Some items such as messages are not synchronized by default To change the type of i...

Page 122: ... way to move documents to your device is to simply connect your MobilePro and host PC open your device icon in the Mobile Devices folder and drag the files Copies of the files are placed on your MobilePro and files are automatically converted to a format that the pocket applications can read However for documents that you update frequently on both your MobilePro and host PC you may want to synchro...

Page 123: ...d and the file extension is changed For example when you transfer a Microsoft Word file to your device some of the file s formatting may be removed or changed and the file extension is changed to pwd Pocket Word When this file is transferred back to the host PC the file extension is converted back to doc but any changed or removed formatting is still lost Therefore if you use the Synchronized File...

Page 124: ...for mobile device to connect In the ActiveSync Options dialog box in Windows CE Services enable synchronization Or you can select Automatically synchronize if data is out of date If you are communicating through a modem connected to the host PC turn on the modem Set the Auto Connect to At all times in Windows CE Services Otherwise open a Mobile Devices window If you are communicating with the host...

Page 125: ...computer you want to connect to Use an Ethernet card to connect to the network Once connected to the network your device detects your host PC and initiates synchronization Once the connection has been created and you are connected select Start Programs Communications and then ActiveSync on the device In the ActiveSync dialog box select Network Connection as the method to connect and the name of th...

Page 126: ... Note the telephone number for your host PC modem 3 On your host PC open the Mobile Device folder Click File and then Communications 4 Under Device Connections via Serial Port click your modem in the Ports list 5 Click Enable mobile device connection 6 Click Enabled in both Device Connections via Serial Port and Device Connections via Network 7 Create a dial up connection as described Setting Up a...

Page 127: ...ncorrect de la batterie Remplacer uniquement avec une batterie du même type ou d un type recommandé par le constructeur Mettre au rébut les batteries usagées conformément aux instructions du fabricant Battery Disposal The main battery is a Lithium Ion battery Do not place used batteries in your regular trash The incineration landfilling or mixing of batteries with the municipal solid waste stream ...

Page 128: ...903 916 388 0101 declare that the product NEC MobilePro 800 is in conformity with part 15 of the FCC Rules Operation of this product is subject to the following two conditions 1 this device may not cause harmful interference and 2 this device must accept any interference received including interference that may cause undesired operation Product Type HandHeld PC Equipment Classification Class B per...

Page 129: ...nd if not installed and used in accordance with the instructions may cause harmful interference to radio communications However there is no guarantee that interference will not occur in a particular installation If this equipment does cause harmful interference to radio or television reception which can be determined by turning the equipment off and on the user is encouraged to try to correct the ...

Page 130: ...total RENs contact the telephone company to determine the maximum REN for the calling area If the MobilePro causes harm to the telephone network the telephone company will notify you in advance that temporary termination of service may be required But if advance notice isn t possible the telephone company will notify the customer as soon as possible Also you will be advised of your right to file a...

Page 131: ... to send any message via a telephone fax machine unless such message clearly contains in a margin at the top or bottom of each transmitted page or on the first page of the transmission the date and time it is sent and an identification of the business or other entity or other individual sending the message and the telephone number of the sending machine or such business other entity or individual ...

Page 132: ...ld be aware that compliance with the above conditions may not prevent degradation of service in some situations Repairs to certified equipment should be coordinated by a representative designated by the supplier Any repairs or alterations made by the user to this equipment or equipment malfunctions may give the telecommunications company cause to request the user to disconnect the equipment Users ...

Page 133: ...B digital apparatus meets all requirements of the Canadian Interference Causing Equipment Regulations Cet appareil numérique de la classe B repecte toutes les exigences du Règlement sur le matériel brouilleur du Canada FCC WARNING Changes or modifications not expressly approved by the party responsible for compliance could void the user s authority to operate the equipment Properly shielded and gr...

Reviews: