background image

English

English-5

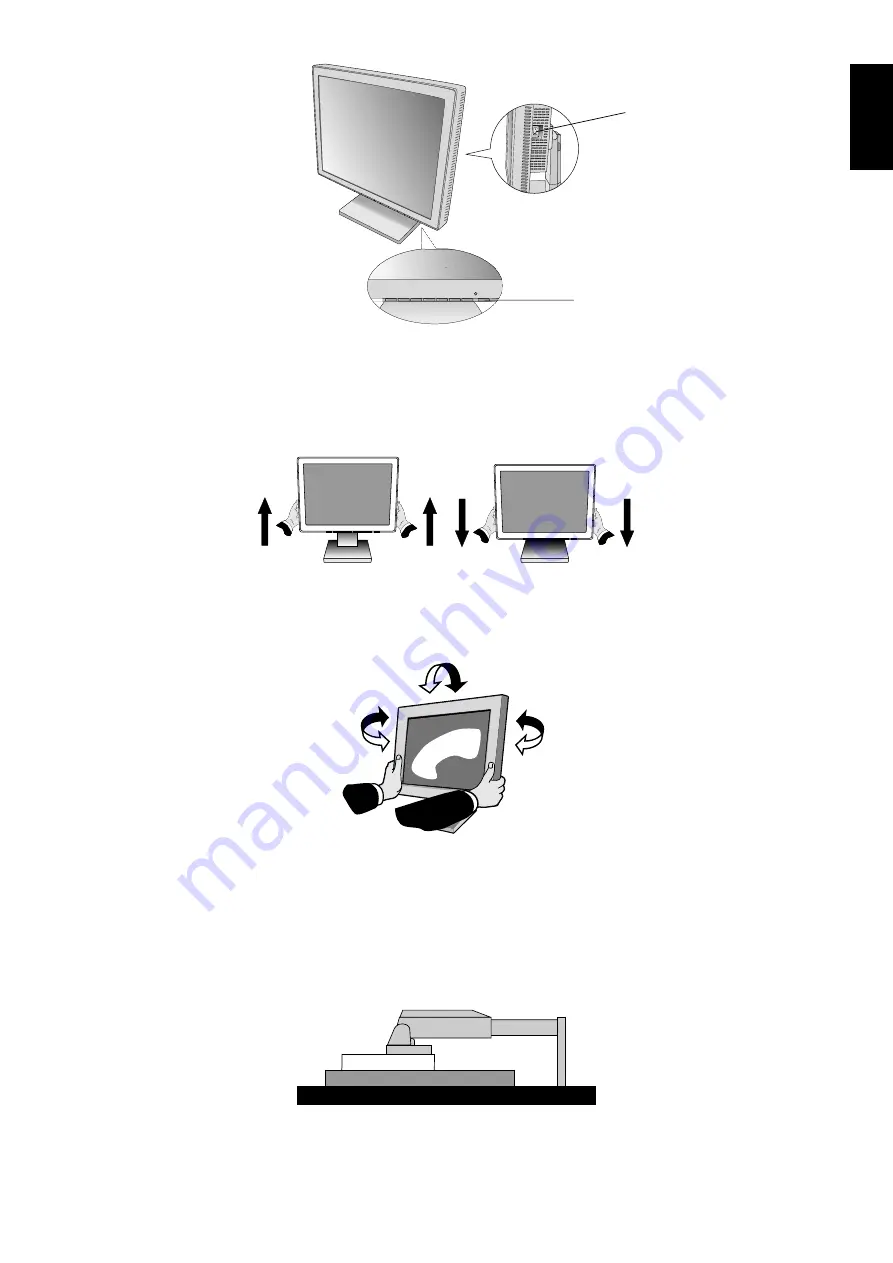
Raise and Lower Monitor Screen

The monitor may be raised or lowered.
To raise or lower screen, place hands on each side of the monitor and lift or lower to the desired height (

Figure RL.1

).

Tilt and Swivel

Grasp both sides of the monitor screen with your hands and adjust the tilt and swivel as desired (

Figure TS.1

).

Remove Monitor Stand for Mounting

To prepare the monitor for alternate mounting purposes:

1. Disconnect all cables.

2. Place hands on each side of the monitor and lift up to the highest position.

3. Place monitor face down on a non-abrasive surface (

Figure S.1

).

Vacation Switch

Power Button

Figure D.1

Figure TS.1

Figure RL.1

Figure S.1

Summary of Contents for MultiSync LCD1760NX-BK

Page 1: ...MultiSync LCD1760NX User s Manual...

Page 2: ...and Macintosh are registered trademarks of Apple Computer Inc Microsoft and Windows are registered trademarks of the Microsoft Corporation NEC is a registered trademark of NEC Corporation ErgoDesign i...

Page 3: ...dio communications However there is no guarantee that interference will not occur in a particular installation If this equipment does cause harmful interference to radio or television reception which...

Page 4: ...e C 3 Please check Tilt Rise and Lower monitor screen when you manage cables NOTE Please refer to Caution section of this manual for proper selection of AC power cord 5 The Vacation Switch on the righ...

Page 5: ...English 4 Figure C 1 Input2 DVI Input1 D Sub Input2 DVI Input1 D Sub Cable cover Figure A 1 Figure B 1 Macintosh Cable Adapter not included Figure A 2 Figure C 2 Figure C 3...

Page 6: ...h sides of the monitor screen with your hands and adjust the tilt and swivel as desired Figure TS 1 Remove Monitor Stand for Mounting To prepare the monitor for alternate mounting purposes 1 Disconnec...

Page 7: ...e stand assembly Figure R 3 the monitor is now ready for mounting in an alternate manner 6 Connect the AC cord and signal cable to the back of the monitor Figure R 4 7 Reverse this process to reattach...

Page 8: ...ust be mounted to an arm which guaranties the necessary stability under consideration of the weight of the monitor The LCD monitor shall only be used with an approved arm e g GS mark 4 SCREWS MAX dept...

Page 9: ...lay area of the LCD DOWN UP Controls Vertical Image Position within the display area of the LCD H SIZE Adjusts the horizontal size by increasing or decreasing this setting Should the AUTO Adjust funct...

Page 10: ...ANGUAGE OSM control menus are available in seven languages OSM POSITION You can choose where you would like the OSM control image to appear on your screen Selecting OSM Location allows you to manually...

Page 11: ...tor OSM Warning OSM Warning menus disappear with Exit button NO SIGNAL This function gives a warning when there is no signal present After power is turned on or when there is a change of input signal...

Page 12: ...nector is the primary means of detaching the system from the power supply The monitor should be installed close to a power outlet which is easily accessible Handle with care when transporting Save pac...

Page 13: ...z Current Rating 0 7 0 36 A Dimensions 374 0 mm W x 343 8 453 8 mm H X 205 0 mm D 14 7 inches W x 13 5 17 9 inches H x 8 1 inches D Weight 6 8 kg 15 0 lbs Environmental Considerations Operating Temper...

Page 14: ...rted directly to your computer automatically optimizing display performance IPM Intelligent Power Manager System Provides innovative power saving methods that allow the monitor to shift to a lower pow...

Page 15: ...the image NOTE As with all personal display devices NEC Mitsubishi Electronics Display Europe recommends using a moving screen saver at regular intervals whenever the screen is idle or turning off the...

Page 16: ...rict environmental demands for example in respect of the reduction of electric and magnetic fields physical and visual ergonomics and good usability Environmental Requirements Flame retardants Flame r...

Reviews: