background image

16

Limited Warranty

NEC Technologies, Inc. (hereinafter “NECTECH”), warrants this Product to be free from defects
in material and workmanship and, subject to the conditions set forth below, agrees to repair or
replace (at NECTECH’s sole option) any part of the enclosed unit which proves defective for a
period of three (3) years from the date of first consumer purchase.  Spare parts are warranted
for ninety (90) days. Replacement parts or units may be new or refurbished and will meet all of
the specifications of the original parts or unit.

This warranty gives you specific legal rights and you may also have other rights, which vary,
from state to state.  This warranty is limited to the original purchaser of the Product and is not
transferable.  This warranty covers only NECTECH-supplied components.  Service required as a
result of third party components is not covered under this warranty.  In order to be covered under
this warranty, the Product must have been purchased in the U.S.A. or Canada by the original
purchaser. This warranty only covers Product distribution in the U.S.A. or Canada by NECTECH.
No warranty  service is provided outside of the U.S.A. or Canada. Proof of Purchase will be
required by NECTECH to substantiate date of purchase. Such proof of purchase must be an
original bill of sale or receipt containing name and address of seller, purchaser, and the serial
number of the product.

It shall be your obligation and expense to have the Product shipped, freight prepaid, or delivered
to the authorized reseller from whom it was purchased or other facility authorized by NECTECH
to render the services provided hereunder in either the original package or a similar package
affording an equal degree of protection. All Products returned to NECTECH for service MUST
have prior approval, which may be obtained by calling 1-800-632-4662. The Product shall not
have been previously altered, repaired, or serviced by anyone other than a service facility
authorized by NECTECH to render such service, the serial number of the product shall not have
been subjected to accident, misuse or abuse or operated contrary to the instructions contained
in the User’s Manual. Any such conditions will void this warranty.

NECTECH SHALL NOT BE LIABLE FOR DIRECT, INDIRECT INCIDENTAL, CONSEQUENTIAL, OR
OTHER TYPES OF DAMAGES RESULTING FROM THE USE OF ANY NECTECH PRODUCT
OTHER THAN THE LIABILITY STATED ABOVE.  THESE WARRANTIES ARE IN LIEU OF ALL OTHER
WARRANTIES EXPRESS OR IMPLIED, INCLUDING, BUT NOT LIMITED TO, THE IMPLIED
WARRANTIES OF MERCHANTABILITY OR FITNESS FOR A PARTICULAR PURPOSE.  SOME
STATES DO NOT ALLOW THE EXCLUSION OF IMPLIED WARRANTIES OR THE LIMITATION OR
EXCLUSION OF LIABILITY FOR INCIDENTAL OR CONSEQUENTIAL DAMAGES SO THE ABOVE
EXCLUSIONS OR LIMITATIONS MAY NOT APPLY TO YOU.

This Product is warranted in accordance with the terms of this limited warranty.  Consumers are
cautioned that Product performance is affected by system configuration, software, the
application, consumer data, and operator control of the system, among other factors.  While
NECTECH Products are considered to be compatible with many systems, specific functional
implementation by the customers of the Product may vary.  Therefore, suitability of a Product for
a specific purpose or application must be determined by consumer and is not warranted by
NECTECH.

For the name of your nearest authorized NECTECH service facility, contact NECTECH at
1-800-632-4662.

 NEC-ADA201 Eng/Fr. manual  9/8/98 12:27 PM  Page 19

Summary of Contents for MultiSync M700

Page 1: ...MultiSync IntelliBase Audio User s Manual MultiSync IntelliBase Audio User s Manual NEC ADA201 Eng Fr manual 9 8 98 12 25 PM Page 1 ...

Page 2: ...ecifications 13 Troubleshooting 14 References 15 Limited Warranty 16 Table des matières Contenu 19 Démarrage rapide 20 29 Commandes 30 Caractéristiques 31 Dépannage 32 Références 33 Garantie Limitée 34 NEC ADA201 Eng Fr manual 9 8 98 12 25 PM Page 2 ...

Page 3: ...ods The power cord of the appliance should be unplugged from the outlet when left unused for a long period of time Object and Liquid Entry Care should be taken so that objects do not fall and liquids are not spilled into the enclosure through openings Damage Requiring Service The appliance should be serviced by qualified service personnel when The power supply cord or the plug has been damaged Obj...

Page 4: ...portant To help us in our continuing efforts to better serve and support you and to bring you new and innovative products please take a few mom ents to register your new NEC MultiSync monitor By returning this card we confirm your date of purchase and records the model and serial numbers This facilitates our ability to process warranty claims especially if your original proof of purchase is lost T...

Page 5: ...se and the attachment of the IntelliBase will vary Locate the model name located in the lower right corner of your monitor s bezel of your MultiSync brand monitor in the table below Follow the removal procedure to detach the original base from your monitor using the diagrams on the following pages and attach the IntelliBase to your monitor MultiSync Monitor Model Names Original Monitor Base Remova...

Page 6: ...ltiSync Monitor Model Names MultiSync 50 MultiSync 70 XV15 and XV15 Step 1 With the monitor unplugged from your system and the wall outlet carefully turn the monitor upside down on a firm table so that the base is facing up as shown in Figure 1 Figure 1 MONITOR IN POSITION TO REMOVE THE BASE AND ATTACH INTELLIBASE AUDIO BASE SWIVEL PLATE SPINDLE DO NOT REMOVE SPINDLE OR SWIVEL PLATE BASE NEC ADA20...

Page 7: ...Audio to your system 4 Figure 2C Step 3 Locate Adapter Plate A that is supplied with the IntelliBase and secure it to the spindle using the screw that was removed in Step 2 as shown in Figure 2B Figure 2B GUIDE SPINDLE THROUGH CENTER HOLE ON ADAPTER PLATE A ADAPTER PLATE A SPINDLE INTELLIBASE BOTTOM VIEW ROTATE ADAPTER PLATE UNTIL IT ALIGNS WITH THROUGH HOLES ON THE BASE NEC ADA201 Eng Fr manual 9...

Page 8: ... firm table so that the base is facing up as shown in Figure 1 Step 2 Using your thumbs push on the locking tabs while pulling forward and up as shown by the directional arrow in Figure 3A This action releases the base from the monitor Remove and save the original base for possible future use Figure 3A Figure 1 MONITOR IN POSITION TO REMOVE THE BASE AND ATTACH INTELLIBASE AUDIO BASE BASE LOCKING T...

Page 9: ... with the IntelliBase and secure it to the spindle using the screw and black nylon washer that was removed in Step 2 as shown in Figure 3C BASE ADAPTER PLATE B NEW MOUNTING Figure 3C Step 5 After the adapter plate has been attached to the base snap the base assembly to the monitor To accomplish this position all the locking tabs on the base so they mate with the holes in the monitor Slide the base...

Page 10: ...el Names MultiSync XE21 XP21 E1100 E1100 P1150 and P1250 Step 1 With the monitor unplugged from your system and the wall outlet carefully turn the monitor upside down on a firm table so that the base is facing up as shown in Figure 1 Figure 1 MONITOR IN POSITION TO REMOVE THE BASE AND ATTACH INTELLIBASE AUDIO BASE Figure 3E INTELLIBASE BOTTOM VIEW ROTATE ADAPTER PLATE UNTIL IT ALIGNS WITH THROUGH ...

Page 11: ...er remove the screw securing the two base halves together as shown in Figure 4B Retain the screw and black nylon washer for use in the next step Figure 4B ORIGINAL MOUNTING RETAIN THESE PARTS TO USE IN NEW MOUNTING Step 4 Locate Adapter Plate B that is supplied with the IntelliBase and secure it to the spindle using the screw and black nylon washer that was removed in Step 3 as shown in Figure 4C ...

Page 12: ...n Step 2 attach the adapter plate assembly to the monitor To accomplish this it will be necessary to turn the adapter plate fully counter clockwise while sliding it forward as shown in Figure 4E This will allow you to install the two rear screws Figure 4E Step 7 Using the remaining screw that was removed in Step 2 complete attachment of the adapter plate assembly To accomplish this it will be nece...

Page 13: ...itor with IntelliBase Audio to your system Figure 4G INTELLIBASE BOTTOM VIEW ROTATE ADAPTER PLATE UNTIL IT ALIGNS WITH THROUGH HOLES ON THE BASE Figure 5 Step 1 Having successfully installed your new IntelliBase carefully turn the monitor right side up as shown in Figure 5 How to connect your MultiSync monitor with IntelliBase Audio to your system NEC ADA201 Eng Fr manual 9 8 98 12 26 PM Page 13 ...

Page 14: ...f the supplied AC adapter to the DC input jack on the rear of the IntelliBase and the other end into any 110 120V AC wall outlet as shown in Figure 7 Figure 7 Step 4 Reconnect your MultiSync monitor to your computer system as shown in the monitor user s manual Step 5 Turn on the IntelliBase and adjust the controls for best sound performance AUDIO LINE OUTPUT SEE DETAIL A DETAIL A DETAIL B SEE DETA...

Page 15: ...ated clockwise and decreases the high frequency response when rotated counter clockwise BASS This control increases the bass response when rotated clockwise and decreases the bass response when rotated counter clockwise HEADPHONE OUTPUT JACK Headphones can be used to listen to audio in private When the headphone plug is inserted into the headphone jack the speakers are automatically disconnected a...

Page 16: ...e 32 Ohms Headphone Jack Type 3 5 mm Stereo Audio Input Jack Type 3 5 mm Stereo Dimensions 265 mm W x 85 mm H x 320 mm D 10 4 inches W x 3 3 inches H x 12 6 inches D Weight 0 9 kg 2 0 lbs Environmental Considerations Operating Temperature 0 to 40 C Humidity 10 to 90 Non Condensing Altitude 0 to 10 000 Feet Storage Temperature 40 to 60 C Humidity 5 to 95 Non Condensing Altitude 0 to 45 000 Feet Sys...

Page 17: ...ard audio source and Windows mixer and raise as necessary Sound card or specific sound file track may be root of problem SYMPTOMS No Sound From Speakers POSSIBLE PROBLEM No power to unit NOTE Provided power has been verified it is possible to test the unit by disconnecting the audio cable that is connected to the computer and reconnecting it to an alternate audio source such as a portable CD playe...

Page 18: ...s BBS 978 742 8706 NEC Technologies Remote Bulletin Board System is an electronic service accessible with your system and a modem Communication parameters are 300 1200 2400 9600 14 4k 28 8k bps no parity 8 data bits 1 stop bit Customer Service Technical Support 800 632 4662 Fax 978 742 7049 Electronic Channels Internet e mail tech support nectech com Internet ftp site ftp nectech com World Wide We...

Page 19: ...he original package or a similar package affording an equal degree of protection All Products returned to NECTECH for service MUST have prior approval which may be obtained by calling 1 800 632 4662 The Product shall not have been previously altered repaired or serviced by anyone other than a service facility authorized by NECTECH to render such service the serial number of the product shall not h...

Page 20: ...Notes 17 NEC ADA201 Eng Fr manual 9 8 98 12 27 PM Page 20 ...

Page 21: ...ils peuvent corroder le boîtier Périodes de non utilisation Le cordon de l appareil doit être débranché de la prise lorsque l appareil ne doit pas être utilisé pendant une période prolongée Entrée d objets et de liquide Il faut veiller à ce qu aucun objet ne tombe dans l enceinte à travers ses ouvertures et qu aucun liquide n y soit déversé Dommages nécessitant une intervention de service L appare...

Page 22: ...prodreg com nec Im portant To help us in our continuing efforts to better serve and support you and to bring you new and innovative products please take a few mom ents to register your new NEC MultiSync monitor By returning this card we confirm your date of purchase and records the model and serial numbers This facilitates our ability to process warranty claims especially if your original proof of...

Page 23: ... fonction du modèle du moniteur de marque MultiSync Repérer le nom du modèle inscrit dans le coin inférieur droit du biseau du moniteur du moniteur de marque MultiSync dans le tableau ci après Suivre la procédure de dépose afin de détacher la base d origine de son moniteur en se reportant aux schémas donnés sur les pages qui suivent et de poser l IntelliBase au moniteur Noms des modèles de moniteu...

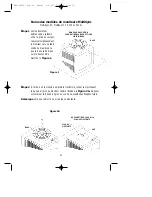
Page 24: ...Noms des modèles de moniteurs MultiSync MultiSync 50 MultiSync 70 XV15 et XV15 Étape 1 Le moniteur étant débranché du système et de la prise de courant renverser soigneusement le moniteur sur une table solide de manière à ce que la base soit dirigée vers le haut comme illustré à la Figure 1 Figure 1 MONITEUR EN POSITION POUR RETIRER LA BASE ET FIXER L INTELLIBASE BASE PLAQUE PIVOTANTE AXE NE PAS R...

Page 25: ...2 Figure 2C Étape 3 Repérer la plaque adaptatrice A fournie avec l IntelliBase et la fixer à l axe à l aide de la vis qui a été déposée à l étape 2 comme illustré à la Figure 2B Figure 2B GUIDER L AXE À TRAVERS LE TROU CENTRAL DE LA PLAQUE ADAPTATRICE A PLAQUE ADAPTATRICE A AXE INTELLIBASE VUE DEPUIS LE BAS FAIRE TOURNER LA PLAQUE ADAPTATRICE JUSQU À CE QU ELLE SOIT ALIGNÉE À TRAVERS LES TROUS DE ...

Page 26: ... soit dirigée vers le haut comme illustré à la Figure 1 Étape 2 À l aide de ses pouces pousser sur les pattes de blocage tout en tirant vers l avant et vers le haut comme illustré par la flèche directionnelle à la Figure 3A Cette action détache la base du moniteur Déposer et conserver la base d origine en vue d une éventuelle utilisation future Figure 3A Figure 1 MONITEUR EN POSITION POUR RETIRER ...

Page 27: ... B fournie avec l IntelliBase et la fixer à l axe à l aide de la vis et de la rondelle en nylon noir qui ont été déposées à l étape 2 comme illustré à la Figure 3C BASE PLAQUE ADAPTATRICE B NOUVEAU MONTAGE Figure 3C Étape 5 Une fois la plaque adaptatrice fixée à la base enclencher l ensemble de base au moniteur À cette fin positionner toutes les pattes de blocage sur la base de manière à les assor...

Page 28: ... XP21 E1100 E1100 P1150 et P1250 Étape 1 Le moniteur étant débranché du système et de la prise de courant renverser soigneusement le moniteur sur une table solide de manière à ce que la base soit dirigée vers le haut comme illustré à la Figure 1 Figure 1 MONITEUR EN POSITION POUR RETIRER LA BASE ET FIXER L INTELLIBASE BASE Figure 3E INTELLIBASE VUE DEPUIS LE BAS FAIRE TOURNER LA PLAQUE ADAPTATRICE...

Page 29: ...nte cruciforme retirer la vis retenant les deux moitiés de base ensemble comme illustré à la Figure 4B Conserver la vis et la rondelle en nylon noir pour utilisation à l étape suivante Figure 4B MONTAGE D ORIGINE CONSERVER CES PIÈCES POUR UTILISATION DANS LE NOUVEAU MONTAGE Étape 4 Repérer la plaque adaptatrice B fournie avec l IntelliBase et la fixer à l axe à l aide de la vis et de la rondelle e...

Page 30: ...ape 2 fixer l ensemble de plaque adaptatrice au moniteur À cette fin il faudra tourner la plaque adaptatrice entièrement en sens anti horaire tout en la faisant glisser vers l avant comme illustré à la Figure 4E Ceci vous permettra de poser les deux vis arrière Figure 4E Étape 7 En utilisant la vis restante qui a été retirée à l étape 2 terminer la fixation de l ensemble de plaque adaptatrice À ce...

Page 31: ...c IntelliBase Audio à votre système Figure 4G INTELLIBASE VUE DEPUIS LE BAS FAIRE TOURNER LA PLAQUE ADAPTATRICE JUSQU À CE QU ELLE SOIT ALIGNÉE À TRAVERS LES TROUS DE LA BASE Figure 5 Étape 1 Une fois la nouvelle IntelliBase posée remettre soigneusement le moniteur à l endroit comme illustré à la Figure 5 Raccordement du moniteur MultiSync avec IntelliBasemc Audio à votre système NEC ADA201 Eng Fr...

Page 32: ...a prise d entrée c c située à l arrière de l IntelliBase et l autre extrémité dans n importe quelle prise de courant 110 120 V c a comme illustré à la Figure 7 Figure 7 Étape 4 Rebrancher le moniteur MultiSync à votre système informatique comme illustré dans le manuel d instructions du moniteur Étape 5 Mettre l IntelliBase en marche et ajuster les commandes en vue d une performance sonore optimale...

Page 33: ...rsqu elle est tournée en sens anti horaire BASS Cette commande accroît la réponse basses fréquences lorsqu elle est tournée en sens horaire et elle diminue la réponse basses fréquences lorsqu elle est tournée en sens anti horaire PRISE DE SORTIE POUR CASQUE D ÉCOUTE On peut utiliser un casque d écoute pour écoute privée Lorsque la fiche du casque d écoute est insérée dans la prise du casque d écou...

Page 34: ...10 120 V c a 60 Hz Courant nominal 0 2 A à 120 V Impédance de sortie du casque 32 Ohms Type de prise du casque d écoute 3 5 mm stéréo Type de prise d entrée audio 3 5 mm stéréo Dimensions 265 mm La x 85 mm H x 320 mm P 10 4 po La x 3 3 po H x 12 6 po P Poids 0 9 kg 2 0 lbs Environnement Température de service 0 à 40oC Humidité 10 à 90 sans condensation Altitude 0 à 10 000 pi Température de stockag...

Page 35: ...besoin est le baisser Vérifier le volume de la carte son de la source audio et du mélangeur Windows et si besoin est l augmenter La carte son ou la piste sonore spécifique est peut être à l origine du problème SYMPTÔME Pas de son dans les haut parleurs PROBLÈME POSSIBLE L appareil n est pas branché REMARQUE Après s être assuré de l alimentation en courant il est possible pour vérifier l appareil d...

Page 36: ...n Board System est un service électronique accessible par l intermédiaire de votre système et d un modem Les paramètres de communication sont les suivants 300 1200 2400 9600 14 4 k 28 8 k bps aucune parité 8 bits de données 1 bit stop Service clientèle Assistance technique 800 632 4662 Télécopieur 978 742 7049 Moyens électroniques Courrier électronique Internet tech support nectech com Site ftp In...

Page 37: ...Tous les produits renvoyés à NECTECH pour service DOIVENT faire l objet d une approbation préalable laquelle peut être obtenue en composant le 1 800 632 4662 Le produit ne doit pas avoir été altéré réparé ou entretenu précédemment par une personne autre qu un centre de service agréé par NECTECH pour rendre ce service le numéro de série du produit ne doit pas avoir fait l objet d un accident d une ...

Page 38: ...Notes 35 NEC ADA201 Eng Fr manual 9 8 98 12 28 PM Page 38 ...

Page 39: ...éalable de NEC Technologies est interdite DÉCLARATION DE CONFORMITÉ Ce dispositif est conforme à la Partie 15 des Règles de la FCC L utilisation est sujette aux deux conditions ci après 1 ce dispositif ne peut causer des interférences nuisibles et 2 ce dispositif doit accepter toute interférence reçue y compris une interférence qui peut causer un fonctionnement non désiré Responsable aux É U NEC T...

Page 40: ...ogies is prohibited DECLARATION OF CONFORMITY This device complies with Part 15 of FCC Rules Operation is subject to the following two conditions 1 This device may not cause harmful interference and 2 this device must accept any interference received including interference that may cause undesired operation U S Responsible Party NEC Technologies Inc 1250 N Arlington Heights Road Itasca Illinois 60...

Reviews: