9-16 Upgrading Your Server
Installation
Install a DIMM in the following procedure.
IMPORTANT:
The server supports DIMMs of only the low-profile
type (30 mm (1.2 inches) in height). The server does not support
DIMMs exceeding the specified height.
1.
See the section "Preparing for Installation and Removal" described earlier to prepare.
2.
Pull out the server from the rack.
3.
Remove the top cover.
4.
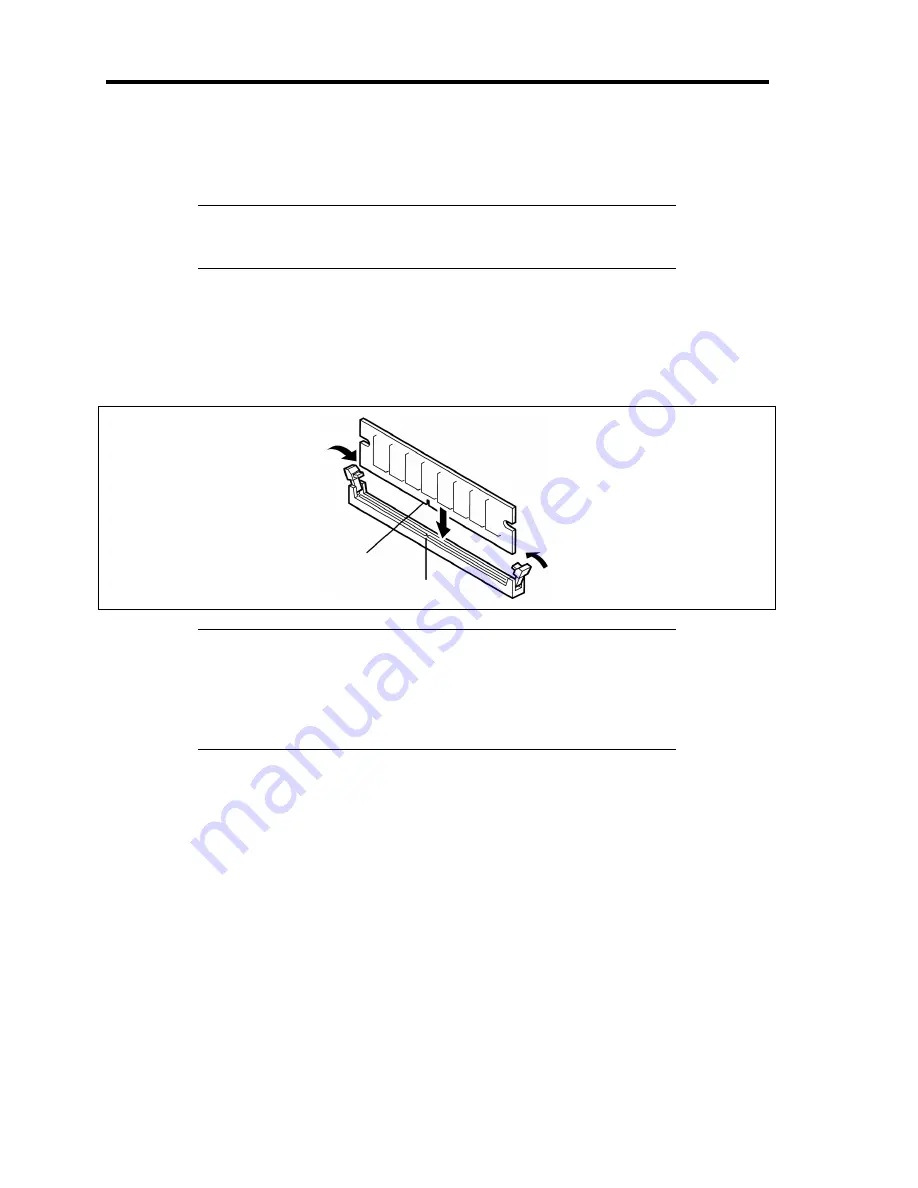
Insert the DIMM straight into the socket.
NOTES:
Make sure of the orientation of the DIMM.
The terminal side of the DIMM has key and key slot to prevent
incorrect insertion.
Applying too much pressure can damage the socket and or terminal.
If the DIMM is inserted into the DIMM socket, the lever is automatically closed.
5.
Install the components you removed in Steps 1 to 3.
6.
Power on the server and verify that POST displays no error messages.
7.
Run BIOS SETUP utility and select [Advanced]
→
[Memory Configuration] to verify that
the capacity shown in [Installed memory] is equivalent to that of installed DIMM. (See
Chapter 4 or details.)
Key slot
Key
Summary of Contents for N8100-1573F
Page 16: ...x This page is intentionally left blank...
Page 19: ...Notes on Using Your Server 1 3 3 5 inch Disk Model FRONT REAR...
Page 126: ...4 50 Configuring Your Server This page is intentionally left blank...
Page 296: ...A 2 Specifications This page is intentionally left blank...
Page 304: ...C 2 IRQ This page is intentionally left blank...
Page 333: ...Installing Windows Server 2008 D 29 4 Activate Windows The Windows activation is complete...
Page 390: ...G 2 Using a Client Computer Which Has a CD Drive This page is intentionally left blank...
Page 394: ...H 4 Product Configuration Record Table This page is intentionally left blank...


