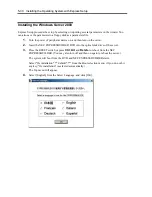
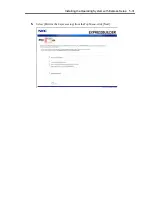


5-40 Installing the Operating System with Express Setup
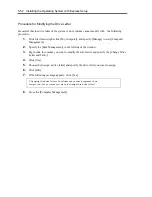
The procedure to set PAE option
If your 32-bit system has a memory capacity in excess of 4GB, setting PAE option will enable the
system to be installed with over 4GB of memory.
IMPORTANT:
However, the Microsoft operating system products
which support /PAE switch option are limited.
Refer to the following article in Microsoft Knowledge Base to check
the supported products.
Microsoft Knowledge Base - Article ID: 291988
"A description of the 4GB RAM tuning feature and the Physical
Address Extension switch"
In Windows Server 2003 system, the PAE option can be set by editing boot.ini.
Below is the example on how to add /PAE switch to Boot.ini file.
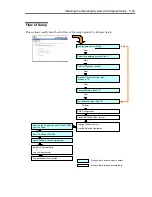
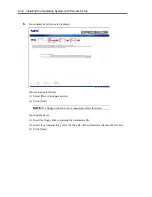
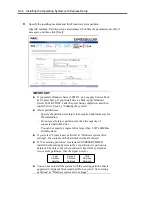
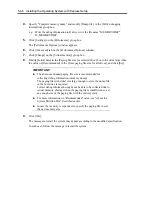
1.
Click [Start], point to [Settings], and then click [Control Panel].
2.
In [Control Panel], double-click [System].
[System Properties] dialog box will be shown.
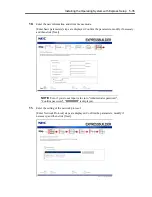
3.
Click the [Advanced] tab, and then click [Settings] under [Setup and Recovery].
4.
Under [System Setup], click [Edit] to open [Boot.ini].
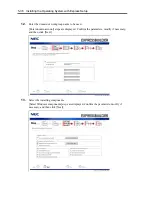
5.
Add "/PAE" to [Operating Systems] section in [Boot.ini] file, and then save it.
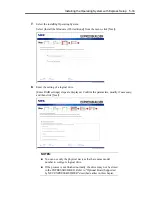
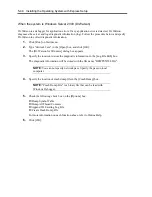
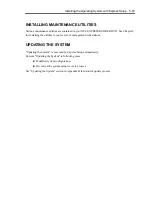
<Example of Boot.ini file>
[boot loader]
timeout=30
default=multi(0)disk(0)rdisk(0)partition(2)\WINDOWS
[operating systems]
multi(0)disk(0)rdisk(0)partition(2)\WINDOWS="Windows Server 2003 "
/fastdetect
multi(0)disk(0)rdisk(0)partition(2)\WINDOWS="Windows Server 2003 ,
PAE" /fastdetect /PAE
C:\CMDCONS\BOOTSECT.DAT="Microsoft Windows Recovery Console " /cmdcons
This is the end of editing Boot.ini file.
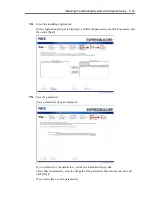
NOTE:
If you choose one of the items in the "Default operating
system" drop-down list box in [Setup and Recovery] group box, you
can make your system start automatically from the switch you
specified.
Summary of Contents for N8400-086F
Page 14: ...viii This page is intentionally left blank...
Page 44: ...2 20 General Description This page is intentionally left blank...
Page 152: ...6 24 Installing and Using Utilities This page is intentionally left blank...
Page 158: ...7 6 Maintenance This page is intentionally left blank...
Page 218: ...A 2 Specifications This page is intentionally left blank...
Page 290: ...B 72 Installing the Operating System 4 Activate Windows The Windows activation is complete...


