3-16 Windows Setup and Operation
Replacing Failed Hard Disk Drives
Follow the procedure below to replace the failed hard disk. The failed hard disk should be replaced
with new device with the server powered-on.
IMPORTANT:
To replace a disk that does not have any error for preventive maintenance, see “Removing Hard
Disk Drives Which Do Not Have Error” on page 3-22 and replace the disk.
Procedures to Replace Failed Disks
When a failure occurs on a disk mirrored by volume using [Disk Management], follow the steps
below to replace the disk.
IMPORTANT:
To reconfigure a mirror, be sure to confirm the Target ID in the disk’s [Properties] and .make
a pair of Target ID 0 and 3, 1 and 4, and 2 and 5. Do not mirror disks using the disk number
shown in [Disk Management].
When the disk to be inserted into a slot for dual configuration of disk has been used as a disk
which contains the boot volume (disk storing the OS), the disk cannot be used for dual
configuration. Initialize the disk to use the disk.
This section describes an example of when the disk 1 and disk 5 failed.
ᴾ
1.
Click [Start]
o
[Administrative Tools]
o
[Computer Management]. The [Computer
Management] window appears.
䎃
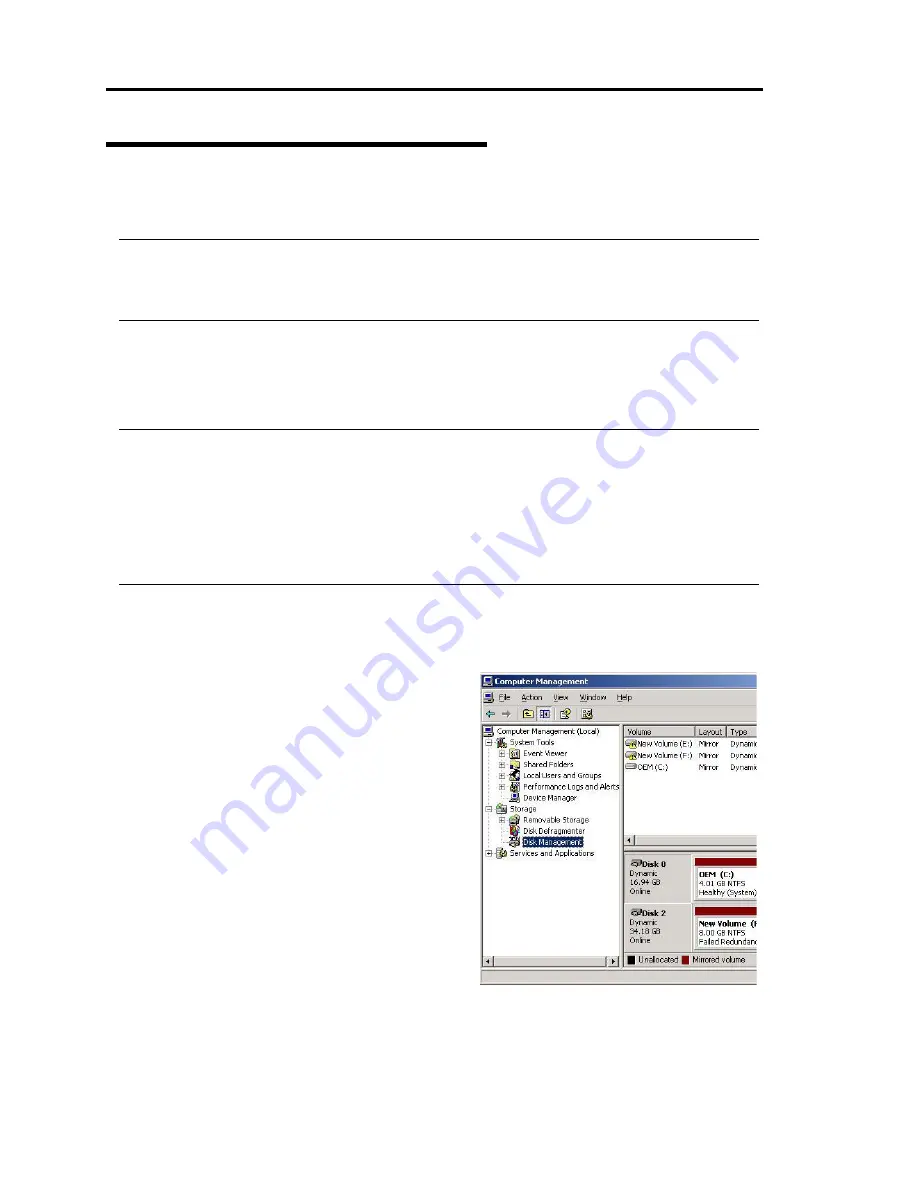
2.
Click [Disk Management] under [Storage]
in the console tree. An example in this
figure shows that one of the mirrored disks
in which Drives E and F are included is
broken. Some disks are indicated as
“Unknown disk.” However, they may be
indicated differently depending on the error
type. Even in such cases, failed disks can be
recovered by following the steps below:
䎃
3.
Remove the hard disks of disk 1 and disk 5.
䎃
䎃
䎃
Summary of Contents for N8800-096F
Page 8: ...NEC Express5800 WARNING CAUTION CAUTION...
Page 9: ......
Page 15: ......
Page 22: ...Precautions for Use 1 3 Rack model Front Rear...
Page 24: ...Precautions for Use 1 5 Water Cooling kit...
Page 34: ...Precautions for Use 1 15 SAFETY INDICATIONS WARNING 32 5 CAUTION...
Page 35: ...1 16 Precautions for Use WARNING CAUTION P IW 9 6 7...
Page 36: ...Precautions for Use 1 17 CAUTION 1...
Page 37: ...1 18 Precautions for Use WARNING CAUTION...
Page 38: ...Precautions for Use 1 19 CAUTION CAUTION...
Page 39: ...1 20 Precautions for Use WARNING CAUTION...
Page 40: ...Precautions for Use 1 21 CAUTION...
Page 44: ...Precautions for Use 1 25 SAFETY INDICATIONS WARNING POWER CAUTION...
Page 45: ...1 26 Precautions for Use WARNING CAUTION AC 4 5m 14 76 ft V 10A 6 7...
Page 46: ...Precautions for Use 1 27 WARNING CAUTION...
Page 47: ...1 28 Precautions for Use CAUTION NEC...
Page 48: ...Precautions for Use 1 29 WARNING CAUTION...
Page 49: ...1 30 Precautions for Use CAUTION CAUTION...
Page 50: ...Precautions for Use 1 31 CAUTION EIA...
Page 51: ...1 32 Precautions for Use 1 9 836 56 3RZHU KXWH3OXV a e a 173 WR e WR 1 SUHVV IW e 1...
Page 52: ...Precautions for Use 1 33...
Page 53: ...1 34 Precautions for Use 5 5 WARNING...
Page 55: ...1 36 Precautions for Use...
Page 68: ...General Description 2 13 Rack model with the front door open...
Page 73: ...2 18 General Description Rear View Tower model Rack model...
Page 110: ...Windows Setup and Operation 3 15 7 Configure the mirror of the extended volume...
Page 128: ...Windows Setup and Operation 3 33 4 The confirmation dialog box appears Click Yes button...
Page 164: ...System Configuration 4 27 Exit Move the cursor onto Exit to display the Exit menu...
Page 225: ...4 88 System Configuration This page is intentionally left blank...
Page 286: ...Installing and Using Utilities 5 61 Sample screen of Server Maintenance Utility...
Page 327: ...6 14 Maintenance This page is intentionally left blank...
Page 381: ...7 54 Troubleshooting This page is intentionally left blank...
Page 424: ...Specifications A 3...
Page 425: ......


