6-4 Maintenance
7.
Wipe the server with a dry cloth.
8.
Wipe off dust from the fan exhaust opening on the rear of the server with a dry cloth.
Cleaning the Keyboard and Mouse
IMPORTANT:
A keyboard and a mouse use USB interface. Therefore it is not necessary to power off the
server when connecting or disconnecting them.
Disconnect the keyboard from the server while the devices in the system (the server and the
peripheral devices) remain turned on. Wipe the keyboard surface with a dry cloth. Then connect the
keyboard to the server.
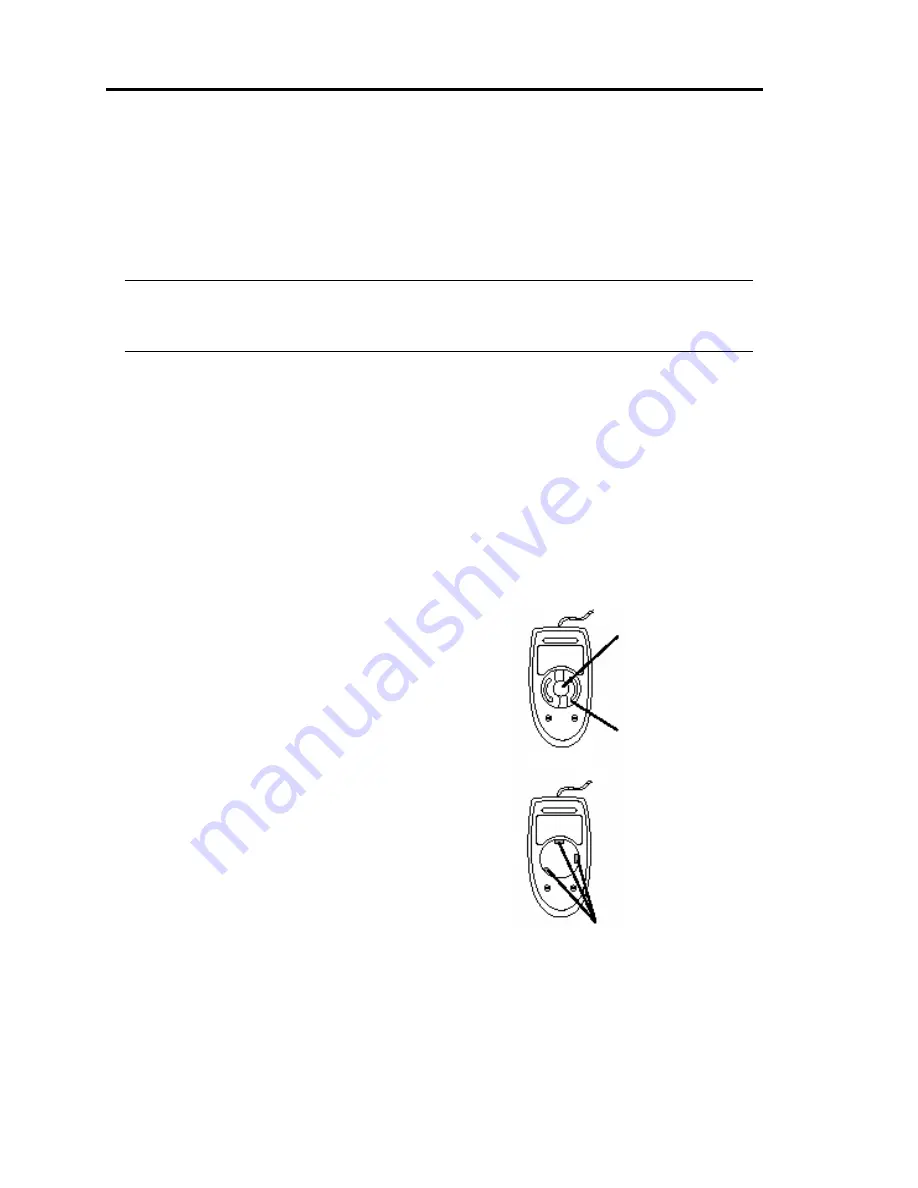
The mouse operation depends on the degree of smoothness of the internal ball rotation. To keep the
mouse ball clean, use the mouse in a place with little dust. Follow the steps below to clean the
mouse regularly:
1.
Disconnect the mouse from the USB hub of the keyboard while the server remains
powered on.
2.
Turn the mouse upside down, and rotate the
mouse ball cover counterclockwise to remove it.
Take out the ball from the mouse.
3.
Wipe the mouse ball with a dry soft cloth.
If stains remain, use a soft cloth to wipe them off.
Soak the soft cloth in neutral detergent that is
diluted with water or warm water, and squeeze it
firmly.
4.
Wipe three small rollers inside the mouse with
cotton swab.
Use the cotton swab soaked with alcohol if stains
remain.
5.
Put the mouse ball back into the mouse.
If the mouse or rollers are wet in steps 3 and 4, put
it back after fully dried.
6.
Place the mouse ball cover, and rotate it clockwise
until it is locked.
7.
Connect the mouse to the server (the USB hub of
the keyboard).
Bottom
Mouse
Mouse cover
Mouse ball
Rollers
Summary of Contents for N8800-096F
Page 8: ...NEC Express5800 WARNING CAUTION CAUTION...
Page 9: ......
Page 15: ......
Page 22: ...Precautions for Use 1 3 Rack model Front Rear...
Page 24: ...Precautions for Use 1 5 Water Cooling kit...
Page 34: ...Precautions for Use 1 15 SAFETY INDICATIONS WARNING 32 5 CAUTION...
Page 35: ...1 16 Precautions for Use WARNING CAUTION P IW 9 6 7...
Page 36: ...Precautions for Use 1 17 CAUTION 1...
Page 37: ...1 18 Precautions for Use WARNING CAUTION...
Page 38: ...Precautions for Use 1 19 CAUTION CAUTION...
Page 39: ...1 20 Precautions for Use WARNING CAUTION...
Page 40: ...Precautions for Use 1 21 CAUTION...
Page 44: ...Precautions for Use 1 25 SAFETY INDICATIONS WARNING POWER CAUTION...
Page 45: ...1 26 Precautions for Use WARNING CAUTION AC 4 5m 14 76 ft V 10A 6 7...
Page 46: ...Precautions for Use 1 27 WARNING CAUTION...
Page 47: ...1 28 Precautions for Use CAUTION NEC...
Page 48: ...Precautions for Use 1 29 WARNING CAUTION...
Page 49: ...1 30 Precautions for Use CAUTION CAUTION...
Page 50: ...Precautions for Use 1 31 CAUTION EIA...
Page 51: ...1 32 Precautions for Use 1 9 836 56 3RZHU KXWH3OXV a e a 173 WR e WR 1 SUHVV IW e 1...
Page 52: ...Precautions for Use 1 33...
Page 53: ...1 34 Precautions for Use 5 5 WARNING...
Page 55: ...1 36 Precautions for Use...
Page 68: ...General Description 2 13 Rack model with the front door open...
Page 73: ...2 18 General Description Rear View Tower model Rack model...
Page 110: ...Windows Setup and Operation 3 15 7 Configure the mirror of the extended volume...
Page 128: ...Windows Setup and Operation 3 33 4 The confirmation dialog box appears Click Yes button...
Page 164: ...System Configuration 4 27 Exit Move the cursor onto Exit to display the Exit menu...
Page 225: ...4 88 System Configuration This page is intentionally left blank...
Page 286: ...Installing and Using Utilities 5 61 Sample screen of Server Maintenance Utility...
Page 327: ...6 14 Maintenance This page is intentionally left blank...
Page 381: ...7 54 Troubleshooting This page is intentionally left blank...
Page 424: ...Specifications A 3...
Page 425: ......


