Linux Setup and Operation 3-3
Corresponding slot
PCI module 0 Slot 0
Ù
PCI module 1 Slot 0
PCI module 0 Slot 1
Ù
PCI module 1 Slot 1
PCI module 0 Slot 2
Ù
PCI module 1 Slot 2
PCI module 0 Slot 3
Ù
PCI module 1 Slot 3
PCI module 0 Slot 4
Ù
PCI module 1 Slot 4
PCI module 0 Slot 5
Ù
PCI module 1 Slot 5
PCI module 0 Slot 6
Ù
PCI module 1 Slot 6
PCI module 0 Slot 7
Ù
PCI module 1 Slot 7
*
In the table above, PCI module names correspond as follows:
PCI module (for CPU/IO module 0) - PCI module 0
PCI module (for CPU/IO module 1) - PCI module 1
IMPORTANT:
When the status of each disk becomes RESYNC, RECOVERY, CHECK or REPAIR, do not add
a disk, insert/remove HDD, power off or restart the system. Wait until the status turns to
DUPLEX. Check the status of RAID using the ftdiskadm command, which is described later in
this document. For more information, see the User’s Guide (Setup).
Use only the hard disk drives specified by NEC. There is a risk of hard disk as well as the entire
device breakdown when you install a third-party hard disk drive.
Purchase two, paired hard disk drive of the same model to configure the hard drive redundancy.
For information on which HDD suits this device the best, ask your sales agent.
The operation such as mounting for a partition of an internal disk is done for the RAID device (md)
that is configured by Software -RAID but not for partition.
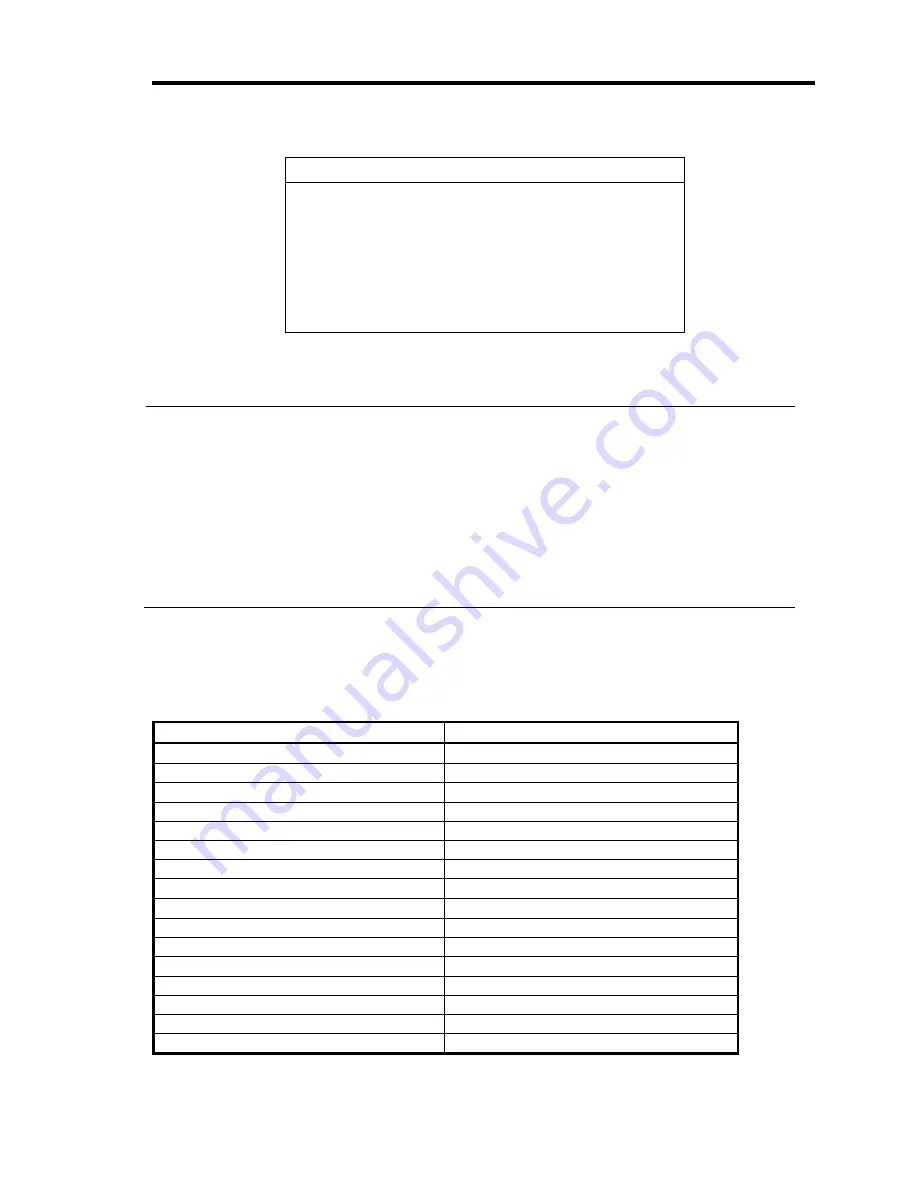
For the ftdiskadm command described later in this document, slot numbers of internal disks are
allocated as follows;
Disk slot number for H/W
Disk slot number for ftdiskadm
PCI module 0 Slot 0
Slot 1
PCI module 0 Slot 1
Slot 2
PCI module 0 Slot 2
Slot 3
PCI module 0 Slot 3
Slot 4
PCI module 0 Slot 4
Slot 5
PCI module 0 Slot 5
Slot 6
PCI module 0 Slot 6
Slot 7
PCI module 0 Slot 7
Slot 8
PCI module 1 Slot 0
Slot 9
PCI module 1 Slot 1
Slot 10
PCI module 1 Slot 2
Slot 11
PCI module 1 Slot 3
Slot 12
PCI module 1 Slot 4
Slot 13
PCI module 1 Slot 5
Slot 14
PCI module 1 Slot 6
Slot 15
PCI module 1 Slot 7
Slot 16
Summary of Contents for N8800-162F
Page 10: ...this page is intentionally left blank...
Page 43: ...General Description 2 7 Front View With front bezel attached With front bezel removed...
Page 46: ...2 10 General Description Rear View R320a E4 R320b M4...
Page 90: ...3 22 Linux Setup and Operation This page is intentionally left blank...
Page 107: ...System Configuration 4 17 Security Move the cursor onto Security to display the Security menu...
Page 124: ...4 34 System Configuration Exit Move the cursor onto Exit to display the Exit menu...
Page 136: ...4 46 System Configuration This page is intentionally left blank...
Page 212: ...6 16 Maintenance This page is intentionally left blank...
Page 236: ...7 24 Troubleshooting This page is intentionally left blank...
Page 267: ...System Upgrade 8 31 PCI 2 PCI 1 R320a E4 R320b M4 PCI 2 PCI 1 PCI 4 PCI 3 Riser Card...