


Assigning a Private Mailbox ID and Password (PW)
Assigning a Private Mailbox ID and Password (PW)
CAUTION
Use these instructions to edit your private mailbox password. These
instructions should be removed from this manual immediately and kept in a
secure location to prevent any unauthorized use.
1
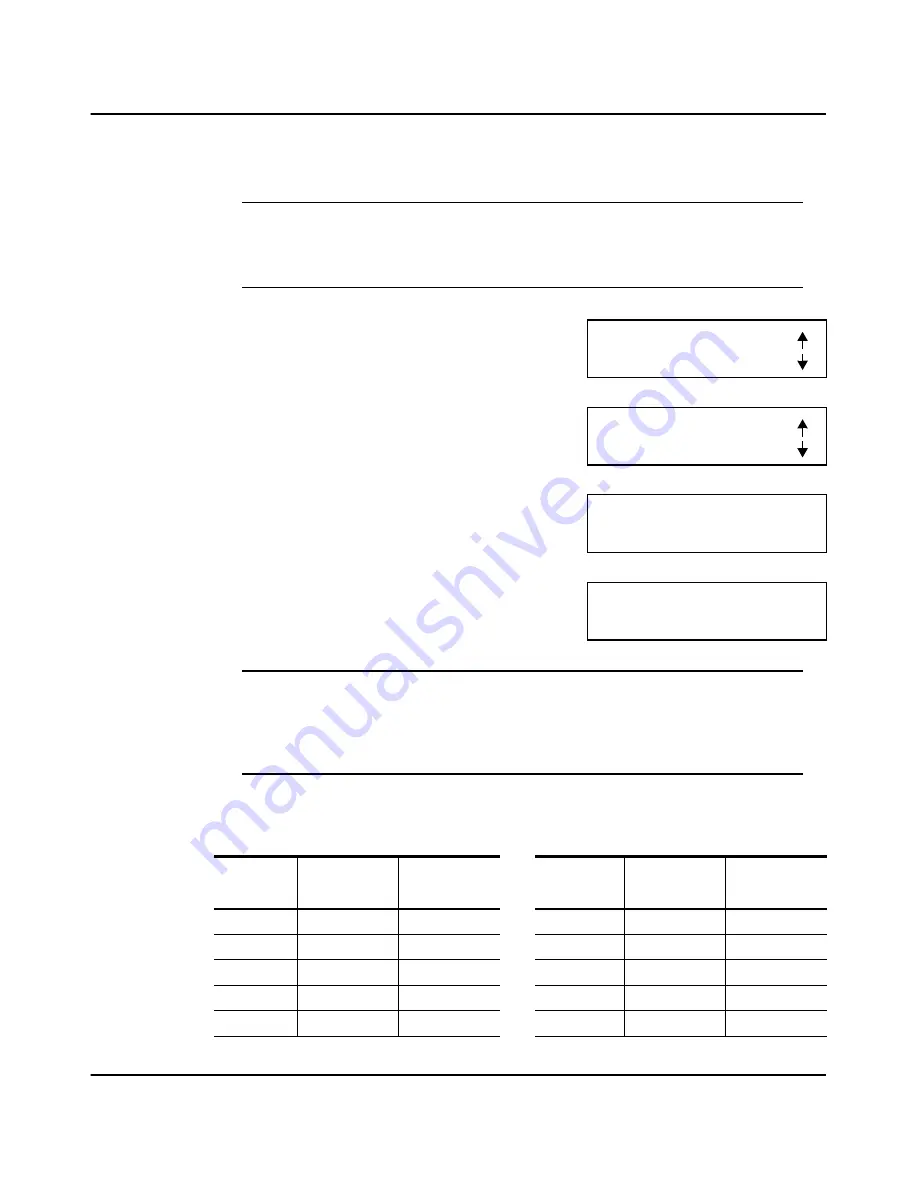
Use the Accessing User Data procedure to access
the RX OPERATION menu selection.
2
Enter 5 or press the Up or Down Arrow until you
reach the MAILBOX RX menu.
3
Press YES. Enter the number (0-9) for your
mailbox ID.
4
At the next screen, enter the 4-digit password for
this mailbox location.
CAUTION
Once the password is entered, you cannot edit without having the old
password. If the old password is not available, choose another mailbox to use.
Call your Service Representative for help in locating your Password from
within machine memory.
5
Use a pencil to note the assignments.This will allow you to change them as needed.
Remember to file this in a secure place.
Mailbox.
ID No.
Mailbox.
PW
Mailbox
Name
Mailbox
ID No.
Mailbox
.PW
Mailbox
Name
0
5
1
6
2
7
3
8
4
9
RX OPERATION?
YES / or 1-9
4 DEPARTMENT ID?
OK=YES
MAILBOX NO.=
SELECT 0-9
MAILBOX 9 PW=_
OK=YES
Summary of Contents for NEFAX655e
Page 1: ...Safety Information ...
Page 10: ...IX Safety Information LABELS ...
Page 13: ...Chapter 1 Introduction ...
Page 26: ...Machine Components 1 13 Introduction ...
Page 27: ...Chapter 2 Basic Operations ...
Page 39: ...Chapter 3 Advanced Facsimile ...
Page 59: ...Chapter 4 Facsimile Programming ...
Page 105: ...Chapter 5 Internet Fax Option ...
Page 124: ...Error Messages 5 19 Internet Fax Option ...
Page 125: ...Chapter 6 PC Printing Scanning ...
Page 146: ...Class 1 Fax Modem 6 21 PC Printing Scanning ...
Page 147: ...Chapter 7 Maintenance Supplies ...
Page 161: ...Maintenance Maintenance Supplies 7 14 Notes ...
Page 162: ...Maintenance 7 15 Maintenance Supplies ...
Page 163: ...Chapter 8 Troubleshooting ...
Page 170: ...Troubleshooting 8 7 Troubleshooting ...
Page 171: ...Chapter 9 Specifications ...
Page 181: ...Appendix A Unpacking Installation ...
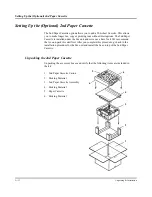
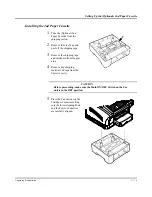
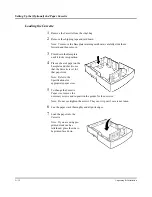
Page 198: ...Setting Up the Optional 2nd Paper Cassette A 17 Unpacking Installation ...


