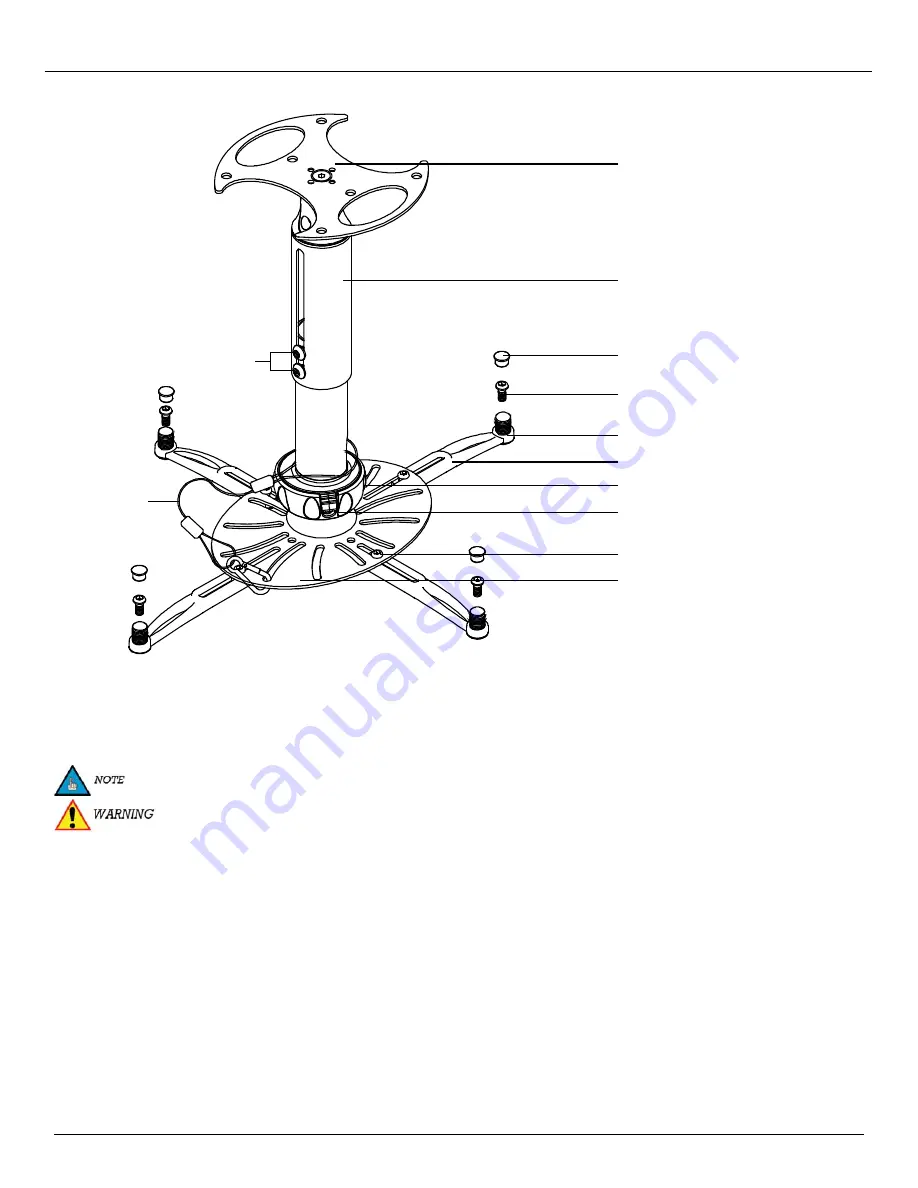
Features
PLASTIC CAP
MOUNTING HARDWARE
SECURITY SAFETY LOCKING TAB
MOUNTING PLATE
LEG ASSEMBLY
MOUNTING HARDWARE
MOUNTING LEG
LEVELING BARREL
EXTENSION NECK
CEILING PLATE
COLLAR ASSEMBLY
EXTENSION NEC K
LO C KING SC REWS
SAFETY C ABLE
AND C LAMP
Selecting the Proper Mounting Hardware
1.
Turn the projector over and locate the mounting points.
2.
Test each size of the screws provided.
3.
The correct screws should thread easily into the mounting point and not pull out when pressure is applied.
The optional M3 flat washers may be used to decrease the screw depth of either the M2.5 x 8mm screws or the
M3 x 16mm screws.
DO NOT OVERTIGHTEN YOUR MOUNTING SCREWS TO THE PROJECTOR CHASSIS. USING THE
INCORRECT SCREW DEPTH MAY CAUSE DAMAGE TO YOUR PROJECTOR.
Page - 4 -
Installation Manual


