Security
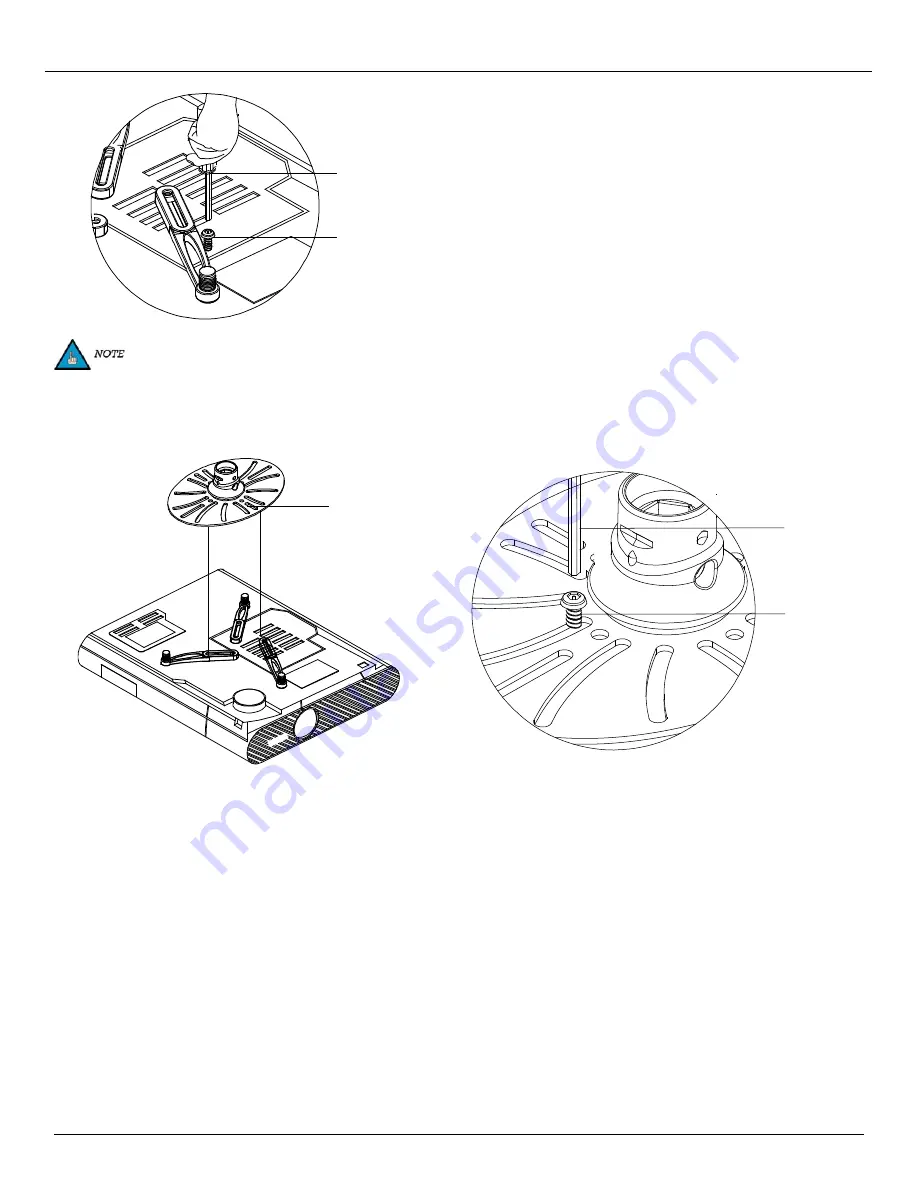
Wrench
Mounting
Hardware
If using M2.5 or M3 screws, the optional
M3 flat washers (max 5 per barrel) may be
used to decrease the screw depth, if needed.
DO NOT OVERTIGHTEN.
Step. 5
. Insert the appropriate mounting hardware (see
Selecting the Proper Mounting Hardware, page 4).
Step 6
. When the desired position is achieved, tighten
the mounting screws to the projector.
Mounting
Plate
M5 Security
Wrench
M6 x 12mm
Security Screw
Step 7.
Place the mounting plate over the mounting legs.
Step 8.
Secure the legs to the projector plate with the security
wrench (supplied) by screwing M6 x 12mm security screws
into the M6 square nut (do not overtighten) on the mounting
legs.
Step 9.
Tighten all security screws at this time.
Page - 6 -
Installation Manual


