

Replacing the Hard Drive in the NVM-2000
1
Introduction
The instructions in this supplement may be used for replacing the
current hard drive in the NVM-2000 with any of the following hard
drives:
17569-24 - 24 Hour Replacement Hard Drive for E, G, and H Series.
17569-65 - 65 Hour Replacement Hard Drive for J and K Series.
You will use the information contained in these instructions to:
1.
Back up the current Voice Mail Database.
2.
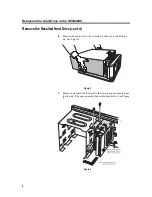
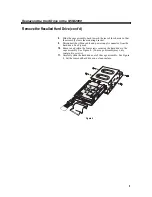
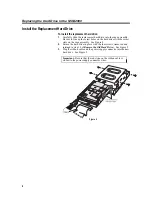
Remove the existing hard drive installed in your NVM.
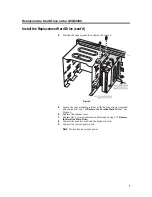
3.
Install the new hard drive.
4.
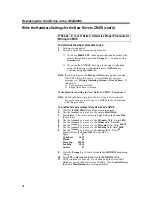
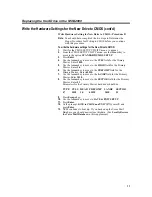
Write the hardware settings for the new drive to CMOS.
5.
Restore the Voice Mail database that you previously backed up.
AMIS and FAX Mail
■
If the installed system (with the old hard drive) had either of these
options, contact NEC America, Inc.
Important Note
■
All work should be performed by a qualified technician.
Tools and Materials Needed
■
Phillips-head Screwdriver
■
ESD Wrist Strap (to be worn on wrist and attached to a grounded
metal object at all times)
■
3 ½ inch floppy disk(s) (Required for backing up the Voice Mail
database.) Four or more diskettes may be required depending on
the system’s number of mailboxes, greetings, Welcome messages
and Instruction messages.
■
Monitor and keyboard connected to NVM
■
Replacement Hard Drive (one of the part numbers from above)
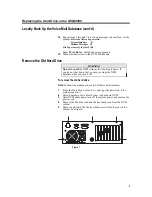
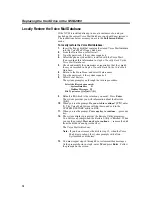
Locally Back Up the Voice Mail Database
You should back up the current Voice Mail database. Backing up the
database should be performed locally and not through a modem.
During the procedure, you will have the option to back up messages for
individual mailboxes. This is a lengthy and extensive process. For
this reason, it is recommended that you suggest that users delete as
many (if not all) of their messages. This will save you time and reduce
the number of mailboxes you will have to back up.
The backup instructions listed on the following page assume you are in
the Full Screen Editor mode of programming the Voice Mail.


