Installing the Voice Mail Hardware
8
◆
NVM-2e/i-Series Quick Setup Guide
Chapter 2: Installing the Voice Mail
Instal ling th e Voi ce Mail Hardw are
To install the Voice Mail:
1.
Place the Voice Mail on any sturdy flat surface.
OR
Mount the Voice Mail on a wall, using the screw slots located on the bottom of the cabinet.
Make sure that the ventilation slots are not blocked. Position the cabinet so that LEDs can be
seen. The LEDs are lit when:
- the unit has power (Power LED)
- the Voice Mail is initializing (Voice Mail LED)
- a particular Voice Mail port is busy (Power Status LEDs).
2.
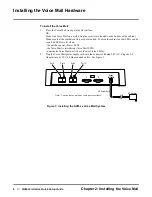
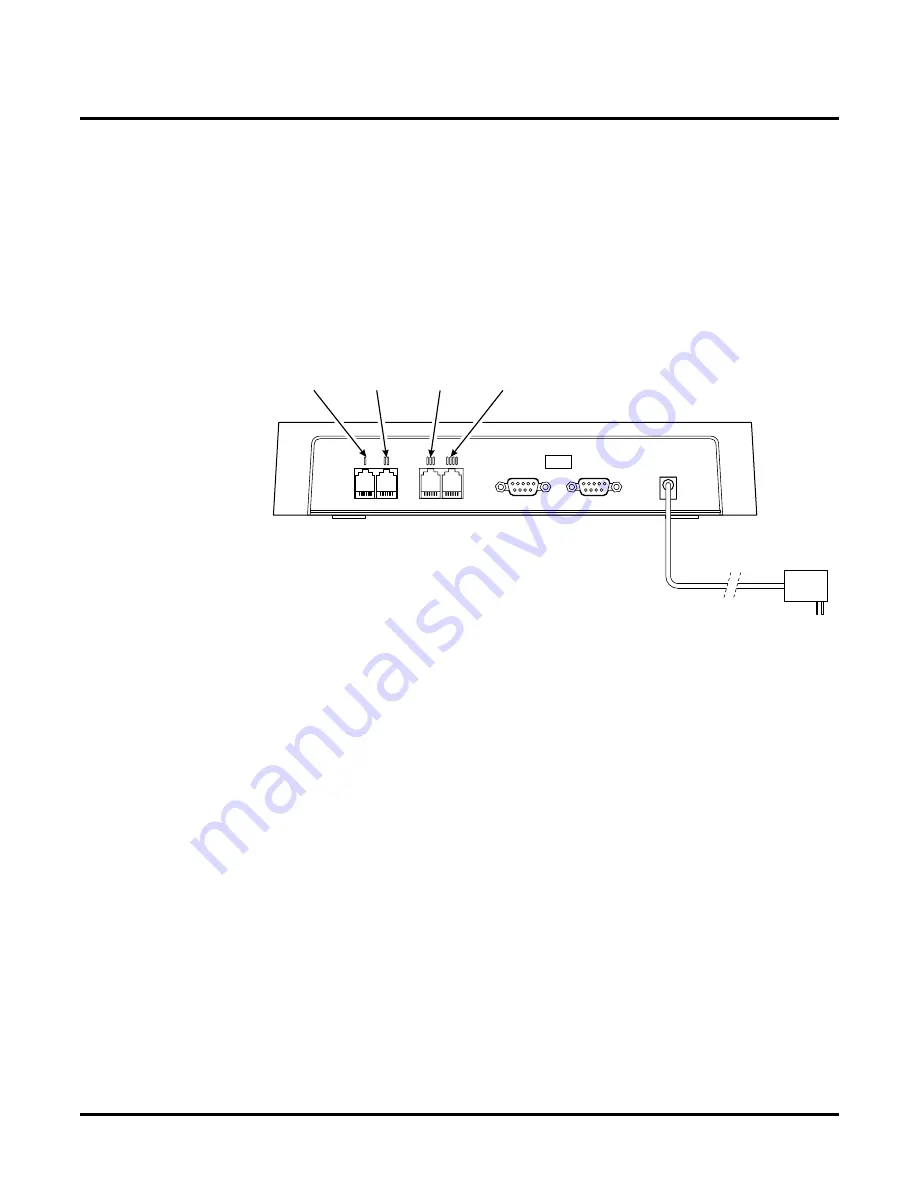
Plug the Voice Mail power supply cord into the connector labeled 24 VAC. Plug the AC
Adapter into a 120 V, 60 Hz grounded outlet. See Figure 3.
Figure 3: Installing the NVM-2e Voice Mail System
1
2
24 VAC
0.7A 50-60Hz
IOIOI
NVM2exVB-C1
Port 2
Port 4
Port 1
Port 3
AC Adapter
AC Power Cord
Note: Your unit may only have two ports available.


