


Disassembly and Reassembly 3-23
Install a 3 1/2-inch device as follows.
Before removing the cover, turn off system power and unplug the
system power cable. Power is removed only when the power cable is unplugged.
1.
Remove the two-device bracket from the chassis.
!
Tag and unplug the power and signal cables from the device in the bracket.
!
Press in on the tab on each side of the bracket to unlatch it from the chassis (see the
figure “Removing the Two-Device Bracket” earlier in this section).
!
Pull the bracket out the front of the chassis.
2.
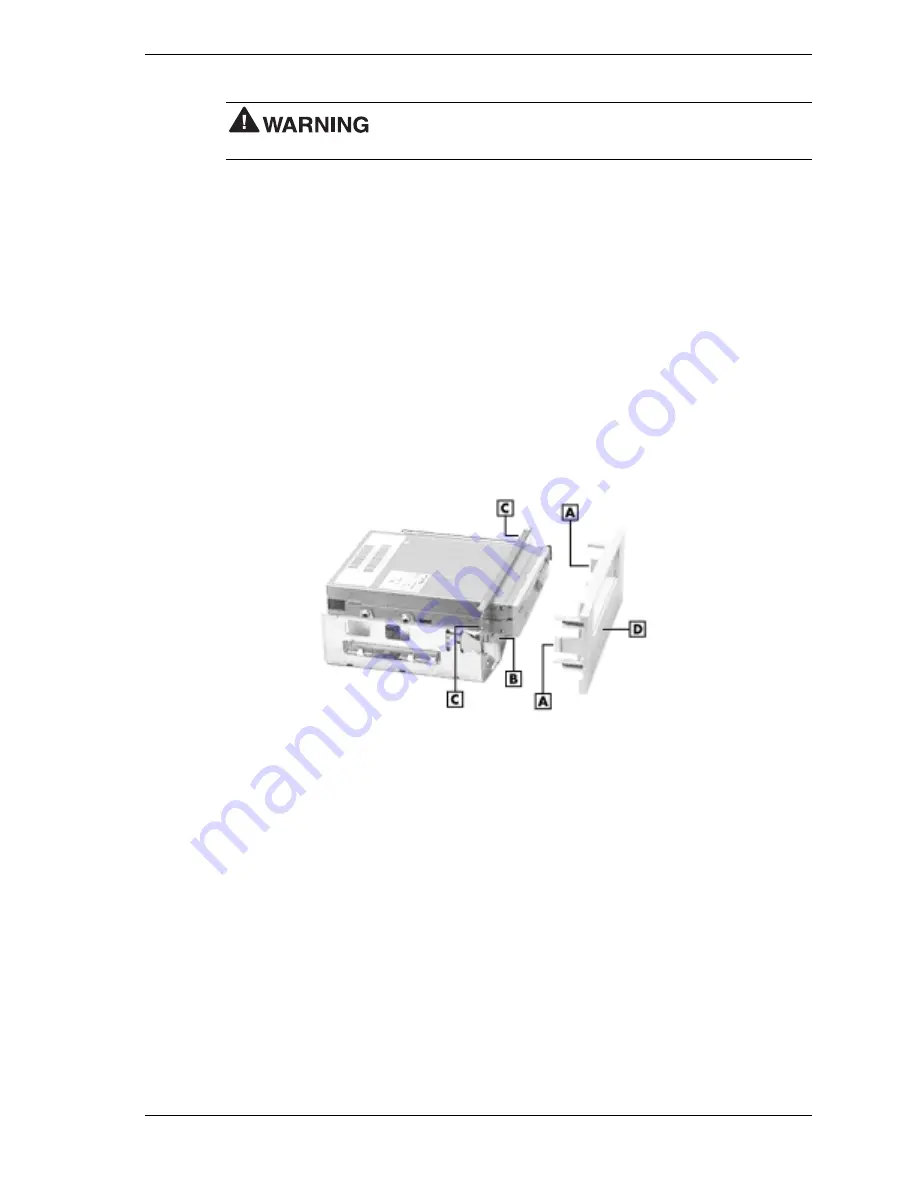
Remove the front cover, blank cover, and metal panel from the bracket.
!
Remove the bracket front cover by pressing in on its two side tabs (see the following
figure, “Removing the Bracket Cover,” for tab locations).
!
Remove the blank cover from the bracket front cover by pressing in on the blank
cover’s two tabs.
!
Remove the metal panel from the bracket. Use a small flat blade screwdriver to
carefully pry out on the panel, then gently twist the panel it until it breaks off.
Removing the Bracket Cover
A
– Bracket Cover Side Tabs
C
– Access for Unlatching Bracket Cover
B
– Metal Panel
D
– Blank Panel
3.
Slide the new device into the front of the bracket, under the diskette drive, connector end
first. Be sure to orient the device so that any labels on the device are right side up for the
system configuration (desktop or minitower).
4.
Secure the new device to the bracket using the following general information and the
specific instructions that come with the device.
!
Some devices are secured to the sides of the bracket with four screws, two to a side,
similar to the diskette drive.
!
Other devices, such as a Zip drive, are secured to the bottom of the bracket with three
screws (see the following figure). Be sure to install the screws in accordance with the
manufacturers instructions for the device or you might damage the device.
5.
Slide the two-device bracket into the bottom 5 1/4-inch accessible bay until the bracket
locks in place. Note that the bracket fits only in the bottom bay.
6.
Connect signal and power cables to the new device and the diskette drive.
7.
Install the front panel and cover.
Summary of Contents for POWERMATE CT 815 - RELEASE NOTES
Page 13: ...1 System Overview Configurations Features Components Software...
Page 106: ...6 Preventive Maintenance System Cleaning Keyboard Cleaning Mouse Cleaning...
Page 109: ...7 Troubleshooting Checklist Diagnostics...
Page 118: ...8 NECC Information Services Service and Support Functions Technical Support...


