Option Installation 3-11
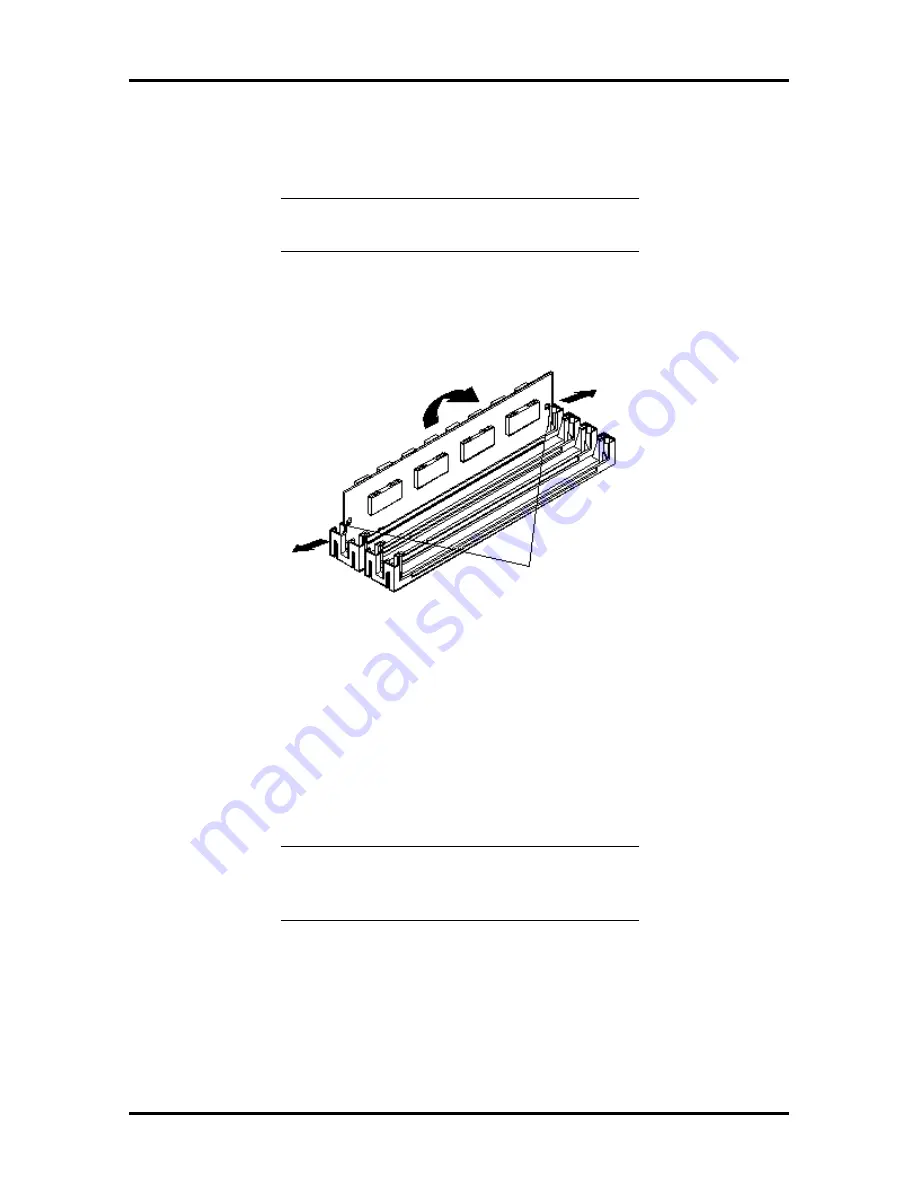
SIMM Removal
If the SIMM configuration requires the removal of a SIMM, remove the SIMM as follows.
CAUTION:
Reduce static discharge by touching
the system's metal chassis.
1.
Press the metal clips at the outer edges of the socket away from the SIMM.
2.
Push the SIMM away from the locking tabs and remove it from the socket.
Figure 3-6 Removing a SIMM
SIMM Installation
1.
Remove the system unit side panel (see “Removing the Side Panel”).
2.
Locate the correct SIMM sockets for the desired configuration (see Figure 3-2).
If you need to remove a currently installed SIMM, see “SIMM Removal.”
CAUTION:
Before you install a SIMM, reduce
static discharge by touching the system's metal
chassis.
3.
Align the notched end of the SIMM with the socket end closest to the bottom of
the system.
4.
Insert the SIMM at an angle into the socket.
Clips
Summary of Contents for POWERMATE PRO150
Page 152: ...A 16 Connector Pin Assignments ...
Page 160: ...B 8 System Board Settings ...


