


Repair 5-13
System Board Removal
Remove the system board by following these steps:
1.
As viewed from the front of the chassis, remove the left side cover on the system
unit (see “System Unit Covers” in Section 3).
2.
Remove the drive cage (see “Removing the Drive Cage”).
3.
Label and disconnect any cables connected to the system board or any expansion
board.
4.
Remove all expansion boards from the system (see “Removing an Expansion
Board” in Section 3).
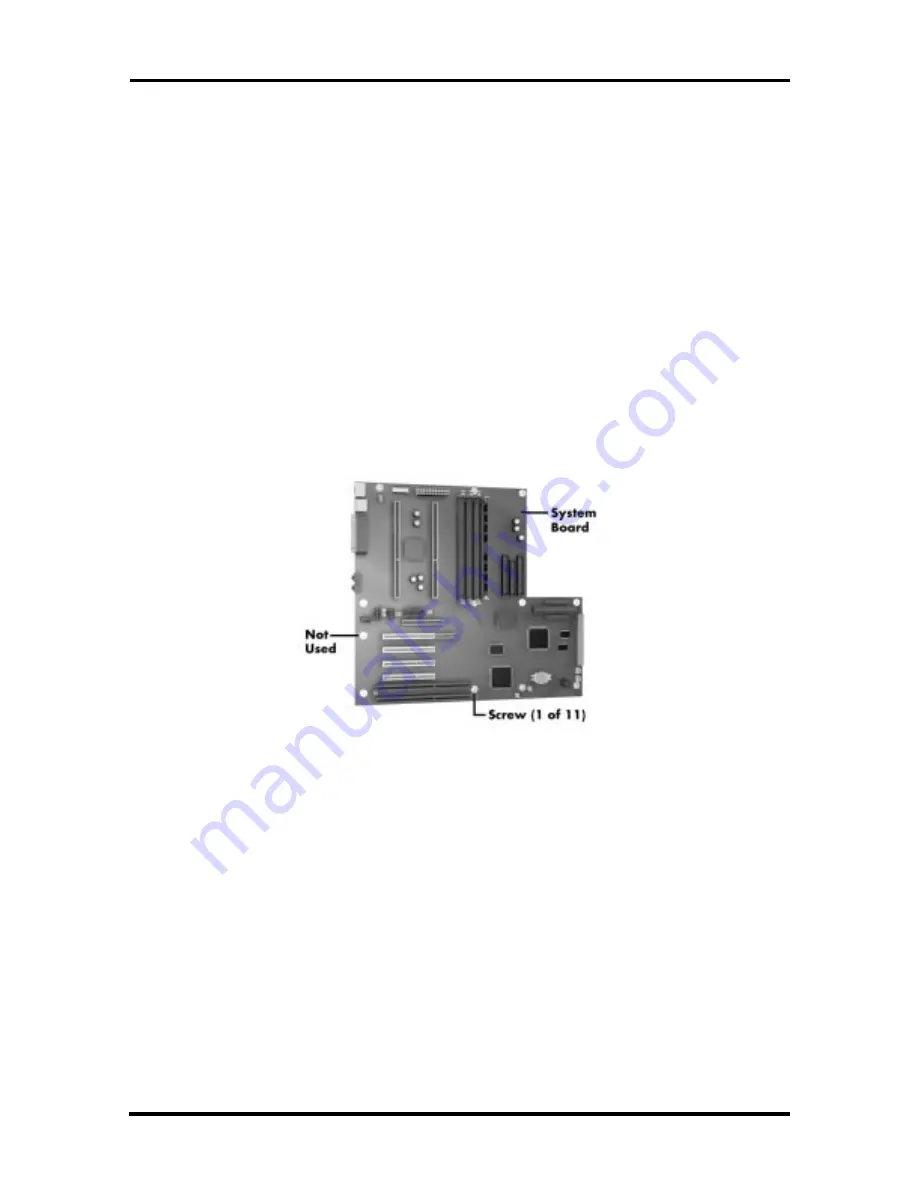
5.
Loosen and remove the eleven screws securing the system board to the side of the
chassis.
Figure 5-14 Locating System Board Screws
6.
Bring the board out of the system unit. Be careful not to scrape the surface of the
board against brackets or edges within the chassis as the board is removed.
System Board Replacement
Replace the system board by following these steps:
1.
Place the replacement system board in the chassis with its external connectors
toward the rear of the chassis. If necessary, push the I/O panel into the I/O
opening in the chassis to make sure it is securely seated.


