background image


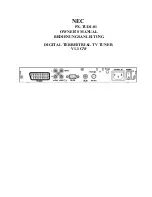
NEC                

                         PX-TUDI-01 

      OWNER’S MANUAL 

                                    BEDIENUNGSANLEITUNG 


DIGITAL TERRESTRIAL TV TUNER 

                 V1.1 GW 


Summary of Contents for PX-TUDI-01

Page 1: ...NEC PX TUDI 01 OWNER S MANUAL BEDIENUNGSANLEITUNG DIGITAL TERRESTRIAL TV TUNER V1 1 GW ...

Page 2: ......

Page 3: ...e harmful interference to radio communications However there is no guarantee that the interference will not occur in a particular installation If this equipment does cause harmful interference to radio or television reception this can be prevented by one or more of the following measures Reorient the receiving antenna Increase the separation between the equipment and tuner Connect the equipment to...

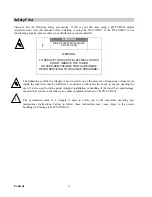
Page 4: ...RVICING TO QUALIFIED PERSONNEL The lightening symbol in a triangle is used to alert you of the presence of dangerous voltage levels inside the tuner that may be sufficient to constitute a risk of electric shock to anyone opening the case It is also used to warn against improper installation or handling of the tuner that could damage the electrical system in the tuner or any other equipment attache...

Page 5: ...re your TV antenna is not located near overhead power lines or where it might fall into any power lines Also be careful to avoid touching any such power lines when installing the TV antenna Antenna Grounding Be sure that antenna is grounded to provide protection from lightening and build up of static electricity Also follow these precautions Ventilation Do not block the ventilation slots on the PX...

Page 6: ... Panel 2 5 RF Video Cable Types 2 5 Physical Installation 2 6 Chapter 3 Initial Configuration 3 1 Introduction 3 1 Steps for Configuring the Receiver 3 2 Setting Channel 3 2 Search Channel 3 3 Auto Scan 3 3 Quick Scan Manual Scan 3 4 Antenna Power 3 4 Restore Defaults 3 5 General Setting 3 5 Menu Language 3 5 Audio Language 3 6 I Plate Option 3 6 Local Time 3 6 Audio Output 3 7 Change Password 3 7...

Page 7: ... 2 Recall Button 4 2 Mute Button 4 2 Audio Track Button 4 3 TV Guide EPG 4 3 Selecting Channels 4 3 Using Numeric keys 4 4 Sort Services 4 4 Parental Guidance 4 7 Censor Control 4 7 Change PIN 4 8 Signal Quality 4 9 IRD Status 4 10 Appendix A Interference With The Receiver A Appendix B Troubleshooting B Appendix C Troubleshooting C Appendix D Specifications D Content v ...

Page 8: ...s can be transmitted in place of one analog program The broadcasters can therefore now increase the number of programs and services they offer with a minimal increase in cost Furthermore since the signals are transmitted in digital format there is absolutely no quality loss between transmission and reception as is the case with analog mode digital format also allows for transmission of high speed ...

Page 9: ...h related equipment Provides a detailed description of the tuner s connection panel Chapter 3 Initial Configuration Explains how to scan the digital terrestrial TV channels Describes how to configure the General settings of the Tuner Chapter 4 Using The Tuner Explains I plate functions How to sort certain channels and use EPG function Parental guidance and password control How to check signal qual...

Page 10: ...Control can be used to operate all Tuner functions as well as some major functions of your NEC Plasma Display For more information on using the Remote Control refer to Chapter 2 and to the various system operations described in Chapter 3 System Menus All the receiver s features can be accessed through the system menus These menus can be accessed with simple point and click actions using the naviga...

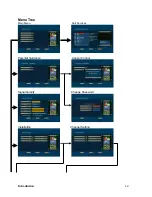
Page 11: ...Menu Tree Main Menu Sort Services Parental Guidance Censor Control Signal Quality Change Password Installation Channel Setting Introduction 1 4 ...

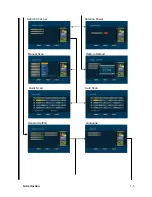
Page 12: ...Search Channel Antenna Power Manual Scan Restore Default Quick Scan Auto Scan General Setting Language Introduction 1 5 ...

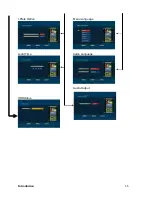
Page 13: ...I Plate Option Menu Language Local Time Audio Language Audio Output IRD Status Introduction 1 6 ...

Page 14: ...cedures for antenna and related system equipment are not covered in this manual Package Contents Unpack the tuner and verify that all of the items listed below are included Should the receiver be sent for troubleshooting or upgrading it must be enclosed in the same case Examine all the items to ensure that nothing has been damaged during shipment If any of the items are damaged then contact your s...

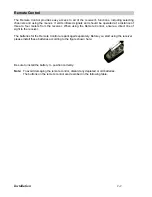
Page 15: ...using the Remote Control ensure a direct line of sight to the receiver The batteries for the Remote Control are packaged separately Before you start using the receiver please install these batteries according to the figure shown here Be sure to install the battery position correctly Note To avoid damaging the remote control discard any depleted or old batteries The buttons on the remote control ar...

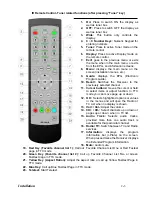
Page 16: ...n TTX mode you can move page up or down 12 OK Selects highlighted options or values in the menus and will open the Radio or TV List when no display is shown 13 Vol Vol Adjust the volume 14 CH CH Select channels up or down or pages up or down when in TV list 15 Audio Track Selects audio tracks provided more than one audio track is available for that particular channel 16 Radio TV Switch between TV ...

Page 17: ...de on the remote control 7 Exit Exit the current menu selection and return to the previous menu Press this button repeatedly to close all menus 8 Menu Select the main OSD On Screen Display menu 11 Cursor buttons Use left right keys to select item or adjust function use up down keys to select desired item on menu 12 OK Confirm the highlighted item in menu 13 Vol Vol Adjust the volume 14 CH CH Selec...

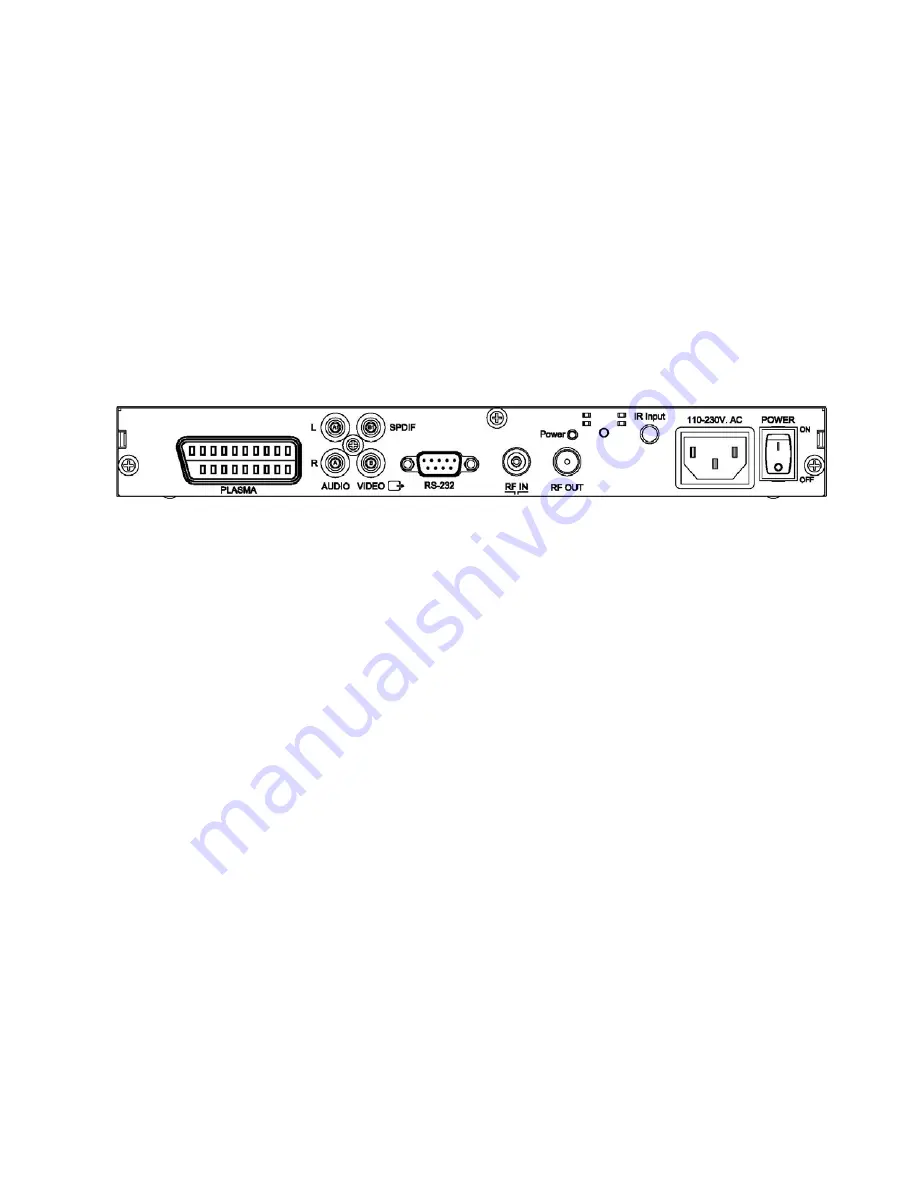
Page 18: ...onnector accepts input signals ranging from 51 to 858 MHz RF OUT is looped through from RF IN and can be used to connect a second receiver F LED Power Indication Red Stand by Green On G Infrared Sensor Connector Connect the IR sensor cable to PX TUDI 01 and mount sensor on display see quick install manual H 230 V AC Connect the attached Y shaped Power Cable I Power Switch RF Video Cable Types Audi...

Page 19: ...T connector to your NEC display s S Video and Audio L R Input o Connecting to the Dolby Digital Amplifier Connecting the PX TUDI 01 s S PDIF with a Dolby Digital Amplifier using a coaxial cable p Connecting to antenna Connecting the PX TUDI 01 s RF IN with antenna q Connecting to Infrared Sensor Connecting the IR sensor to PX TUDI 01 r Connecting Y Shaped Power Cable to PX TUDI 01 Installation 2 6...

Page 20: ...ontrol will take you to the main menu of OSD On Screen Display The key functions of each item on the main menu are shown as below Menu Description SORT SERVICE Displays all of the available TV channels in separate Main List and selected channels in the Favorites List similarly for Radio channels also PARENTAL GUIDANCE Used for locking certain channels according to the age limits SIGNAL QUALITY Pro...

Page 21: ...ain Menu Using the Up Down keys select the INSTALLATION option Channel Setting Upon selecting the Channel Setting option from the Installation menu the following menu will be displayed The CHANNEL SETTING menu has the following options 1 Search Channel 2 Antenna Power 3 Restore Default Initial Configuration 3 2 ...

Page 22: ... don t know which TV channels are used in your area Upon selecting the AUTO SCAN menu the following submenu will be displayed Upon pressing the green key on the remote control the scanning process will begin and the Scan Screen displayed Scanning all channels will take about 1 to 3 minutes The progress of the scanning process will be indicated along with any channels detected Initial Configuration...

Page 23: ...enu will be displayed 1 Press OK key to activate the Channel mode background of channel number will change from yellow to red 2 Use L R Arrow keys to go to desired channel number or use numeric keys 3 Press OK to confirm 4 Press green key to start scan of the selected channel 5 The newly detected services will be added to the already stored services Note The Channel number and Frequency are accord...

Page 24: ...ting the General Setting option from the Installation menu the submenu will be displayed 1 LANGUAGE 2 I PLATE OPTION 3 LOCAL TIME 4 AUDIO OUTPUT You can configure the receiver for the required language and control the display and duration of the information banner I Plate You can set the time of the receiver according to your local time Menu Language On selecting this option from the above menu yo...

Page 25: ...ng on screen of between 0 and 20 seconds On selecting DISPLAY ON CHANNEL CHANGE option you can press Left Right arrow keys to select YES when you want to show I Plate during channel change select NO when you don t want to show I Plate during channel change Local Time You can use the Local Time option to set the time in the Receiver On selecting this option you can set the time by changing the offs...

Page 26: ...anged to AC 3 or PCM depending on the received signal and your Audio Amplifier Note In most cases there will not be an analogue Audio Output signal if one of the Digital modes is selected Go to Audio Output Menu and change setting with L R key and confirm with OK key EXIT key to return to the previous menu Initial Configuration 3 7 ...

Page 27: ...on 3 If you live in an area subject to frequent snow or freezing rain you may need to install a deicing system to eliminate the accumulation of unwanted ice snow or moisture from the surface of your antenna 4 If the program reception is adversely affected by heavy winds you can stabilize the antenna mount with cables Home Appliances Interference When you turn on home appliances like air conditione...

Page 28: ...al S video input mode in NEC display b Press the Tuner button on the remote control Then press Menu button on the remote control to call up the On Screen Display If the tuner menu appears the connections between tuner and display are OK and it seems the problem is caused by an incorrect incoming antenna signal 3 Poor picture quality a Check the antenna and make sure it is aligned to the correct di...

Page 29: ...n to scan these missing channels 7 Cannot lock signal by using Manual Scan a Check in the Manual Scan menu if the frequency of the selected channel displayed below the channel number is exactly same as the frequency used in your local area If not change the frequency in this menu accordingly 8 Cannot receive all channels after moving the receiver to another city a In the new area different channel...

Page 30: ...KHz Analogue Output Mono Stereo Dual Connectors Digital SPDIF Coaxial Analogue RCA L R SCART L R TELETEXT DECODER Fasttext 4 pages MEMORY RAM 6 Mbytes Flash 2 Mbytes Non Volatile Memory 8 Kbytes CONNECTORS Tuner Input from Digital Antenna IEC female Tuner Loop Output IEC male Composite Video Output RCA Audio Output RCA L R SCART Output S Video Audio L R SPDIF RCA RS232 9 Pin D sub male for Softwar...

Page 31: ... Y Power Cable Plasma Tuner on one cable 1 x SCART Adapter Cable Scart to S Video Audio L R 1 x Dual Function Remote Control 1 x IR Sensor with cable The specifications can be changed at any time without pre advice Appendix E ...

Reviews: