A Phillips-head screwdriver is required for installing the NEC SuperScript 1800 PostScript
®
Level 2 Upgrade Kit.
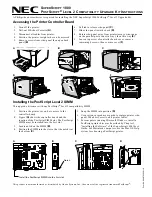
Accessing the Printer Controller Board
Installing the PostScript Level 2 SIMM
This upgrade kit comes with one PostScript
®
Level 2 compatibility SIMM.
This product is not manufactured or distributed by Adobe Systems, Inc., the owners of the registered trademark PostScript
®
.
1. Turn off the printer.
2.
Pull-out 500-sheet Cassette
(A)
.
3. Disconnect all cables from printer.
4. Position the printer so right-side can be accessed.
5. Remove screws from side-panel then open back-
panel
(B)
.
6. Pull tab to release side-panel
(C)
.
7. Slide side-panel towards back
(D)
.
8. Rotate side-panel away from printer (assure wire-snaps
on the parallel port are not in way), then lift away
(E)
.
9. Loosen top screw of controller board cover, remove
remaining 4 screws, then remove cover
(F)
.
1. Position the printer so you have access to the
controller board.
2.
Figure
(A)
shows the controller board and the
location of the PostScript SIMM slot. The PostScript
SIMM must be installed into the first slot.
3. Locate notch on the SIMM
(B)
.
4. Position the SIMM into the slot so that the notch is at
the bottom
(C)
.
5. Snap the SIMM into position
(D)
.
6. Use previous procedure as guide to replace printer side-
panel, 500-sheet Cassette, and printer cables.
7. For computers running Microsoft Windows, install a
PostScript printer driver as described by Chapter 3,
“Installing the Software,” of the SuperScript 1800 User’s
Guide. For Macintosh computers, use the Mac OS Help
system for choosing a PostScript printer.
A
B
C
D
E
F
B
A
D
C
Install the PostScript SIMM into the first slot.
Notch
NEC
P
ART
N
O
. 808-878303-011A
S
UPER
S
CRIPT
1800
P
OST
S
CRIPT
®
L
EVEL
2 C
OMPATIBILITY
U
PGRADE
K
IT
I
NSTRUCTIONS


