Setting Up Windows NT
25
W
INDOWS
S
ETUP
Shared Printing in Windows 95/98
Use these steps to set up shared printing in Windows 95/98.
1.
Install the printer as a “local” printer using LPT1 port.
2.
Press the Windows Start button, select Settings, then
select Control Panel.
3.
In the Control Panel window, double-click the Network
icon.
4.
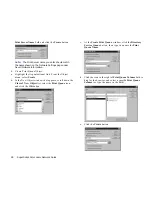
Click on the File and Print Sharing button and in the
dialog box that appears, make sure that I want to be able
to allow others to print to my printer(s)
is checked.
5.
Click OK and Click OK in the Network window.
6.
Next, press the Windows Start button, select Settings,
then select Printers.
7.
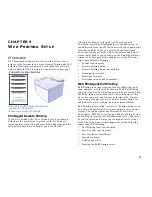
In the Printers window, select the printer installed on
LPT1. Click on it with the right mouse button and select
Sharing
from the pop-up menu.
8.
Select Shared as and enter a name to identify the printer
on the network. Then click OK.
9.
On another PC, press the Windows Start button, select
Settings
, then select Printers.
10. In the Printers window, double-click the Add Printer
icon.
11. Click Next to begin installation and specify Network
when prompted.
12. When prompted for Network Path or Queue Name, click
on Browse, and browse to the name of the computer
where the printer was installed locally.


