Preventing Paper Jams
89
TROUBLESHOOTING
P
REVENTING
P
APER
J
AMS
This section explains how to prevent and remove paper jams.
There are several things you can do to prevent paper jams.
•
Make sure the paper in not folded, wrinkled, or curled.
•
Do not overfill the paper trays. Paper Tray 1 and 2 have a
fill-limit mark on the inside left side.
•
Use paper, envelopes, labels, and transparencies that
match the printer specifications (see Appendix A).
•
If you have problems with double feeding, remove the
media from the tray and fan the sheets. They may be
sticking together.
•
Store all media in a dry location.
•
Make sure you have loaded the paper printing-side up.
Many manufacturers place an arrow on the end of the
wrapper to indicate the printing side.
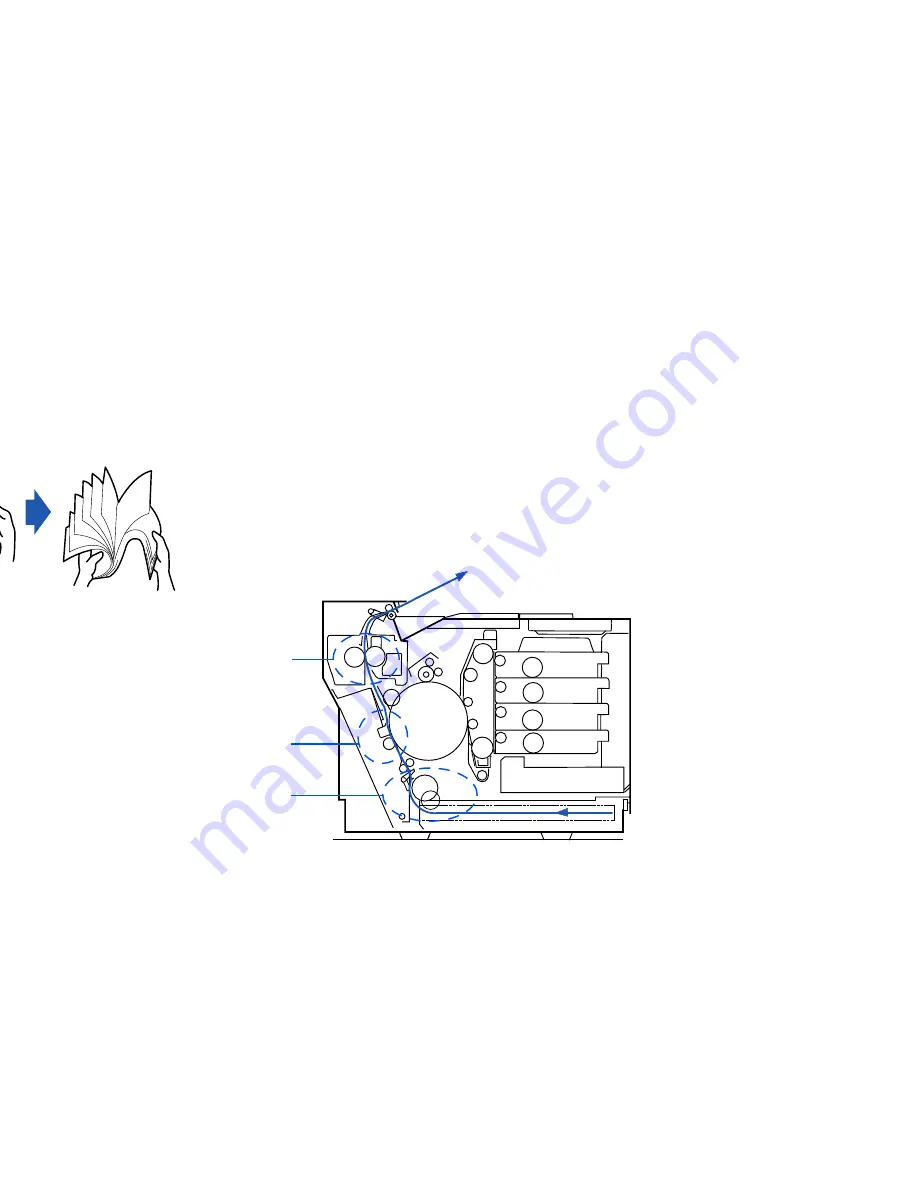
Understanding the Paper Path
The following illustration shows the printer’s paper path.
Understanding this path will help you locate paper jams. The
paper is picked up from Paper Tray 1 (or 2) and passed under
the Transfer Drum. It then passes through the Fuser Unit and
is delivered to the Output Tray on the top of the printer.
Paper jams occur in the following three areas.
1.
The top Fuser Roller/output area. Operator Panel will
report
PAPER JAM EXIT/DRUM
.
2.
The back Transfer Unit area. Operator Panel will report
PAPER JAM/INNER
or
PAPER JAM/DRUM
.
3.
The Paper Tray feed area. Error message on the Operator
Panel will report
MISFEED
.
note:
Frequent jams in any area indicate that area
should be checked, repaired, or cleaned.
K
Y
M
C
1
2
3
Output Tray
Paper Tray 1
Paper Path of the SuperScript 4200N
Summary of Contents for SuperScript 4200N
Page 4: ...N User s Guide ...
Page 32: ...0N User s Guide ...
Page 38: ...0N User s Guide ...
Page 50: ...0N User s Guide t 3 Printer Driver ...
Page 108: ...00N User s Guide ...
Page 124: ...00N User s Guide ...


