UNIVERGE SV8100
Issue 4.1
System Hardware Manual
3 - 75
4.
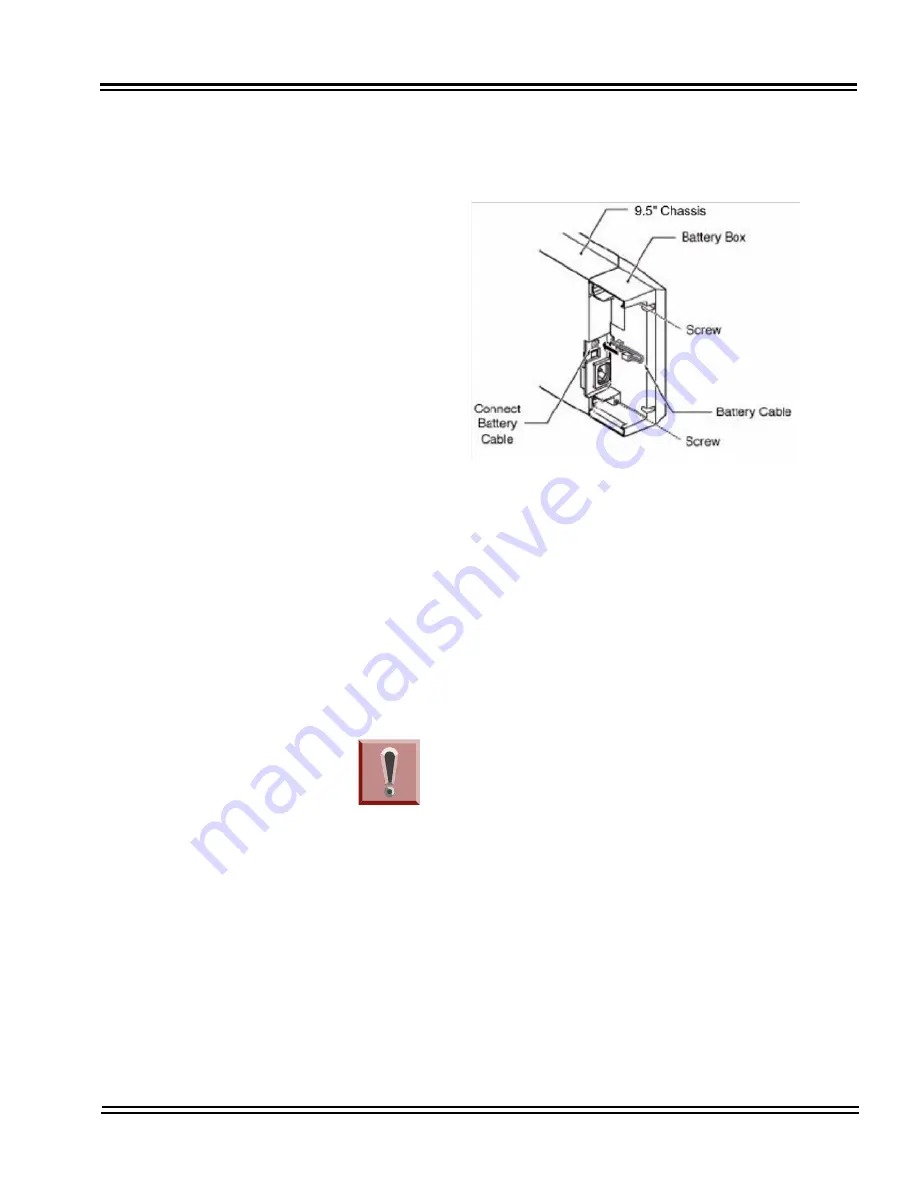
Secure the battery compartment to the chassis using the two
screws provided and attach the battery cable to the 9.5”
chassis.
5.
Reconnect AC power cable to rear of chassis.
6.
To power on the 9.5” chassis, refer to
Chapter 4
,
2.6 Powering
Up the SV8100 on page 4-9
.
3.3.3
CHSGW SMALL BATT BOX Fuse Replacement
1.
Correct the issue which caused the fuse problem.
.
Replacing fuses without first correcting the issue could cause a fire and/
or electric shock hazard.
2.
Disconnect AC power cable from rear of chassis.
.
Make sure to unplug the unit from the electrical outlet prior to removing
the connection cables within the battery box unit.
Figure 3-99
Attach to the CHS2U GW Chassis and
Connect Battery Cable
Only replace fuses of the same rating.
Fuses may be hot, use caution when replacing
them
Summary of Contents for Univerge SV8100
Page 1: ...System Hardware Manual Issue 4 1 February 2011...
Page 2: ...THIS PAGE INTENTIONALLY LEFT BLANK...
Page 36: ...Issue 4 1 UNIVERGE SV8100 1 14 Introduction to SV8100...
Page 68: ...Issue 4 1 UNIVERGE SV8100 2 32 SV8100 System Specifications...
Page 99: ...UNIVERGE SV8100 Issue 4 1 System Hardware Manual 3 31 Figure 3 34 Install Screws Option 2...
Page 148: ...Issue 4 1 UNIVERGE SV8100 3 80 Installing the SV8100 Chassis...
Page 247: ...UNIVERGE SV8100 Issue 4 1 System Hardware Manual 4 99 Figure 4 34 Control Signal Connection...
Page 258: ...Issue 4 1 UNIVERGE SV8100 4 110 Installing the SV8100 Blades NOTES...
Page 418: ...Issue 4 1 UNIVERGE SV8100 6 64 Installing SV8100 Optional Equipment...


