Issue 4.1
UNIVERGE SV8100
6 - 8
Installing SV8100 Optional Equipment
9.
Install a modular jack for each PGD(2)-U10 ADP. For each module, run
one-pair 24 AWG station cable from the cross-connect block to a
modular jack. Ground the unused pair.
10.
Terminate the extension leads to GRN/RED of the modular jack.
Terminate the unused leads to the jack.
11.
Install bridging clips as required.
.
For the module to ID correctly, set the circuit type to 0 for the port in Program
10-03-01 prior to connecting the line cord.
12.
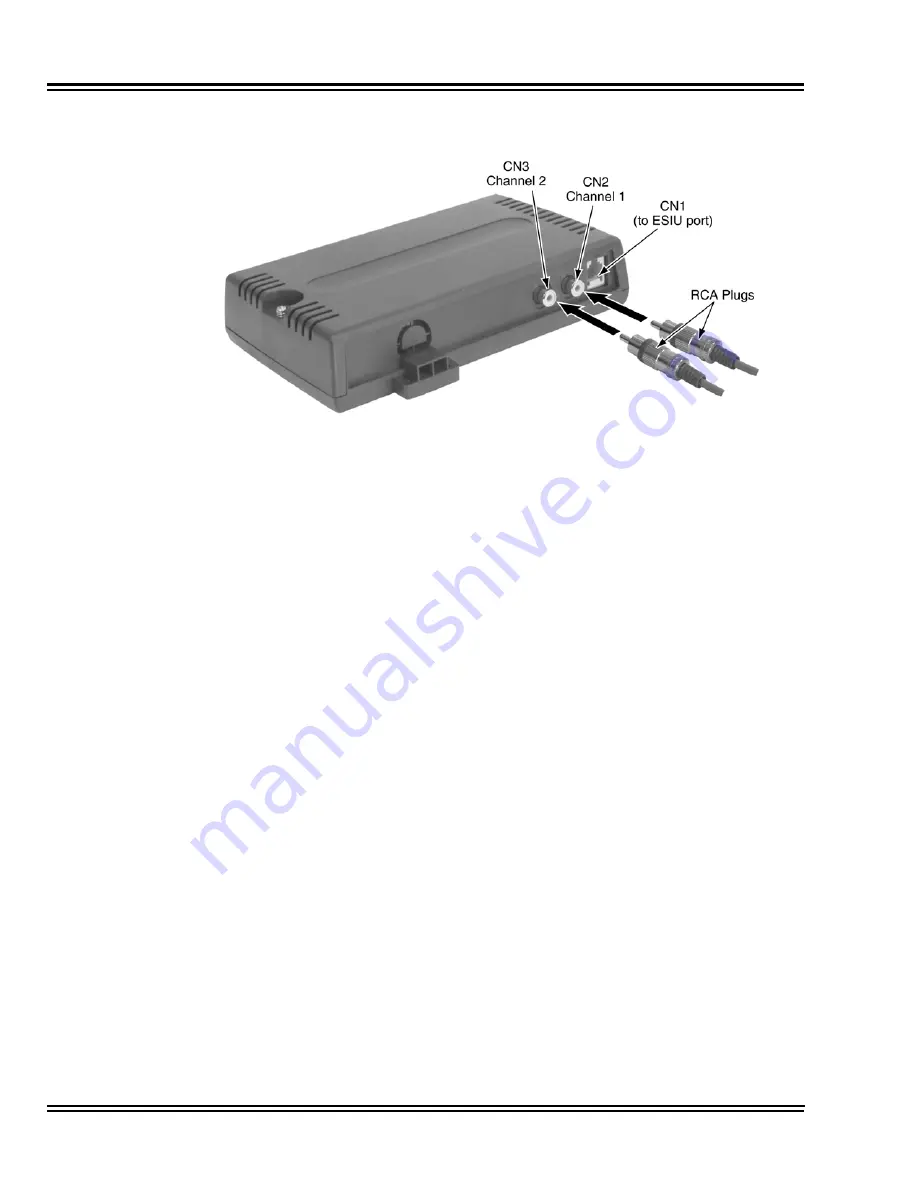
Plug a modular line cord from the mod jack to the CN1 connector on the
PGD(2)-U10 ADP.
13.
Optional:
To wall mount the PGD(2)-U10 ADP, insert two wood screws 100mm
apart (3 15/16”). Leave 3mm (1/8”) of the screw exposed. The screws
can be installed either vertical or horizontal, depending on which position
Figure 6-7 PGD(2)-U10 ADP Connections
Summary of Contents for Univerge SV8100
Page 1: ...System Hardware Manual Issue 4 1 February 2011...
Page 2: ...THIS PAGE INTENTIONALLY LEFT BLANK...
Page 36: ...Issue 4 1 UNIVERGE SV8100 1 14 Introduction to SV8100...
Page 68: ...Issue 4 1 UNIVERGE SV8100 2 32 SV8100 System Specifications...
Page 99: ...UNIVERGE SV8100 Issue 4 1 System Hardware Manual 3 31 Figure 3 34 Install Screws Option 2...
Page 148: ...Issue 4 1 UNIVERGE SV8100 3 80 Installing the SV8100 Chassis...
Page 247: ...UNIVERGE SV8100 Issue 4 1 System Hardware Manual 4 99 Figure 4 34 Control Signal Connection...
Page 258: ...Issue 4 1 UNIVERGE SV8100 4 110 Installing the SV8100 Blades NOTES...
Page 418: ...Issue 4 1 UNIVERGE SV8100 6 64 Installing SV8100 Optional Equipment...


