
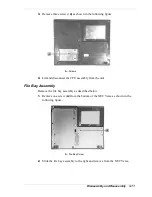


3-24 Disassembly and Reassembly
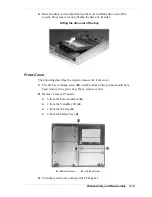
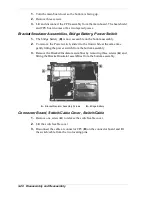
2.
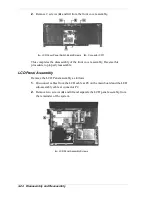
Remove 2 screws (
A
) and lift from the front cover assembly.
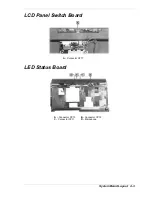
A – LCD Cover Panel Switch Board Screws
B – Connector CP17
This completes the disassembly of the front cover assembly. Reverse this
procedure to properly reassemble.
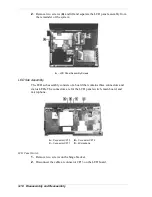
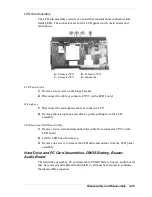
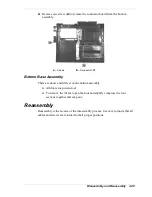
LCD Panel Assembly
Remove the LCD Panel assembly as follows.
1.
Disconnect cables from the LCD cable at P4 on the main board and the LED
sub-assembly cable at connector P2.
2.
Remove two screws (
A
) and lift and separate the LCD panel assembly from
the remainder of the system.
A – LCD Panel Assembly Screws
Summary of Contents for Versa LX
Page 1: ...NEC Versa LX Notebook Computer VERSA LX S E R V I C E A N D R E F E R E N C E M A N U A L...
Page 57: ...3 Disassembly and Reassembly Required Tools and Equipment Disassembly Reassembly...
Page 91: ...5 2 Illustrated Parts Breakdown Illustrated Parts Breakdown Non AGP Models...
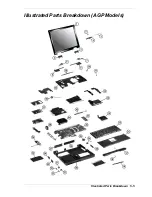
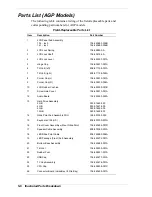
Page 94: ...Illustrated Parts Breakdown 5 5 Illustrated Parts Breakdown AGP Models...
Page 102: ...7 Troubleshooting Quick Troubleshooting Helpful Questions...


