Using the System Drives and Bays 5-5
Once the swap utility is installed on your system, a small icon appears in the lower
right hand corner of the Windows taskbar. Moving your cursor over the icon displays
information about the NEC VersaBay III. The balloon message that appears indicates if
the bay is empty or if a device is installed. Because warm swapping is only supported
for the CD-ROM drive, CD Read/Write drive, SuperDisk drive, DVD-ROM drive, and
the NEC VersaBay III Battery Pack, the balloon message may not be accurate if you
install a hard disk drive. Your system must be powered off before installing a hard disk
drive in the NEC VersaBay III.
Using the NEC VersaBay III Swap Utility
With the NEC VersaBay III Swap Utility running on your notebook computer, you can
warm swap a CD-ROM drive, CD Read/Write drive, SuperDisk drive, DVD-ROM
drive, or NEC VersaBay III Battery Pack in the NEC VersaBay III. Please note the
following when using the swap utility:
!
Windows 98 Power Management must be enabled to use the swap utility.
!
Warm swapping is not supported under Windows 2000 or Windows NT.
!
Warm swapping is not supported on the NEC Versa Dock.
!
The swap utility only supports the warm swapping of a CD-ROM drive, CD
Read/Write drive, SuperDisk drive, DVD-ROM drive, or NEC VersaBay III Battery
Pack. Other devices installed in the VersaBay will work properly. However, warm
swapping other devices is not supported.
Warm swapping other devices can damage the device, the
system, or both.
Swap devices in the NEC VersaBay III as follows:
1.
If you have files open on the device you are planning to remove, close them.
2.
Right click on the swap utility taskbar icon to display the menu.
3.
Highlight and click on the Swap Device option.
4.
A dialog box appears and lets you know that your system must be in a sleep state
to swap the device and asks you if you want to continue. Press
Yes
to put your
system into a sleep state.
5.
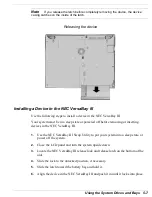
Once your system is in a sleep state, remove the device from your computer. Insert
the new device while your system is still in a sleep state.
6.
To resume your system after removing and/or installing a device, press the Power
button.
Summary of Contents for VERSA LXI - VERSION 10-2000
Page 1: ......
Page 39: ...2 12 Getting Started Inserting the battery pack 6 Turn over the system...
Page 144: ...9 Using Multimedia Audio Video Multimedia Applications...
Page 151: ...10 Solving System Problems Problem Checklist Start Up Problems If You Need Assistance...
Page 168: ...B Specifications System Components Memory Map Interrupt Controllers...


