2-24 System Configuration and Setup
4.
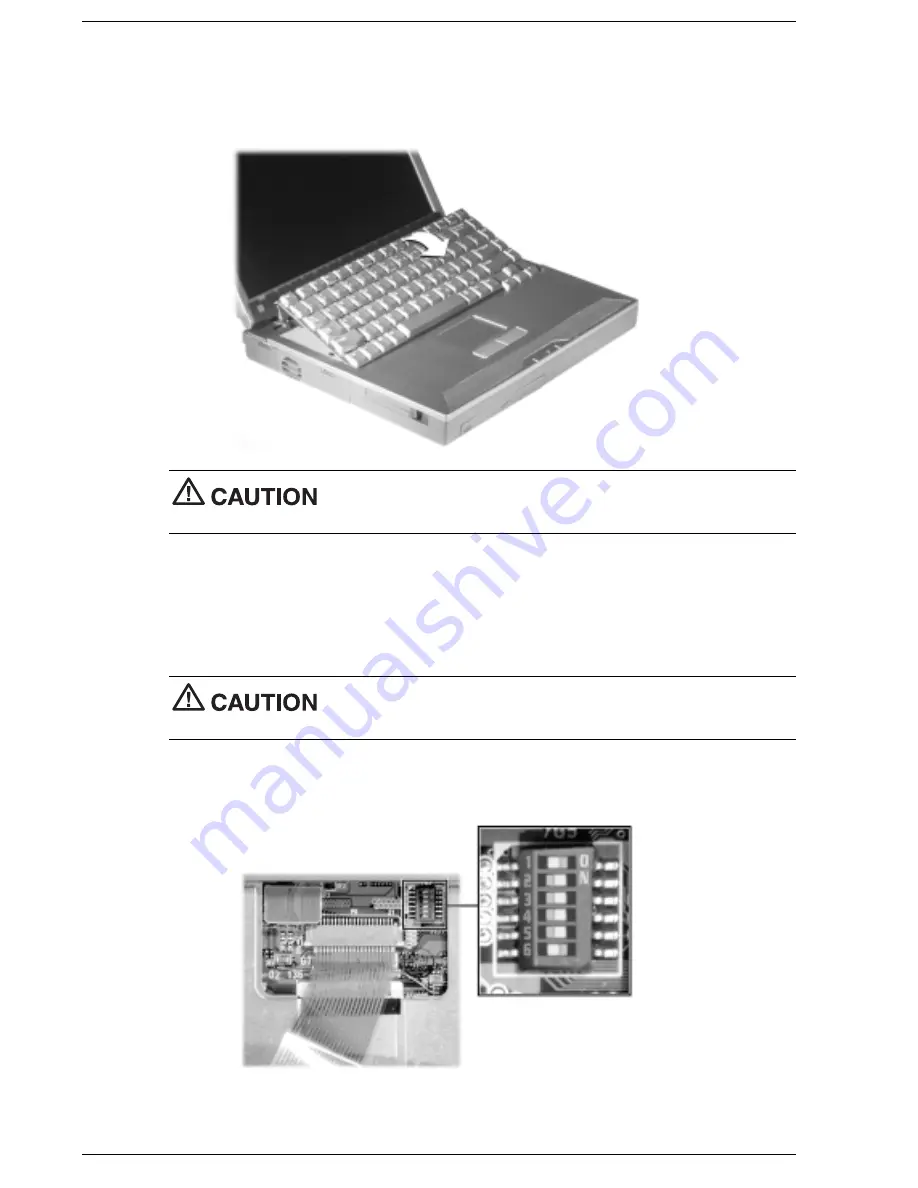
Gently lift up the edge of the keyboard nearest the LCD and slide the keyboard toward the
LCD screen to release the tabs that secure it.
Lifting the keyboard
Be careful not to disconnect the keyboard or keyboard cable entirely
from the system.
5.
Gently rest the keyboard on top of the base unit to view and access the dip switch block. Be
careful not to twist or disconnect the keyboard cable.
6.
Locate the dip switch block. Using a fine-tipped object, change switch 5 to “ON” to enable
the BIOS flash.
Never use a pencil to change switch settings. Residue from the pencil
can damage the system.
BIOS flash switch enabled
Dip switches 2, 3, 4, and 5 set to “On.”
Summary of Contents for Versa LXi
Page 1: ...NEC Versa Notebook Computer NEC VERSA LXI S E R V I C E A N D R E F E R E N C E M A N U A L...
Page 80: ...4 System Board Layout LED Status Board Audio Board Connector Board Main Board...
Page 83: ...5 Illustrated Parts Breakdown Illustrated Parts Breakdown Parts List...
Page 84: ...5 2 Illustrated Parts Breakdown Illustrated Parts Breakdown...
Page 91: ...7 Troubleshooting Quick Troubleshooting Helpful Questions...
Page 99: ...9 Specifications System Components Connector Locations Memory Map Interrupt Controllers...


