Connecting a Disk Enclosure to Another Disk Enclosure
Follow the procedure below to install additional disk enclosures.
Note:
In the procedure below, DE1 refers to the previously
installed disk enclosure and DE2 refers to the disk enclosure to be
added to your storage network.
1.
Make sure that the power switches of the disk enclosure to be added (DE2) are set to
OFF and that the plugs of the power cords are removed from the AC outlets.
2.
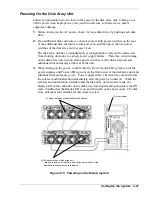
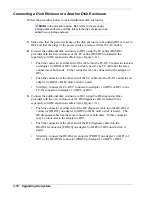
Connect the additional disk enclosure to DE1 using the FC cables (HSSDC)
provided with the new enclosure or the FC cables (HSSDC) included in the
separately sold DE expansion cable kit (see Figure 3-11).
• Push the connector at either end of the cable into the FC-OUT connector located
on adapter 0 (ADP0) of DE1 until a click is heard. The FC cable has the same
connectors at both ends. Either connector may be connected to the adapter of
DE1.
• Push the connector at the other end of the FC cable into the FC-IN connector on
adapter 0 (ADP0) of DE2 until a click is heard.
• Similarly, connect the FC-OUT connector on adapter 1 (ADP1) of DE1 to the
FC-IN connector on adapter 1 (ADP1) of DE2.
3.
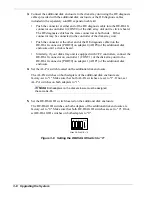
Connect the additional disk enclosure to DE1 using the DE diagnosis cables
provided with the new enclosure or the DE diagnosis cables included in the
separately sold DE expansion cable kit (see Figure 3-11).
• Push the connector at either end of the DE diagnosis cable into the DE-DIAG
connector [PORT1] on adapter 0 (ADP0) of DE1 until a click is heard. The
DE diagnosis cable has the same connectors at both ends. Either connector
may be connected to the adapter of DE1.
• Push the connector at the other end of the DE diagnosis cable into the
DE-DIAG connector [PORT0] on adapter 0 (ADP0) of DE2 until a click is
heard.
• Similarly, connect the DE-DIAG connector [PORT1] on adapter 1 (ADP1) of
DE1 to the DE-DIAG connector [PORT0] on adapter 1 (ADP1) of DE2.
3-10 Upgrading the System
Summary of Contents for VERSA S1300 Series
Page 1: ... U s e r s G u i d e NEC Storage S1300 ...
Page 2: ......
Page 4: ......
Page 8: ...vi Contents ...
Page 18: ...xvi Using This Guide ...
Page 19: ...1 System Overview Overview System Chassis System Features ...
Page 54: ...A B Figure 2 3 Installing the Rack Mounting Kit 2 6 Setting Up the System ...
Page 73: ...3 Upgrading the System Overview Adding Hard Disk Drives Adding Disk Enclosures ...
Page 86: ...3 14 Upgrading the System ...
Page 114: ...A 8 Appendix ...
Page 117: ...xx ...
Page 118: ... ...


