5.
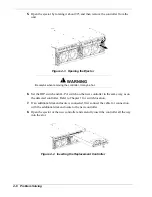
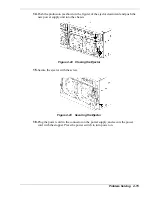
Open the ejector by rotating it about 90
o
, and then remove the controller from the
unit.
Figure 4-3 Opening the Ejector
WARNING
!
Be careful when removing the controller. It may be hot.
6.
Set the DIP switch and AL-PA switch on the new controller in the same way as on
the defected controller. Refer to Chapter 1 for switch location.
7.
If an additional disk enclosure is connected, first connect the cable for connection
with the additional disk enclosure to the new controller.
8.
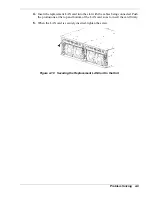
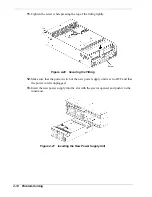
Open the ejector of the new controller and carefully insert the controller all the way
into the slot.
Figure 4-4 Inserting the Replacement Controller
4-6 Problem
Solving
Summary of Contents for VERSA S1300 Series
Page 1: ... U s e r s G u i d e NEC Storage S1300 ...
Page 2: ......
Page 4: ......
Page 8: ...vi Contents ...
Page 18: ...xvi Using This Guide ...
Page 19: ...1 System Overview Overview System Chassis System Features ...
Page 54: ...A B Figure 2 3 Installing the Rack Mounting Kit 2 6 Setting Up the System ...
Page 73: ...3 Upgrading the System Overview Adding Hard Disk Drives Adding Disk Enclosures ...
Page 86: ...3 14 Upgrading the System ...
Page 114: ...A 8 Appendix ...
Page 117: ...xx ...
Page 118: ... ...


